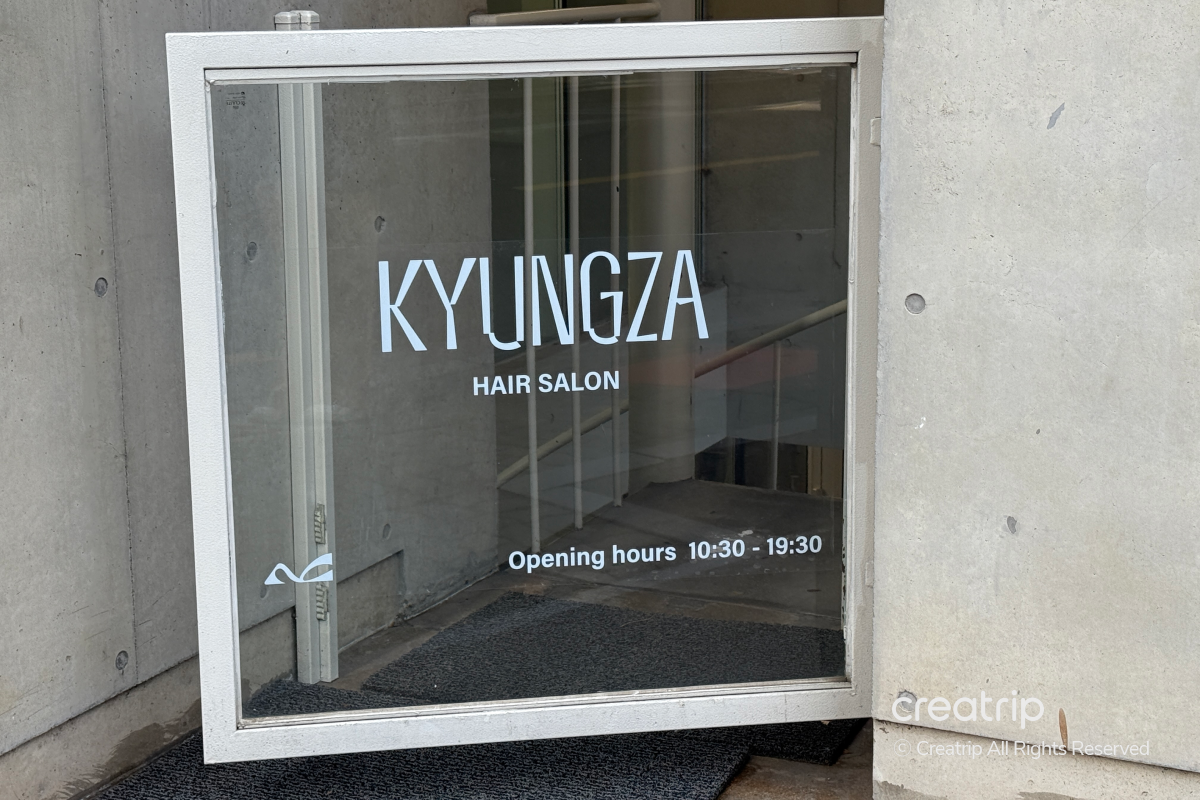
KYUNGZA Hongdae Main Branch · KYUNGZA Hongdae FAB Hair Salon | Damage-Minimizing Color & Perm Specialist Hair Salon
KYUNGZA: A color-focused hair salon in Hongdae known for precise treatments and reliable care


KYUNGZA is a salon often mentioned when looking for a place in Hongdae that does great color and perms.
Known as a salon specializing in color, it’s famous for delivering vivid tones even without bleaching.
Our editor was curious, so they visited both KYUNGZA Hongdae Main Branch and KYUNGZA Hongdae FAB Branch.
Both locations are strong at treatments that consider color and hair condition together.
In this post, I’ll summarize features and recommendation points based on visits to both branches!
👇 Click below to see more detailed business information, reservation instructions, refund policy, and precautions 👇
[Spot] [Discount Event🎁] KYUNGZA Hongdae Main Branch | Low-Damage Color & Perm Specialty Hair Salon
[Spot] [Discount Event🎁] KYUNGZA Hongdae FAB Branch | Low-Damage Color & Perm Specialty Hair Salon
KYUNGZA Hongdae Main Branch· Hongdae FAB Branch | Why We Recommend It
✨Creatrip exclusive booking benefits
- Creatrip users who book through Creatrip can get a special package, so you can receive high-quality treatments at a reasonable price all the way at the clinic.
- If you pay through Creatrip and write a review afterward, you can receive a discount.
💇🏼♀️ A salon specializing in customized treatments strong in color expression
- A stylist specialized in color handles your service, so you can get vivid, healthy color designs without bleaching. It’s great for people who want to express their desired shade while minimizing hair damage.
- The stylist personally checks the overall direction and final result of the procedure, working with staff, and takes responsibility for the color’s completion and maintenance. Because they focus on each client individually, they can fully reflect the style you want.
- The salon has a high repeat rate among locals, and many foreign customers come back when they visit Korea again, so it has built trust in its results.
- The main services are color, perm, and Keratin Magic, with a particular strength in combining color with hair texture improvement.
🌎 A hair salon that's convenient for foreign customers
- Luggage storage is available, so you can conveniently visit right after arrival or before departure.
- Water, drinks, and light snacks are provided on site, so you can relax during your treatment.
- Both locations are about a 4–6 minute walk from Hongdaeipgu Station Exit 2, situated toward Yeonnam-dong, offering good access while being relatively quiet.
- If you prefer care in a quieter setting rather than the noisy main commercial streets, this is a great fit, and it’s also nice to explore the Hongdae area after your treatment.
KYUNGZA Hongdae Main Branch· Hongdae FAB Branch | Benefits
Creatrip review required | Cut Perm & color 10% discount |
* This benefit applies through April 30, 2026. (Discount applies based on the payment date)
KYUNGZA | Perm Visit Review
I recently noticed damage to my hair and needed a style refresh, so I visited KYUNGZA Hongdae Main Branch in Hongdae to get a perm.
It's within walking distance of Hongdaeipgu Station, so it's easy to get to, and it's a great salon to pop into while you're visiting the Hongdae and Hapjeong area.
'KYUNGZA' is a hair salon known for natural perm styles and detailed consultations, offering customized styling tailored to face shape and hair condition.
[image slider] 
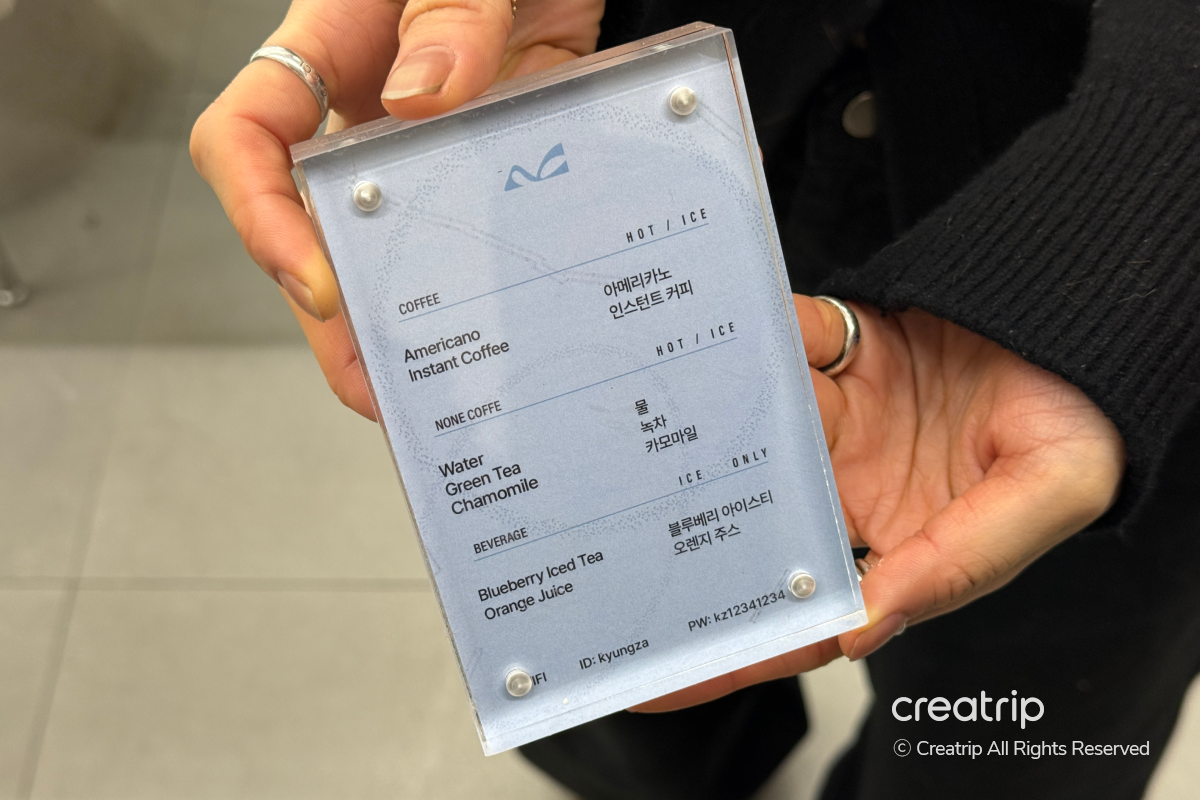
After arriving at the salon, I could choose a drink before the treatment.
They had a variety of drinks available, from Americano to tea and juice, so I could pick whichever I wanted.
[image slider] 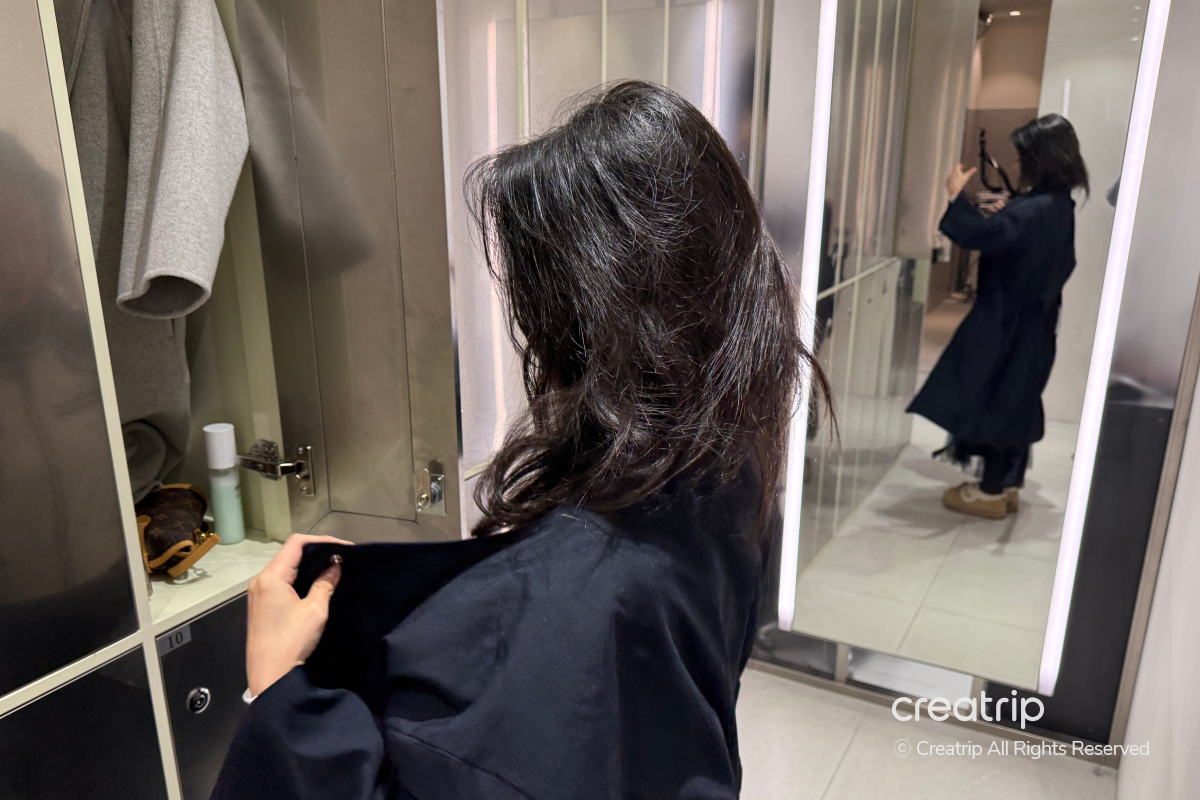

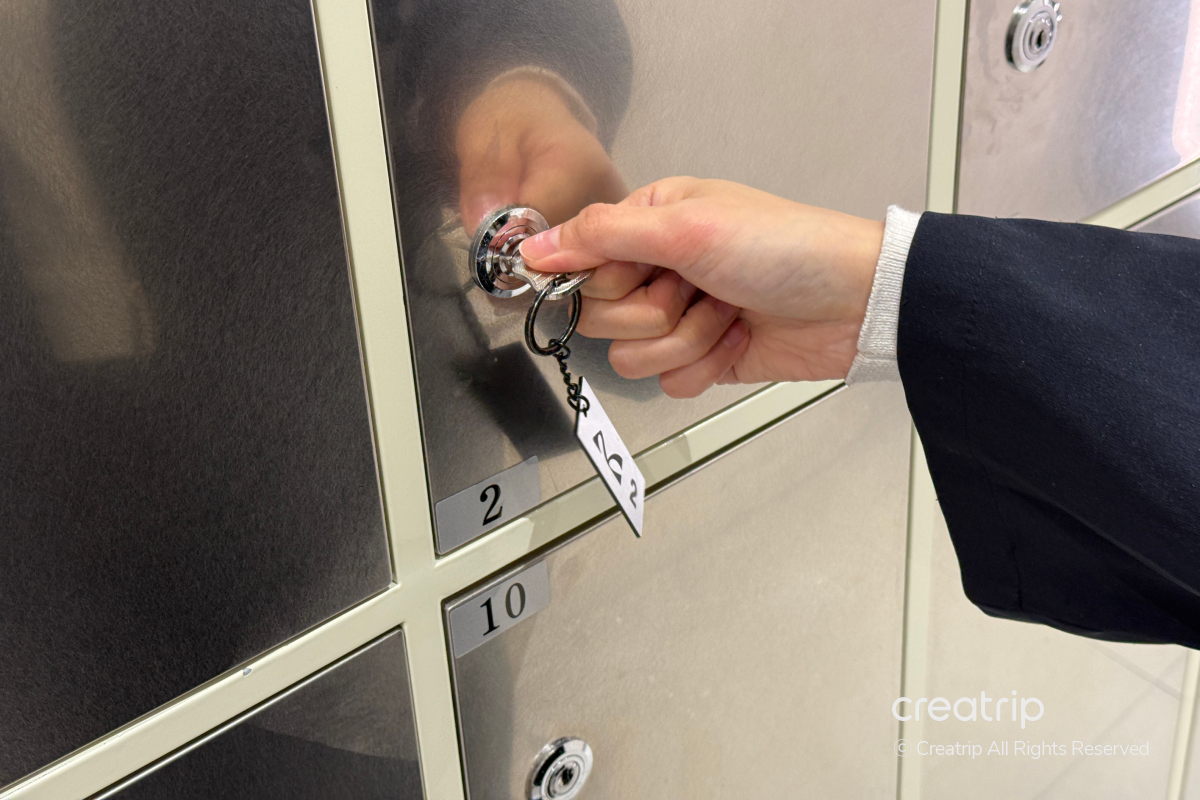
I changed into a gown in the locker room.
You can store outerwear and personal belongings in a locker and lock it with a key, so you can use the facility with peace of mind.
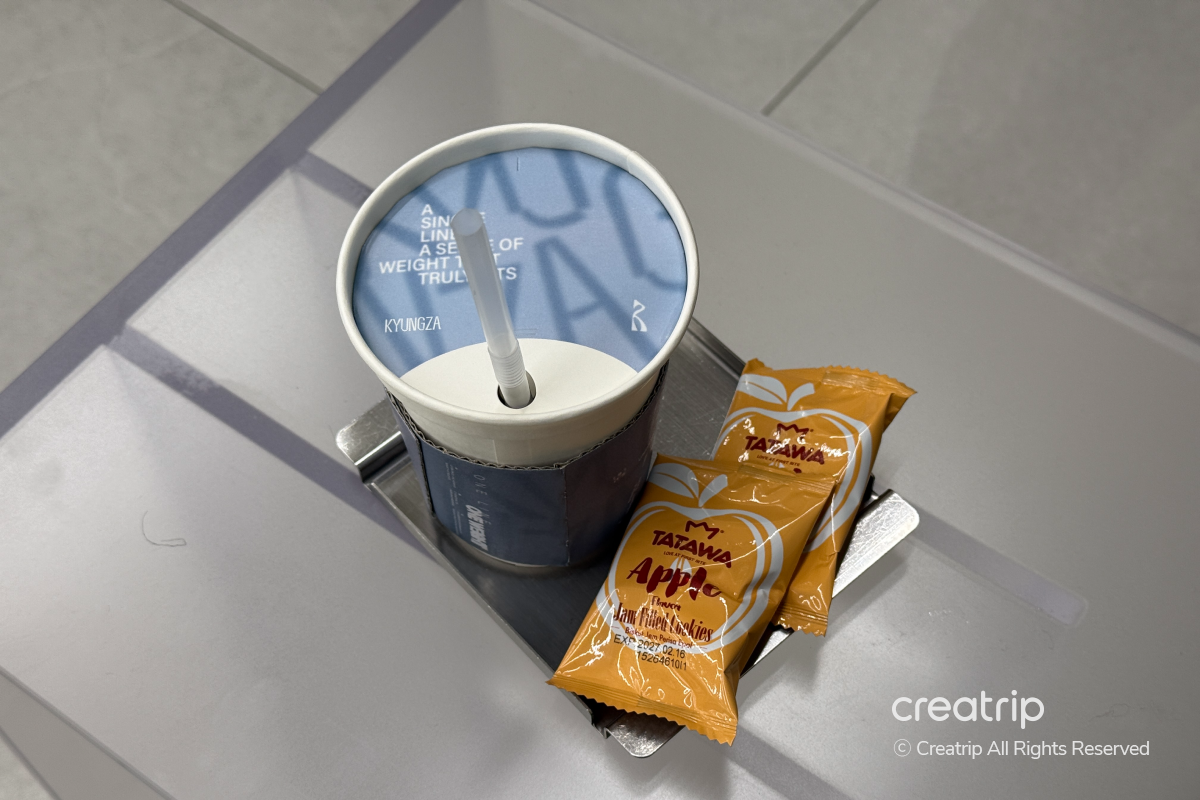
They also prepared a light snack to go with the drink.
It was easy to snack on while getting the treatment, and I felt they paid attention to even the smallest details.
[image slider] 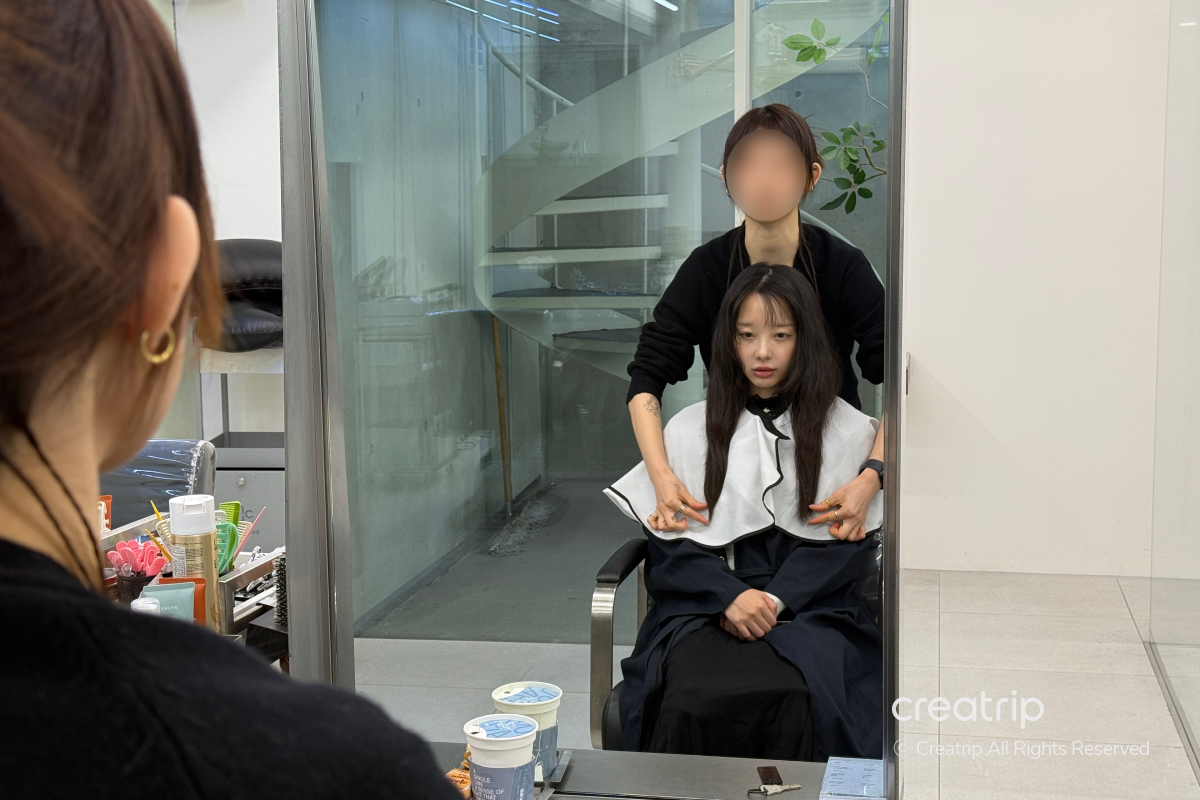
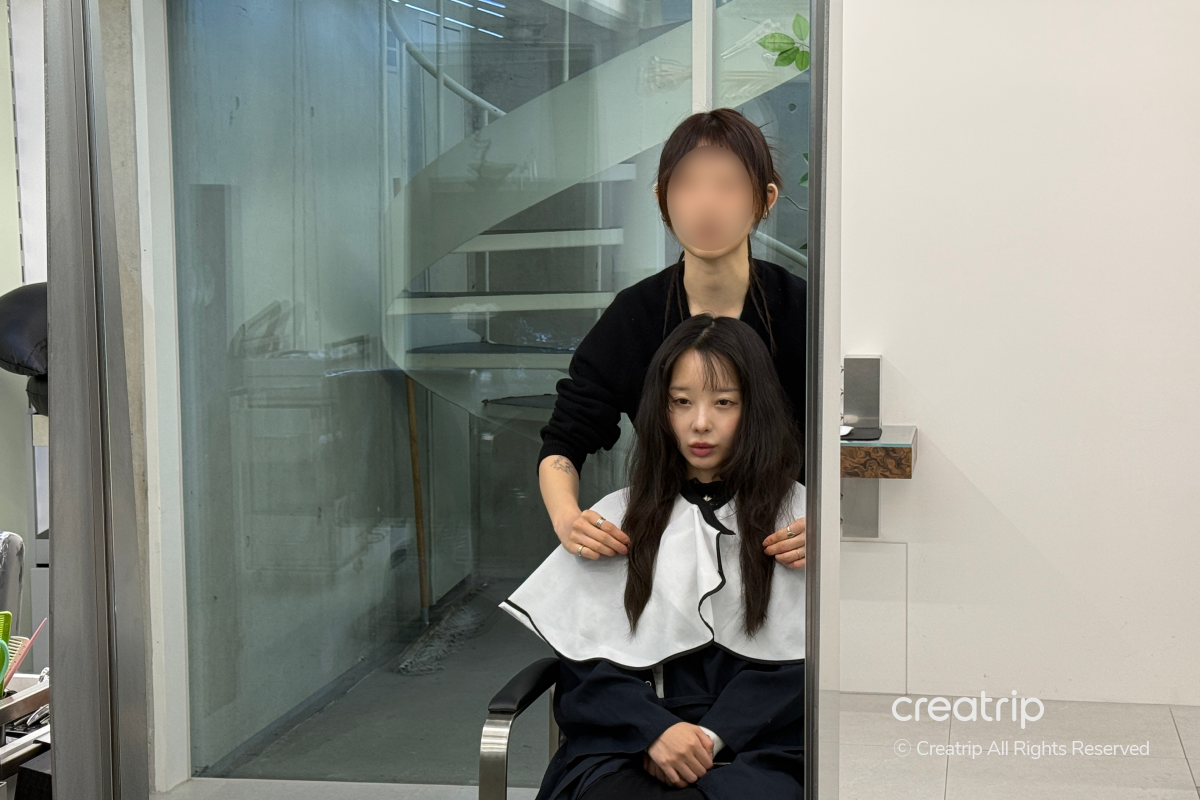
After taking a seat and having a consultation, the treatment began.
Before my visit I had booked the cold perm package (haircut + perm + 2-step clinic (hair treatment) + styling + scalp pack), but after checking my hair condition they changed it to a heat perm and proceeded.
They carefully checked the condition of my hair on site and recommended a treatment that suited me better, which I appreciated.
You can switch to a heat perm if needed, and extra charges may apply in that case.
[image slider] 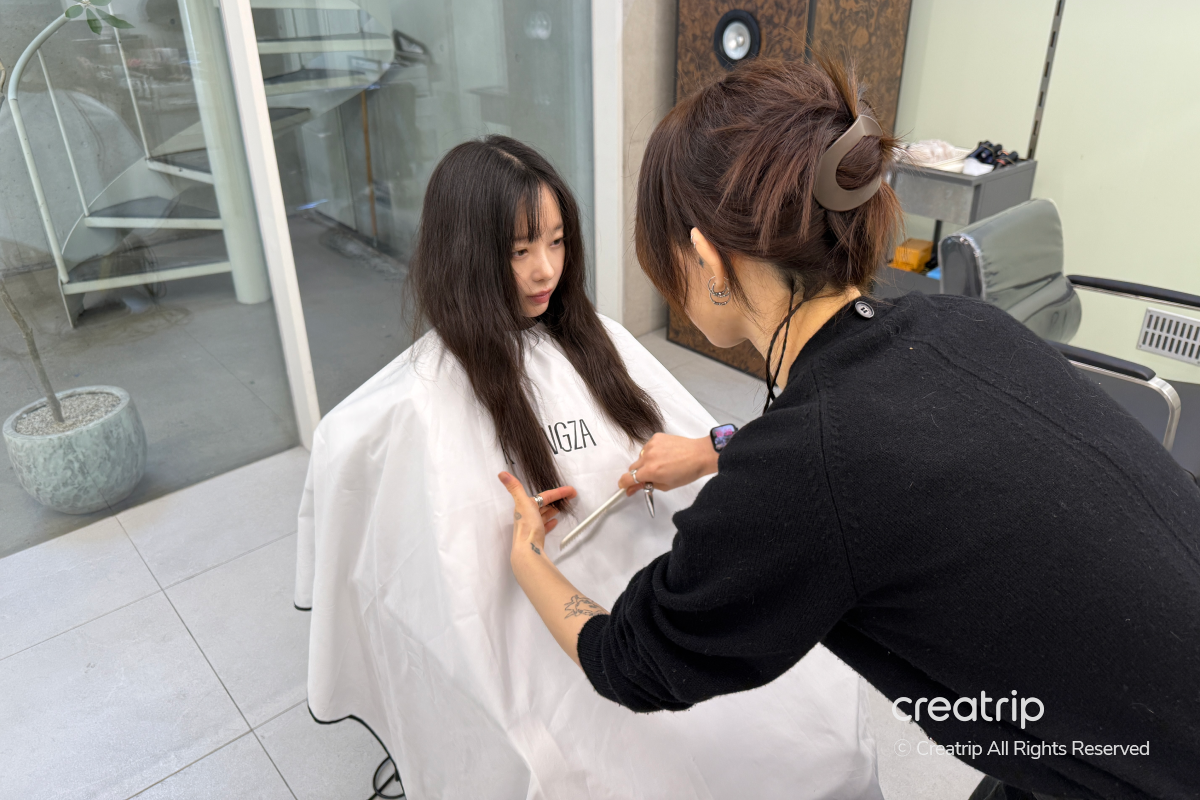
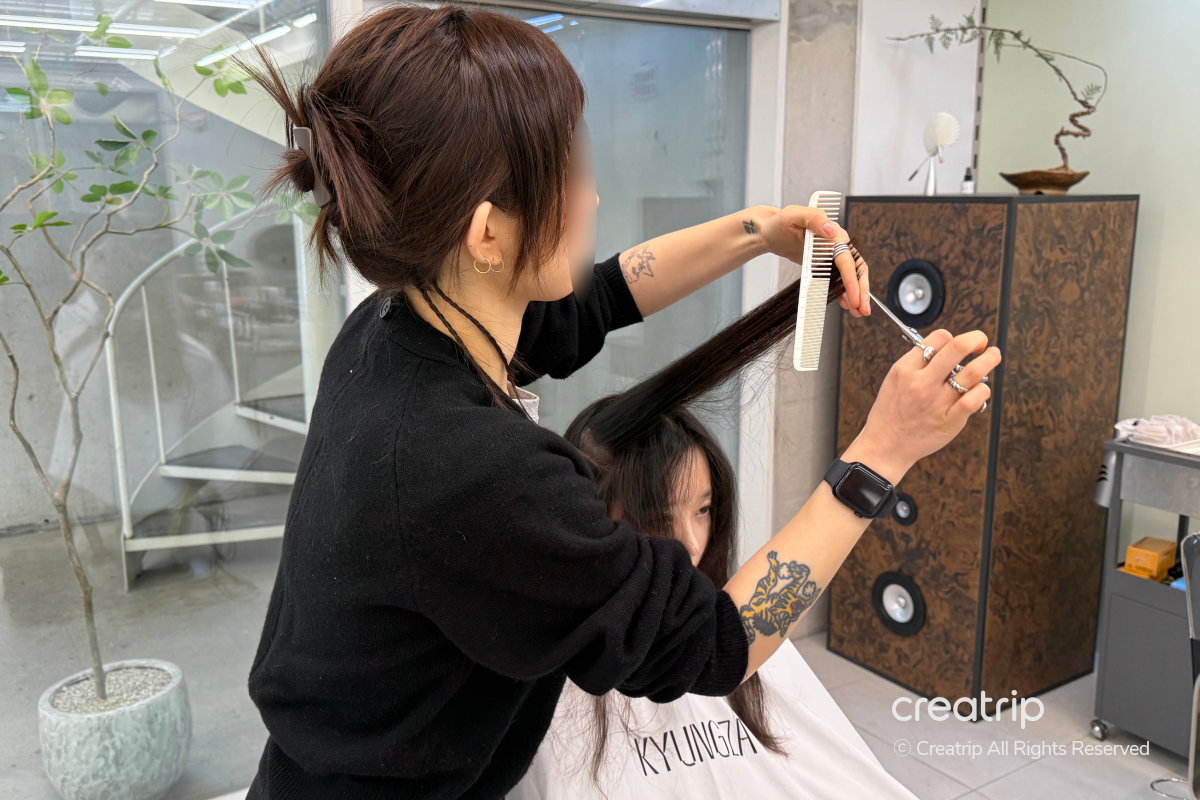
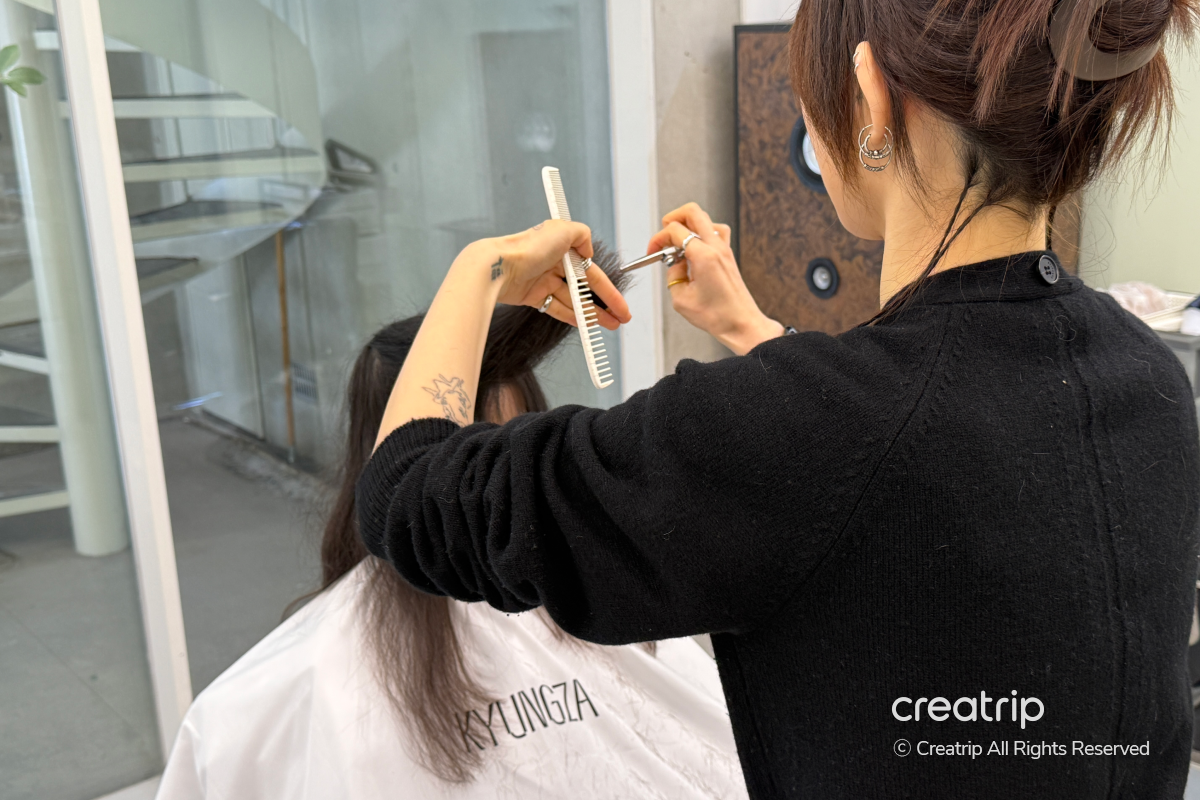
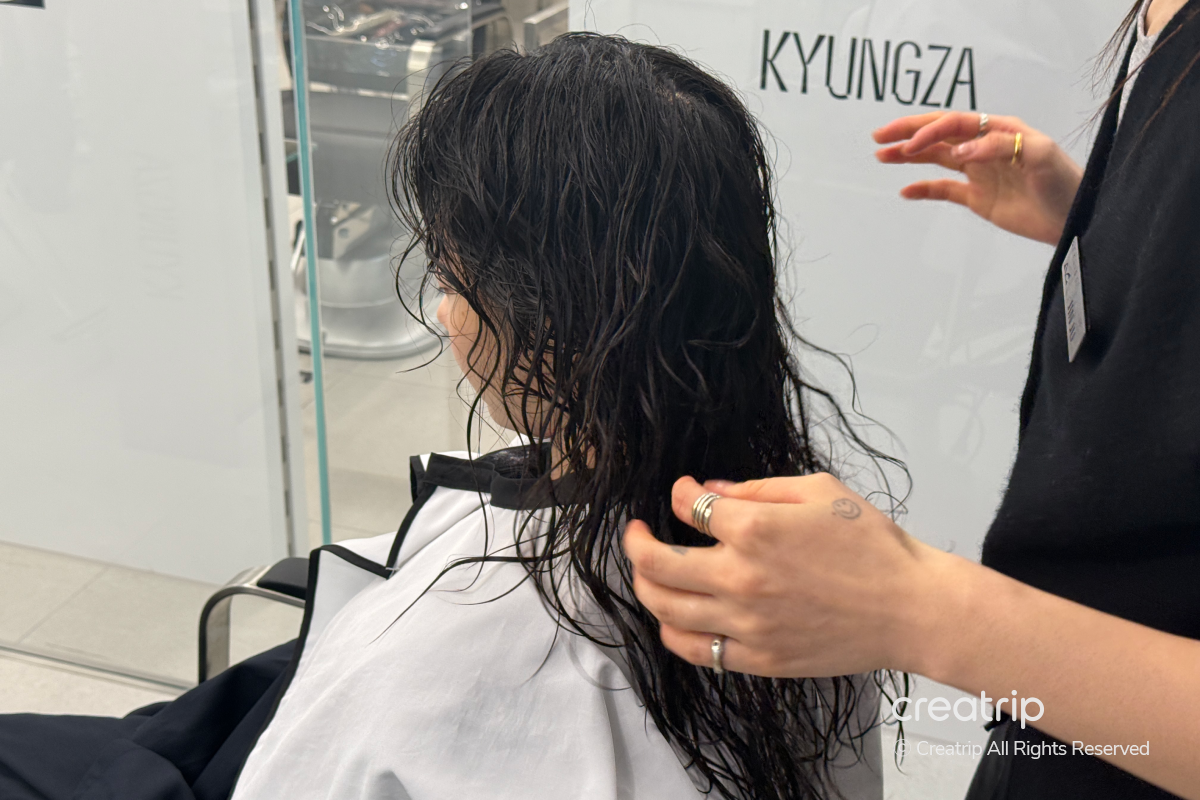
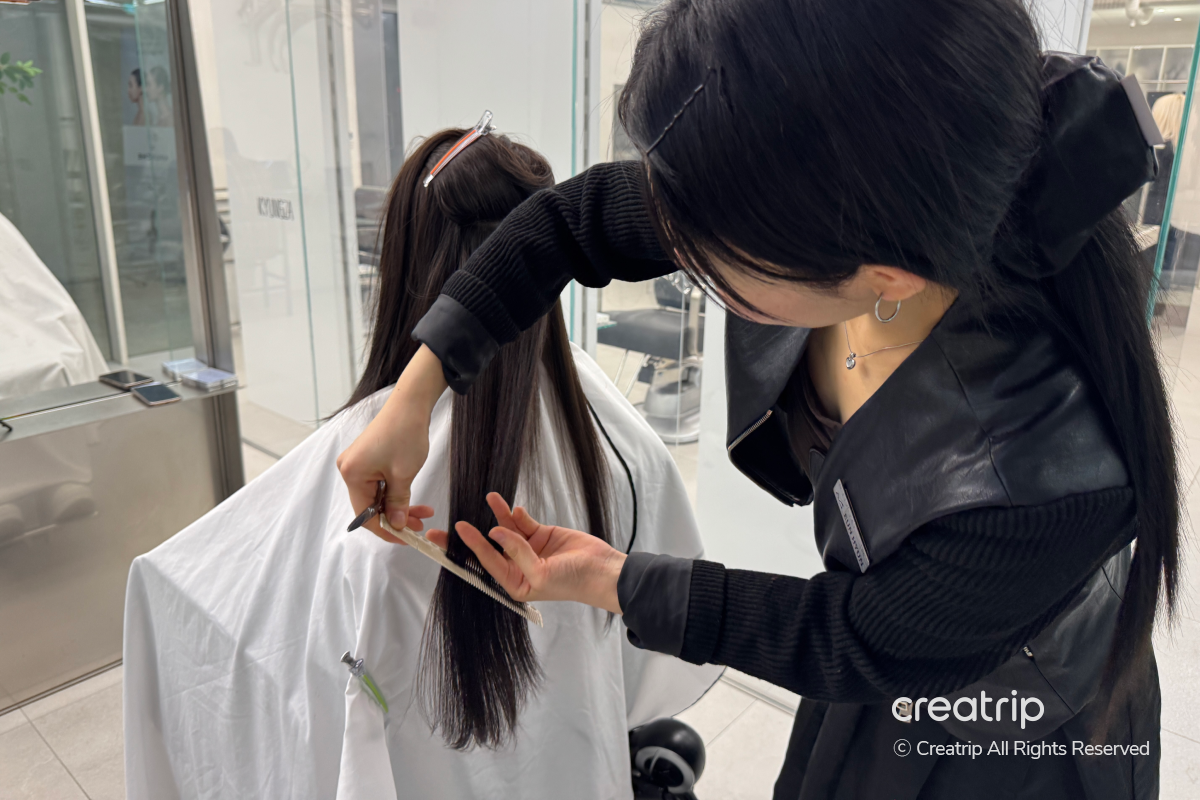
First, I got a haircut.
The style I wanted suited longer lengths, so I kept the length as much as possible and proceeded with a haircut to tidy everything up overall!
[Image Slider] 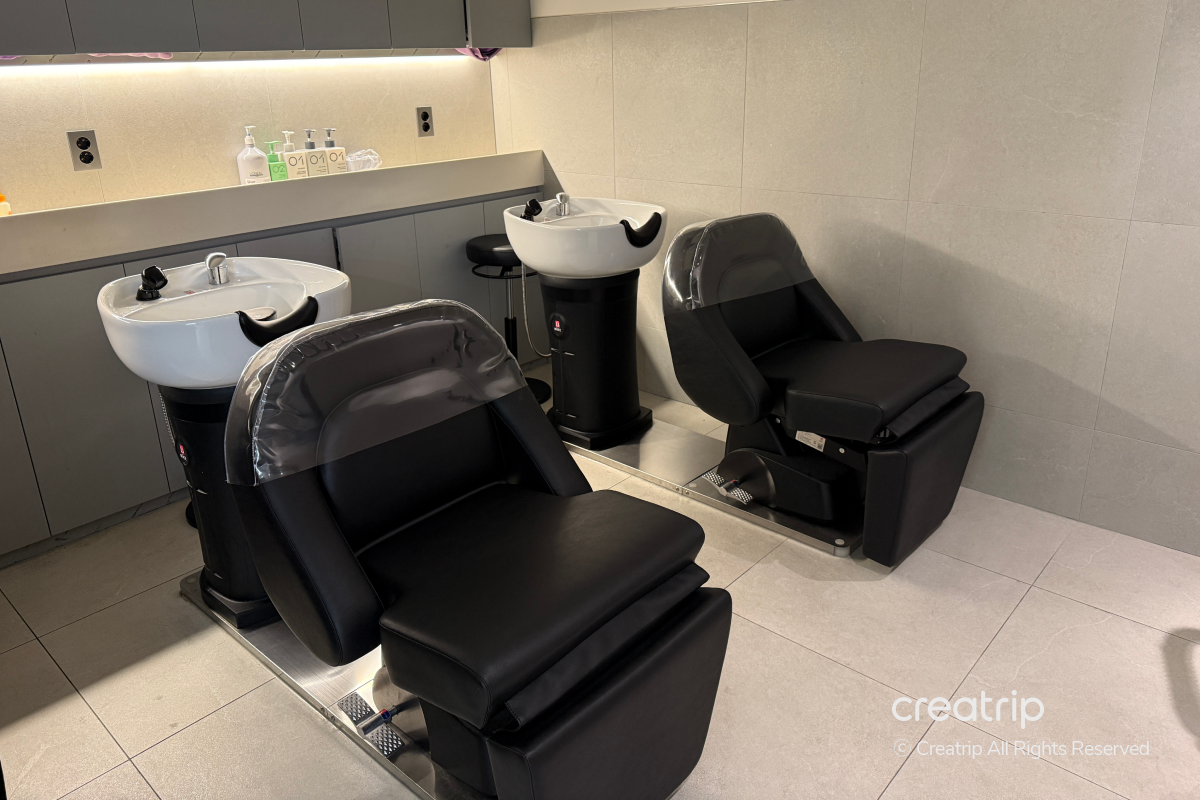
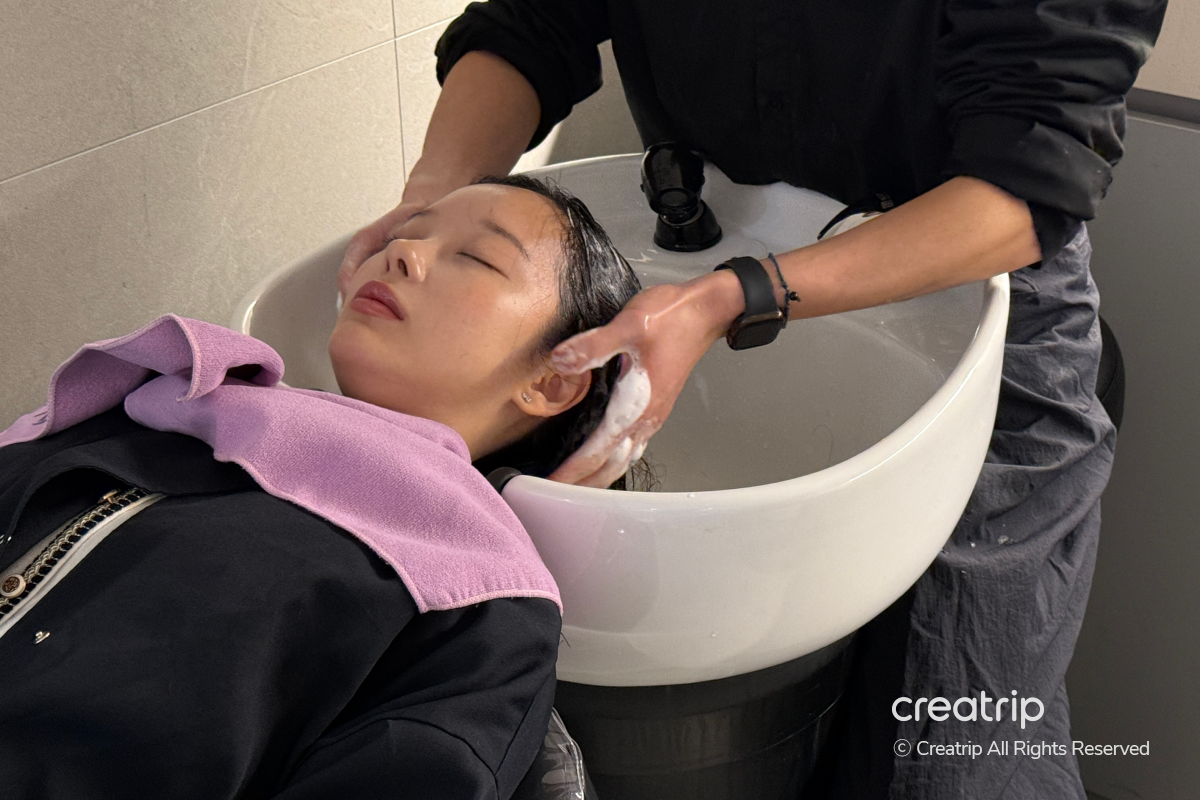
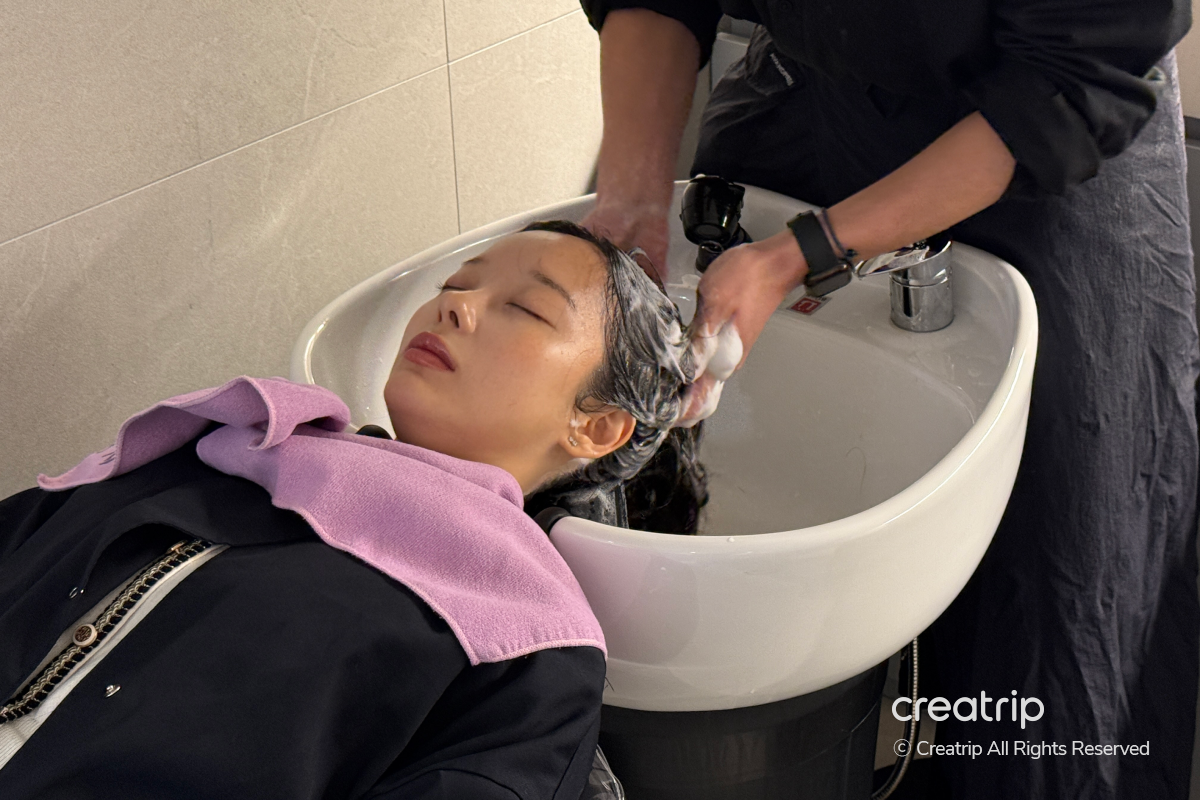
We moved to the shampoo area and started the shampoo.
First, they used a care shampoo to remove remaining metal elements and impurities inside the hair, then thoroughly eliminated calcium and lime components from the water.
After that, they performed a protein treatment to smooth the cuticles and strengthen the hair.
They finished everything neatly to prepare for the next treatment.
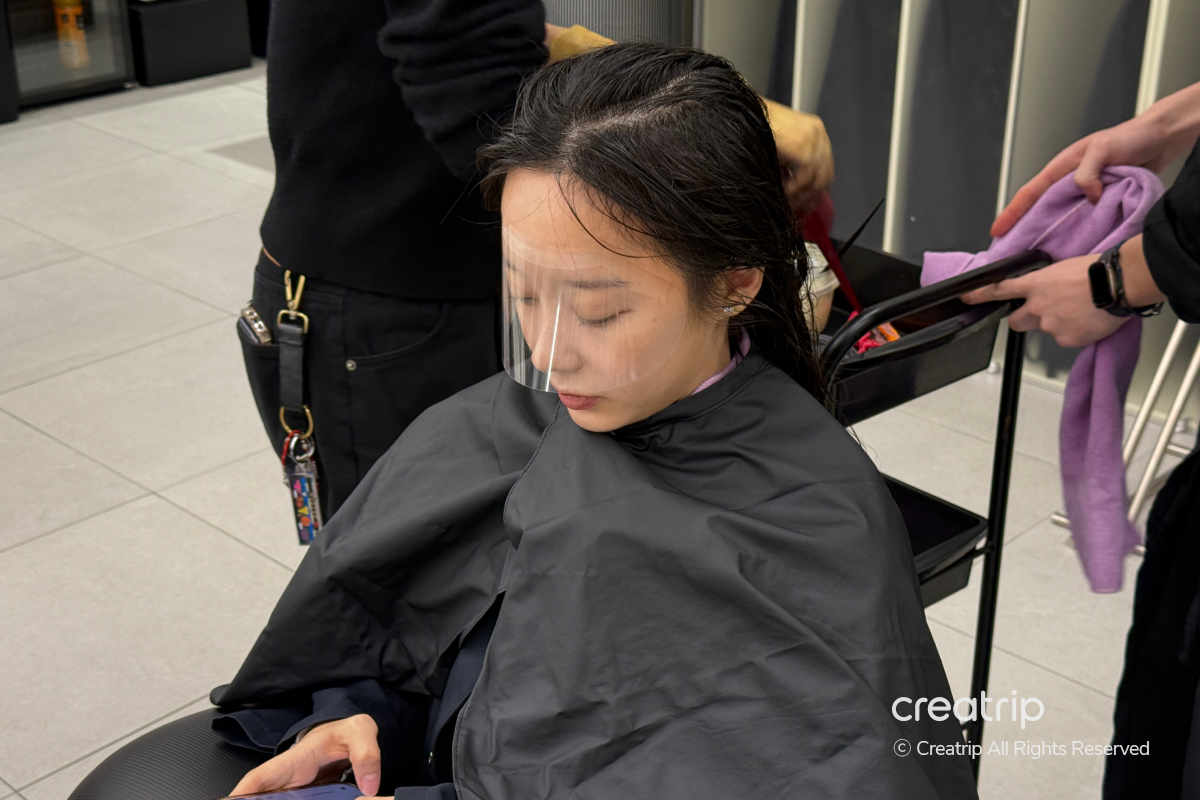
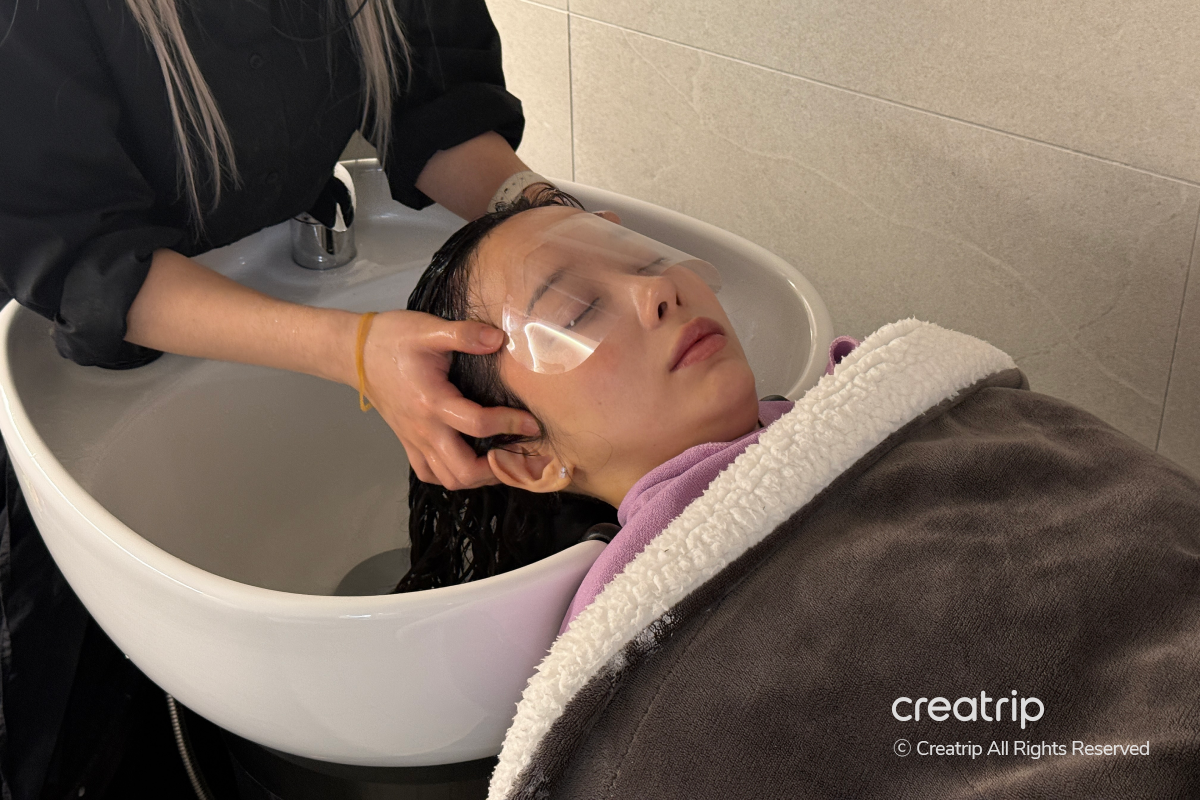
After shampooing, we moved back to our seats to prepare for the next treatment.
After putting on a face shield and arranging the gown, we prepared to start the 2-step clinic (hair treatment).
[Image Slider] 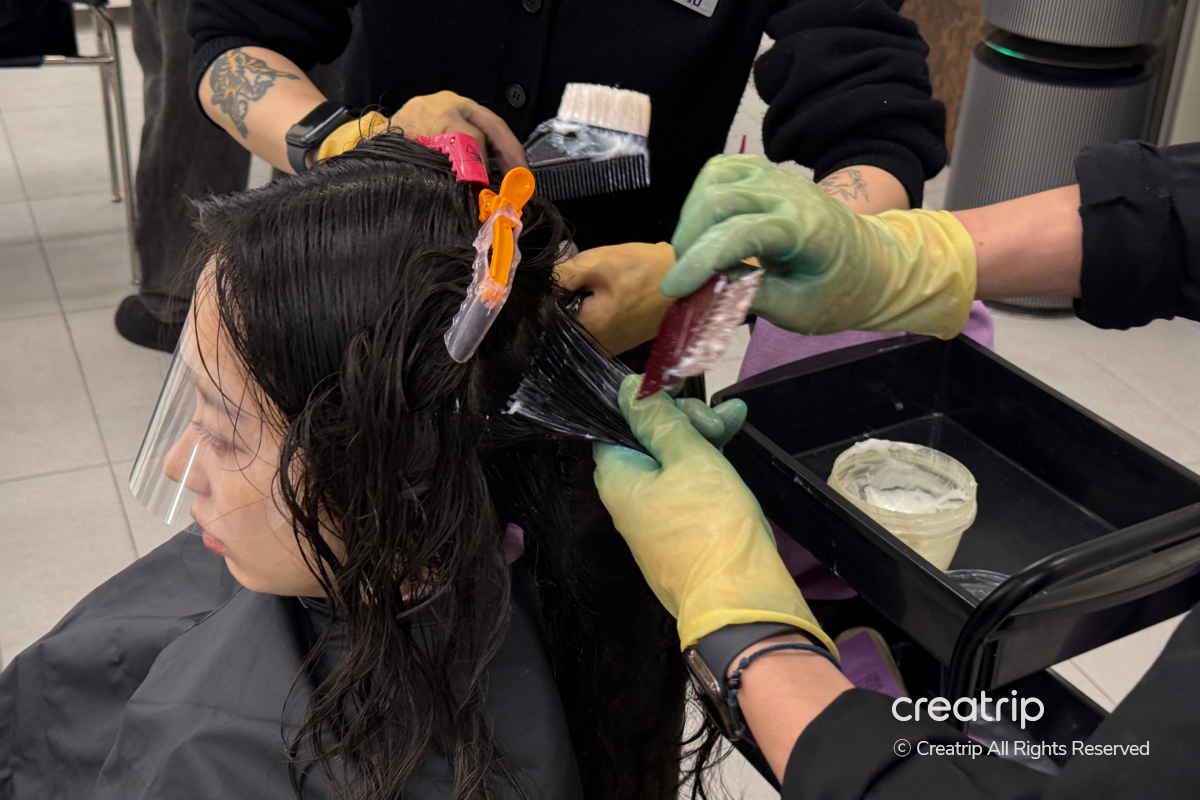
First, a 1-step treatment was applied to protect the hair.
This step prepares the hair by opening the cuticle so the solution can work effectively, helping the next treatment proceed more smoothly and reliably.
[image slider] 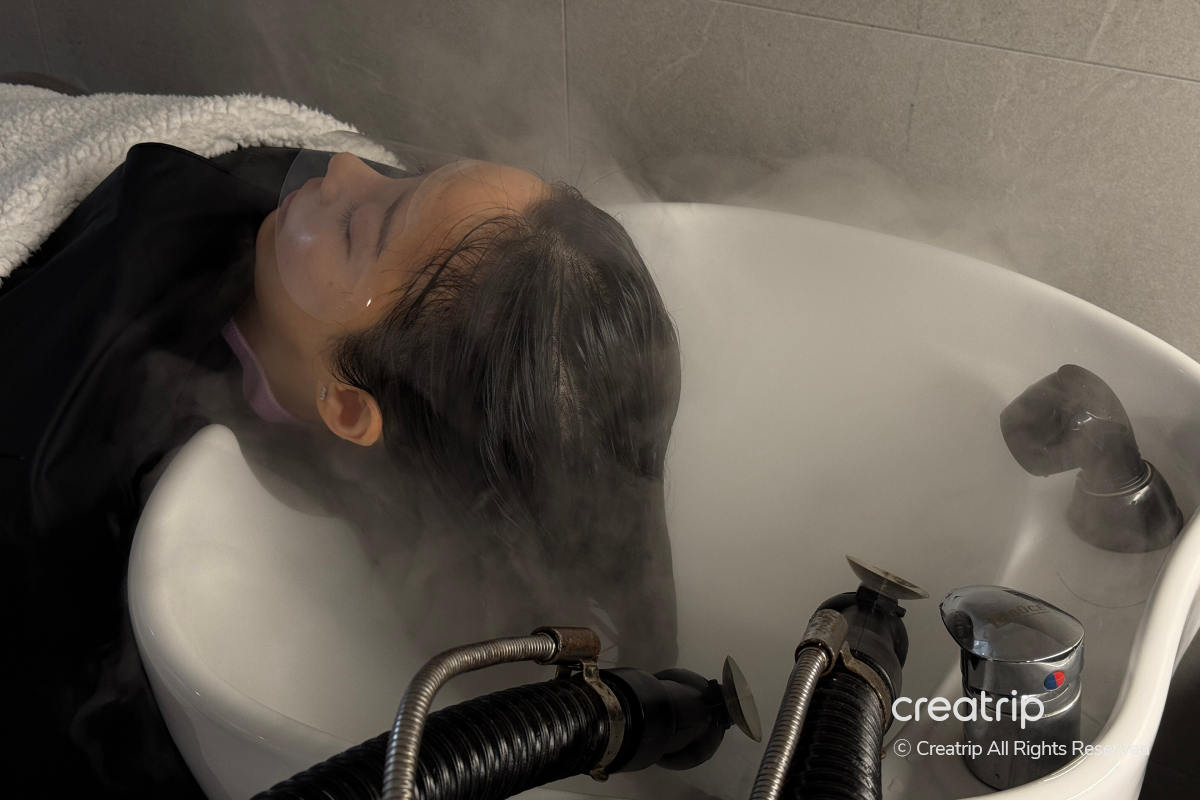
We then moved on to the oil-moisture mask (2-step) treatment.
We moved to the shampoo room, applied a protein treatment to replenish the hair, and followed with a care treatment that manages moisture and protein together.
This is the process of replenishing nutrients needed for damaged hair to prepare for the next treatment.
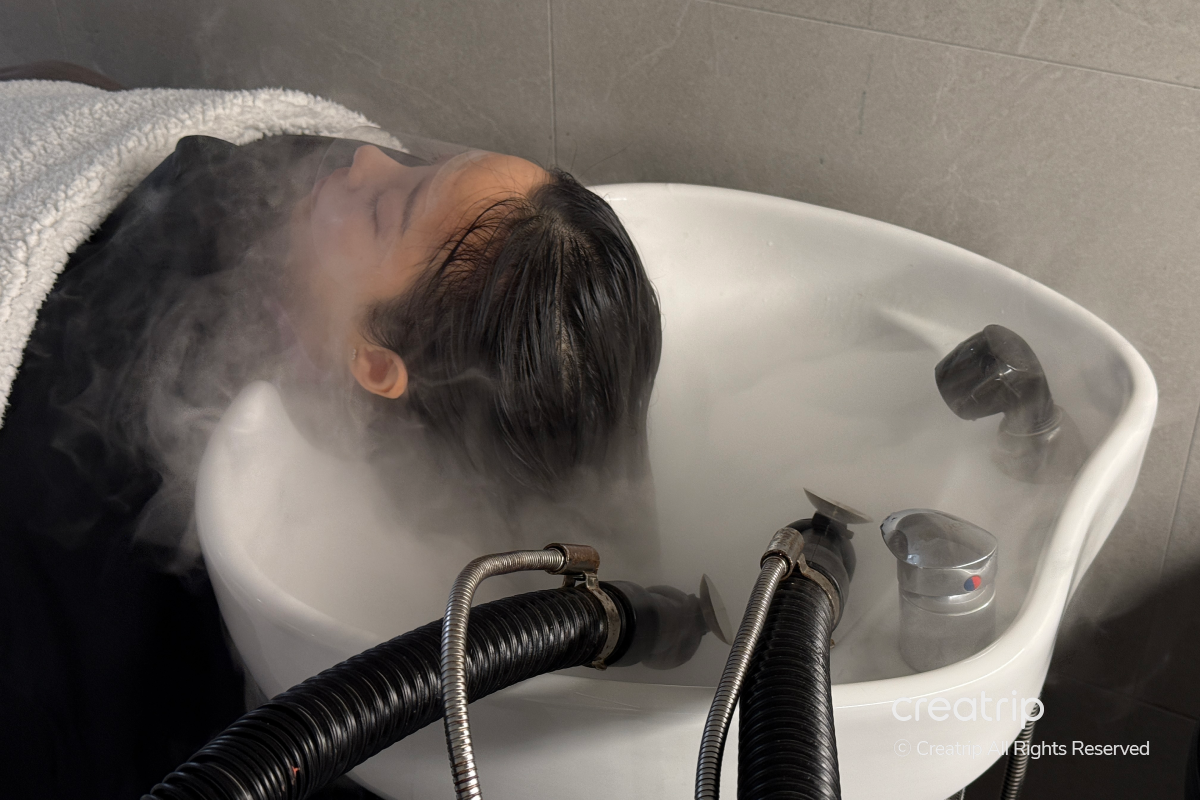
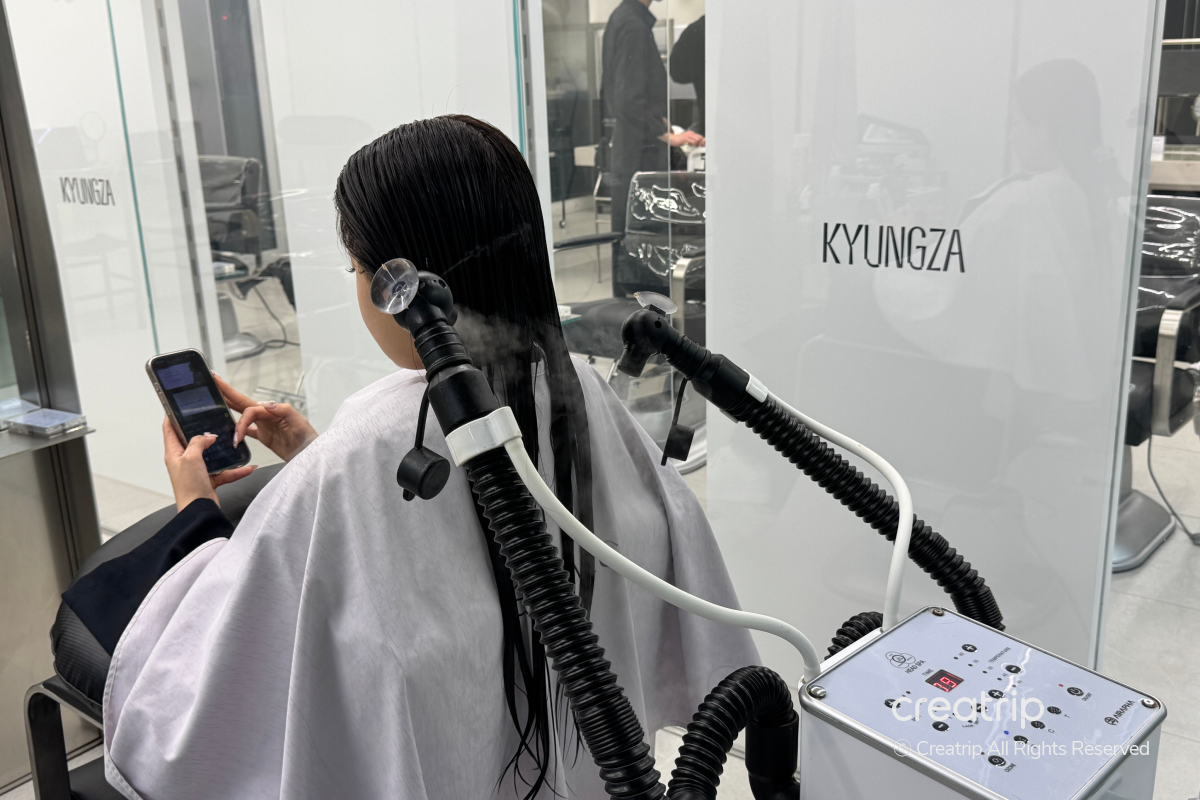
Afterwards, they used a misting device to hydrate the hair, then treated it so the nourishing ingredients could be fully absorbed.
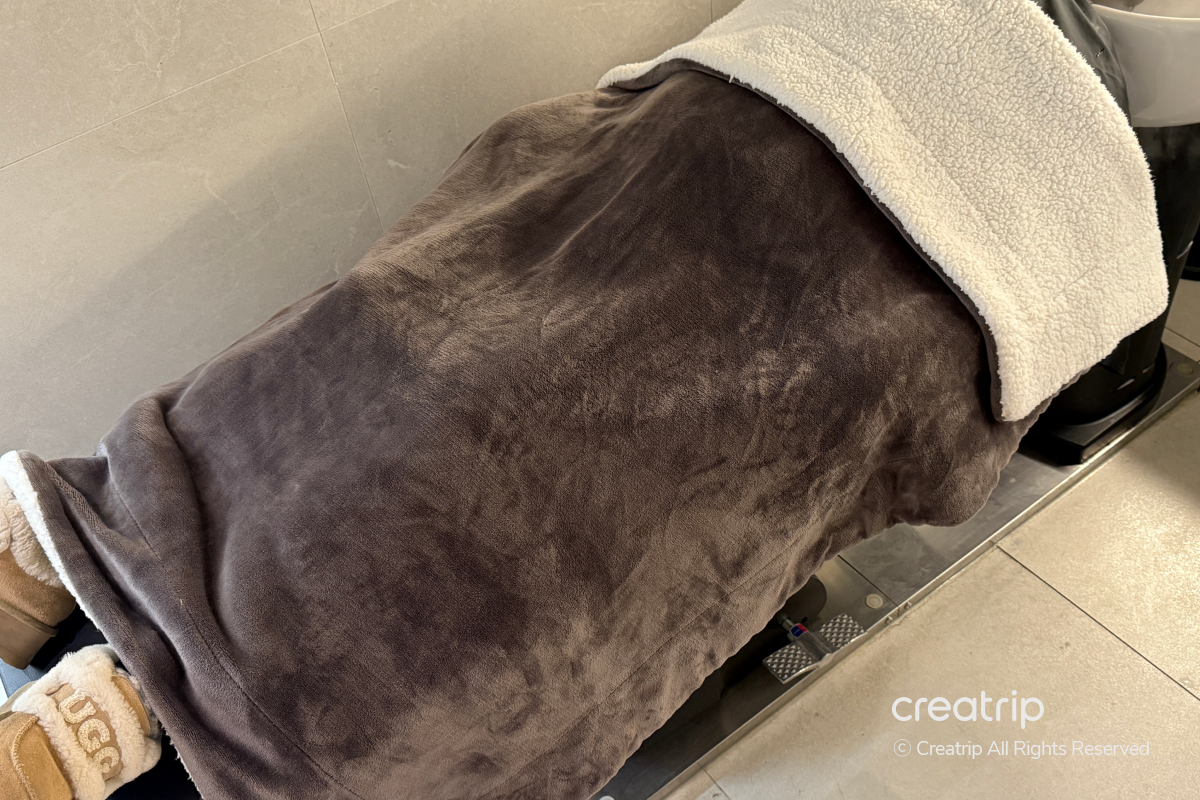
They warned that your hair can feel cold while it's being treated in the shampoo room, and they also covered me with a blanket.
They paid attention to even the smallest details, so I felt comfortable and well taken care of.

After the treatment, I moved back to my seat to get ready for the next procedure.
Before starting the heat perm treatment, a protein product was applied first to protect the hair from heat.
This is a step in the coloring and perm process to reduce hair damage and protect the hair.
[image slider] 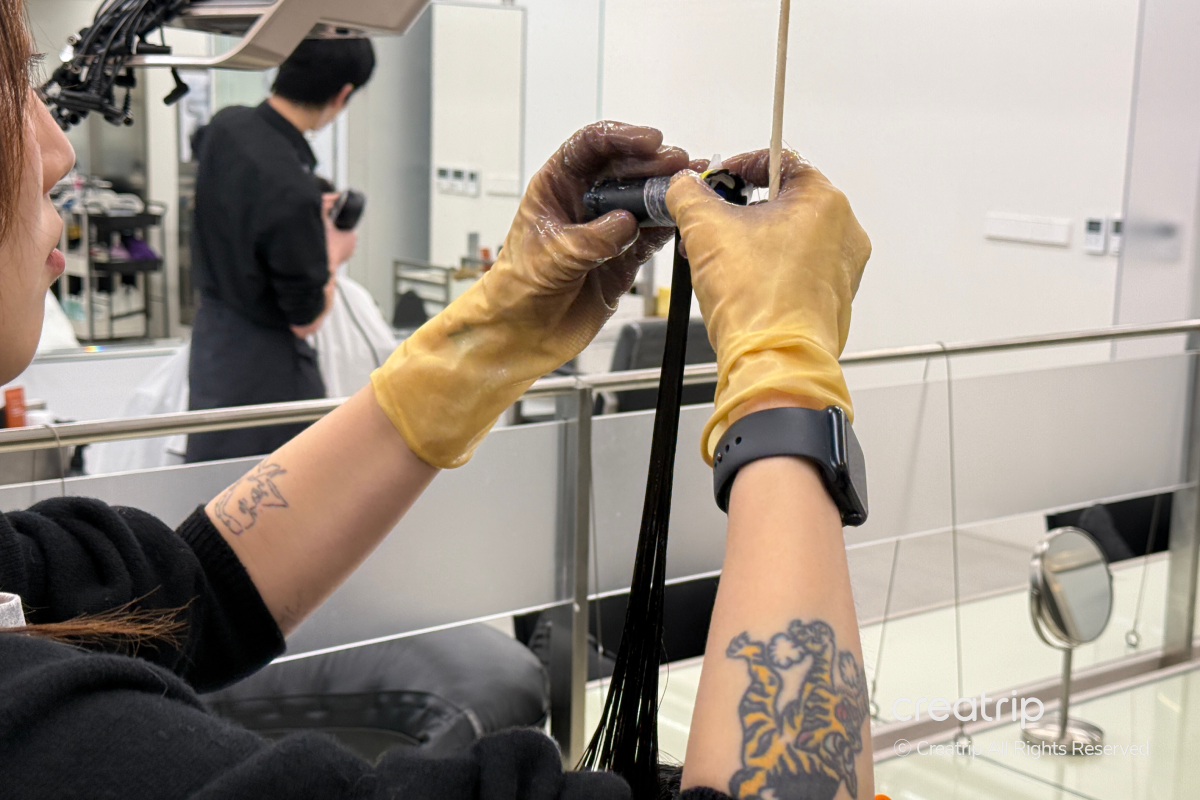
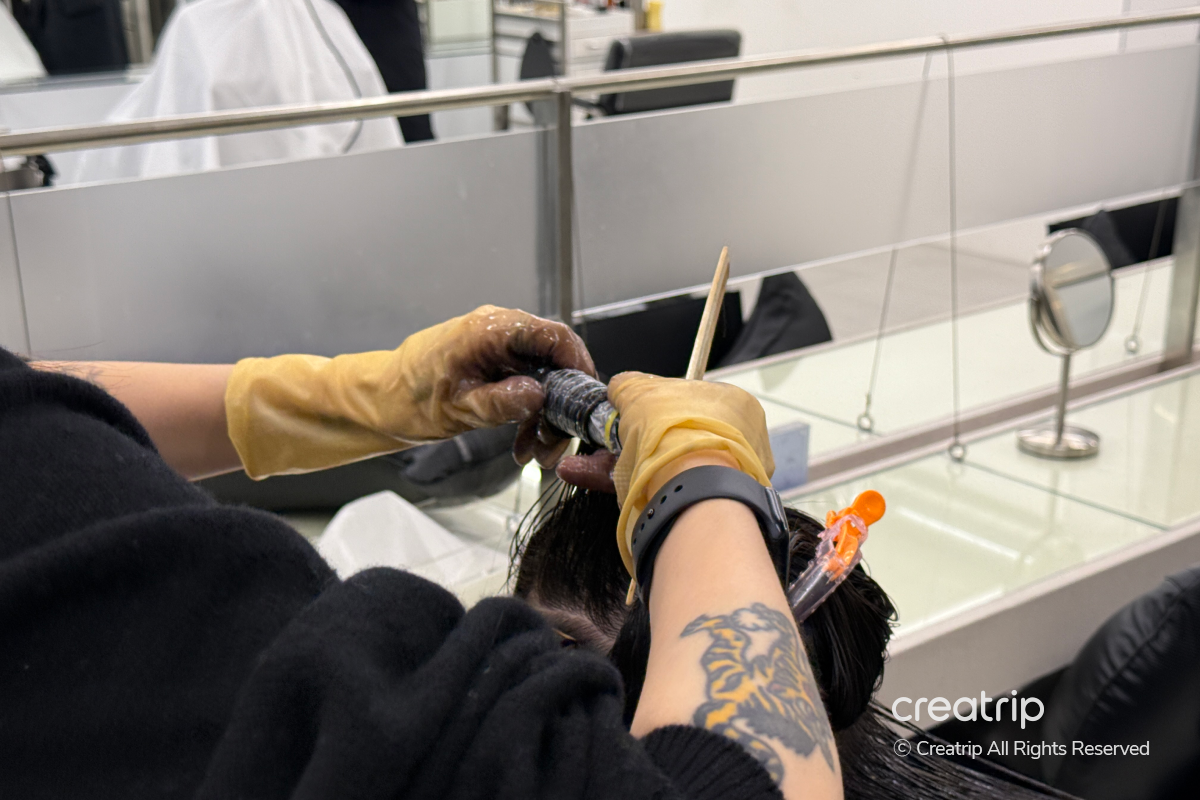
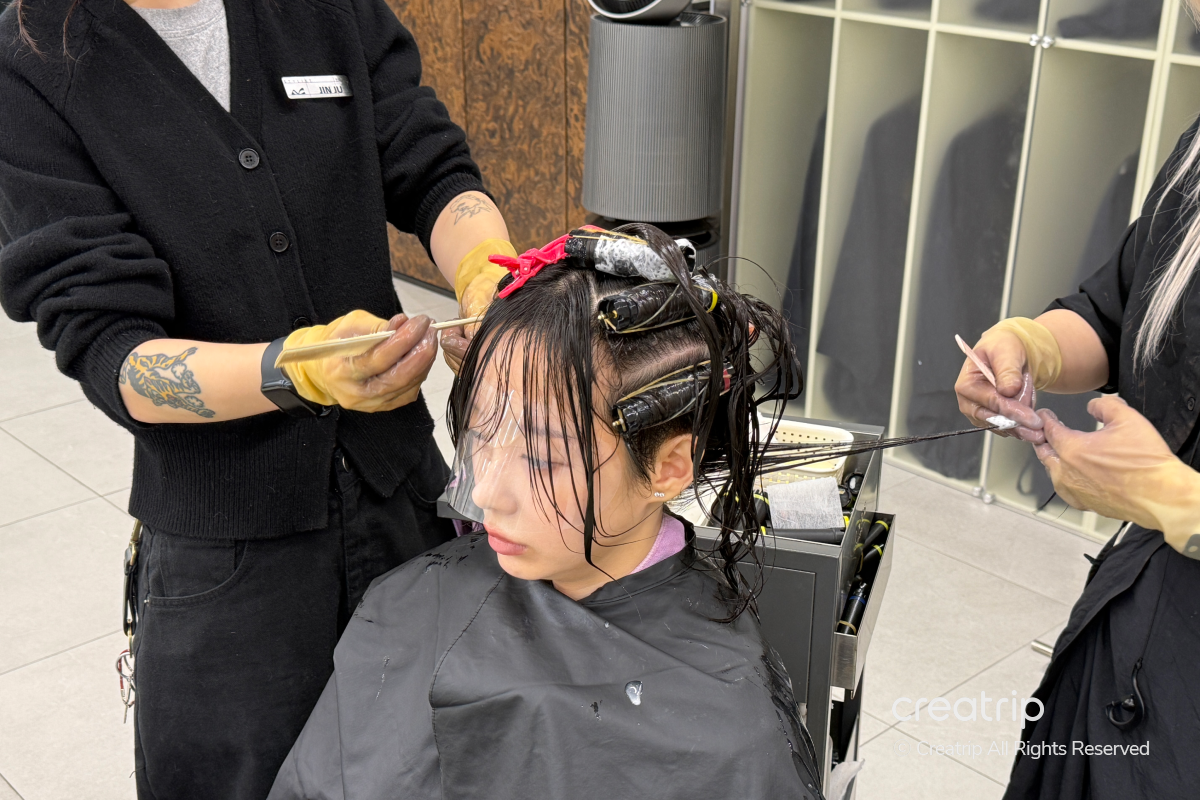
The rod work for the perm has officially begun.
Two stylists worked together, so they split my hair and wrapped the rods quickly and efficiently!
They sectioned my hair and carefully wrapped each rod, while shaping the overall perm line.
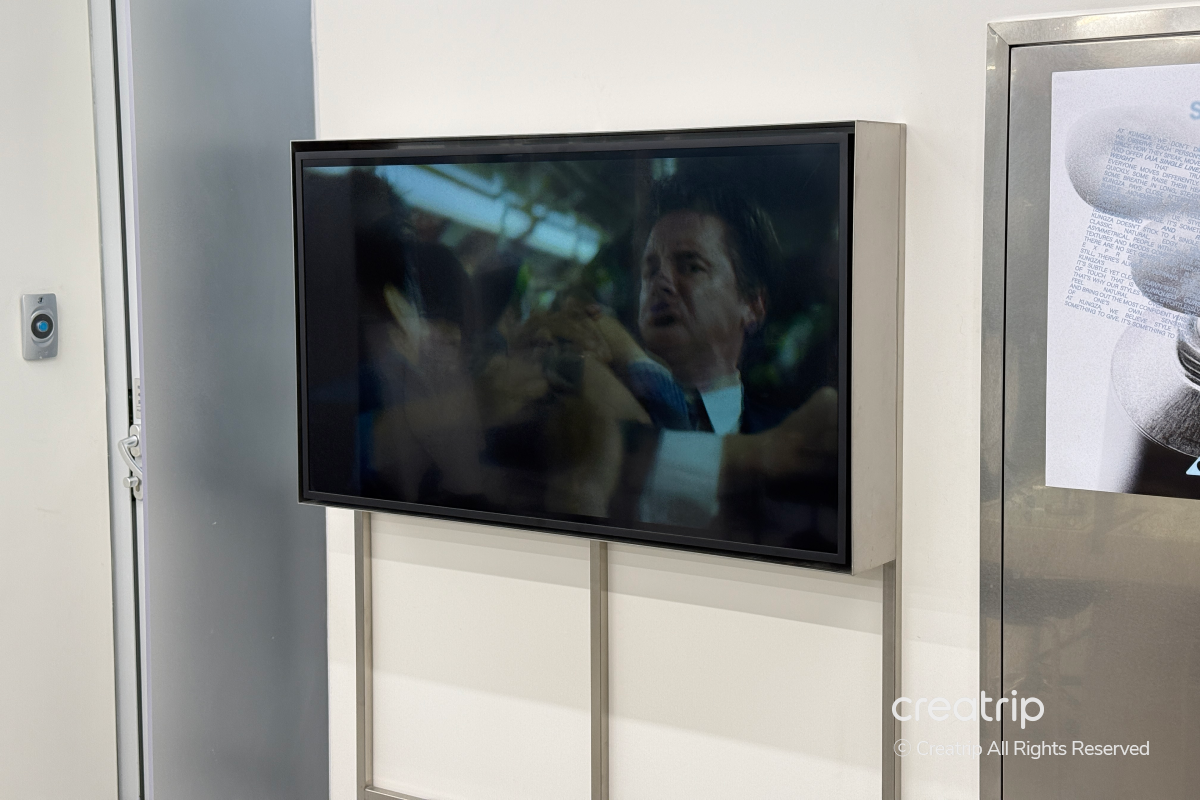
A TV was set up so you could watch it while getting the treatment.
Thanks to that, I was able to comfortably pass the time by watching videos during the treatment!
[image slider] 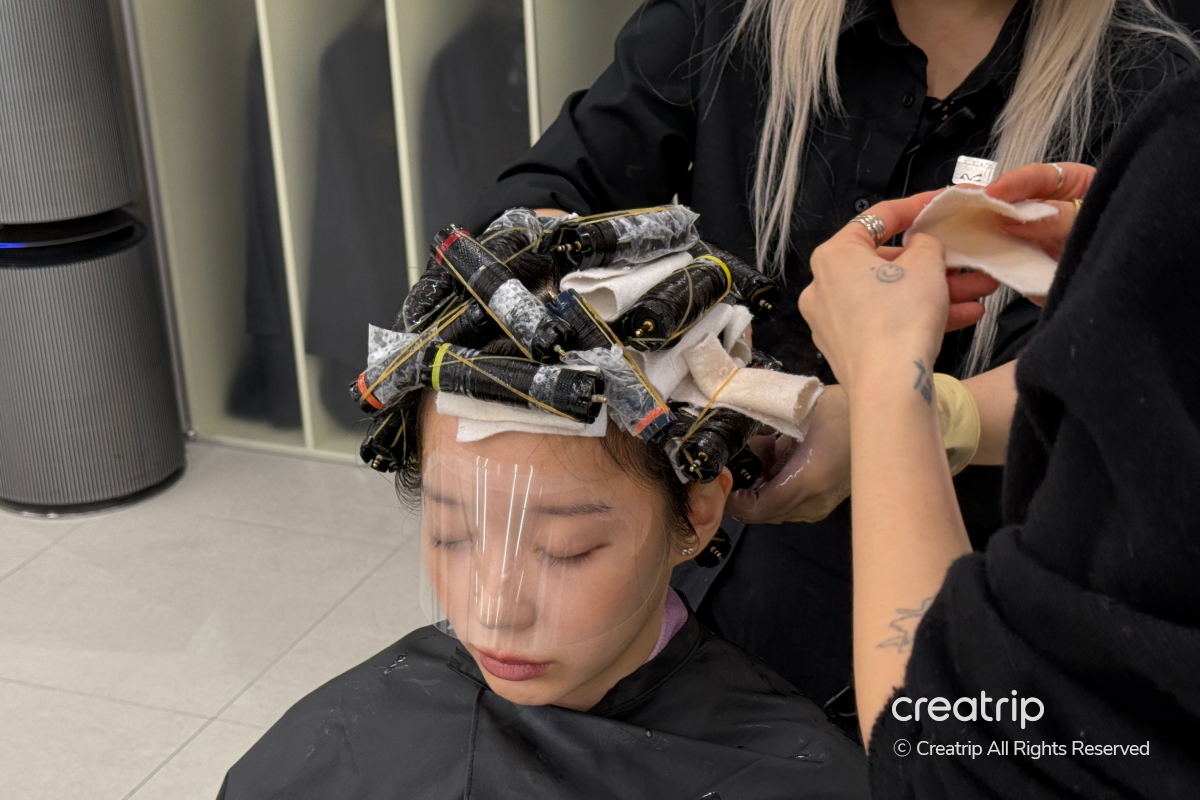
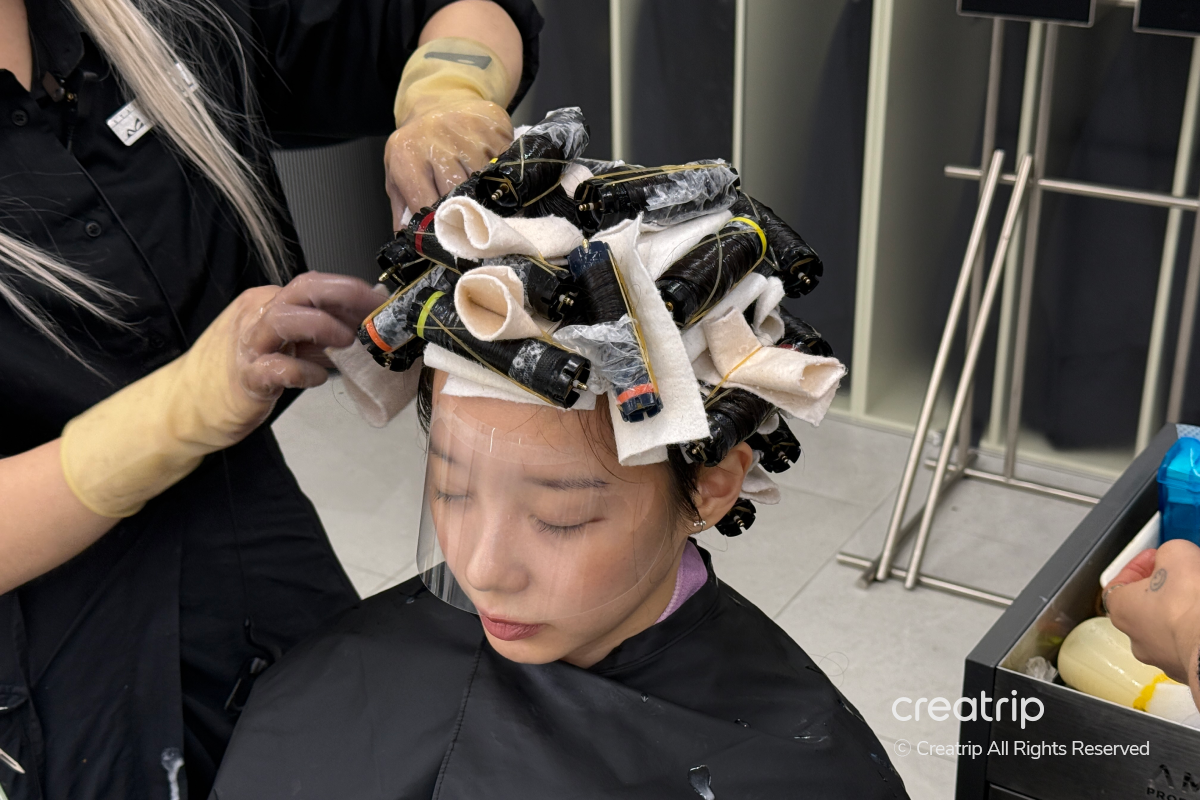
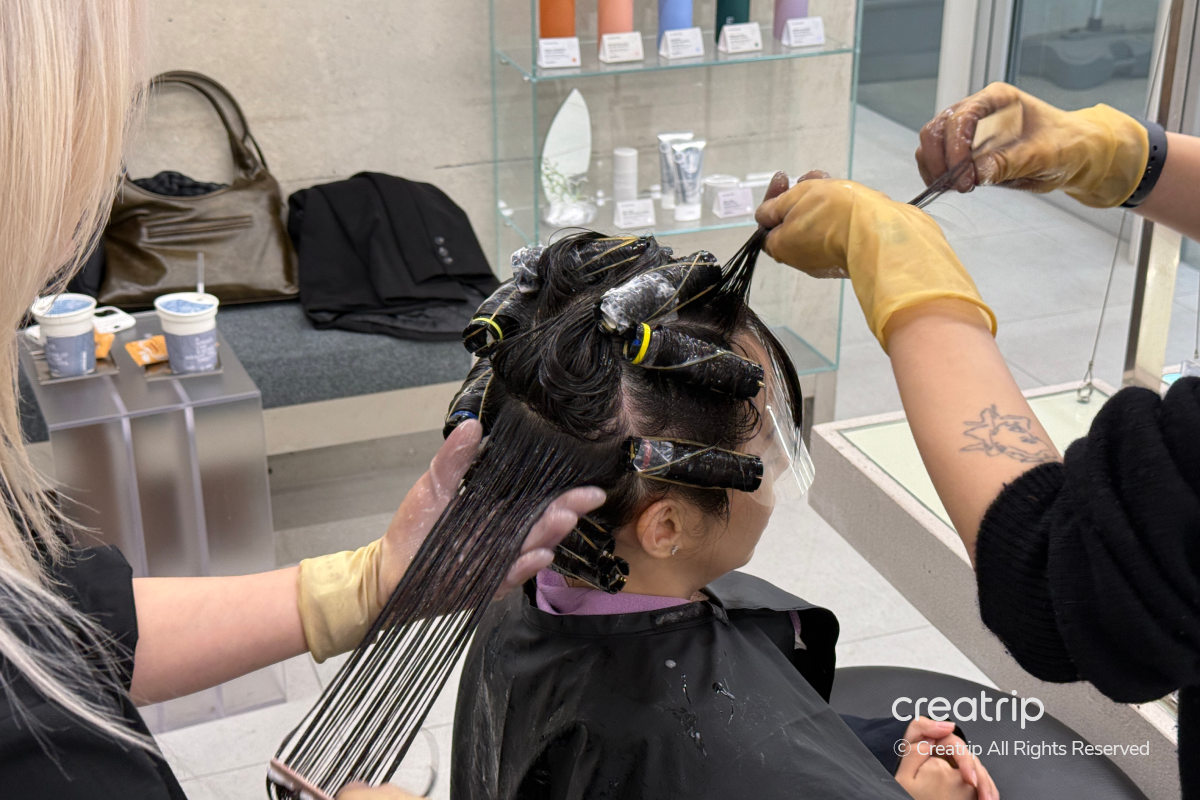
The full rod work was finished quickly, and their swift, steady hands showed long experience.
After that, they prepared for the heat perm by adding a sponge-style pad over the rods, as shown in the photo.
This step helps protect the hair and keep the product in place during the heat transfer process.
[image slider] 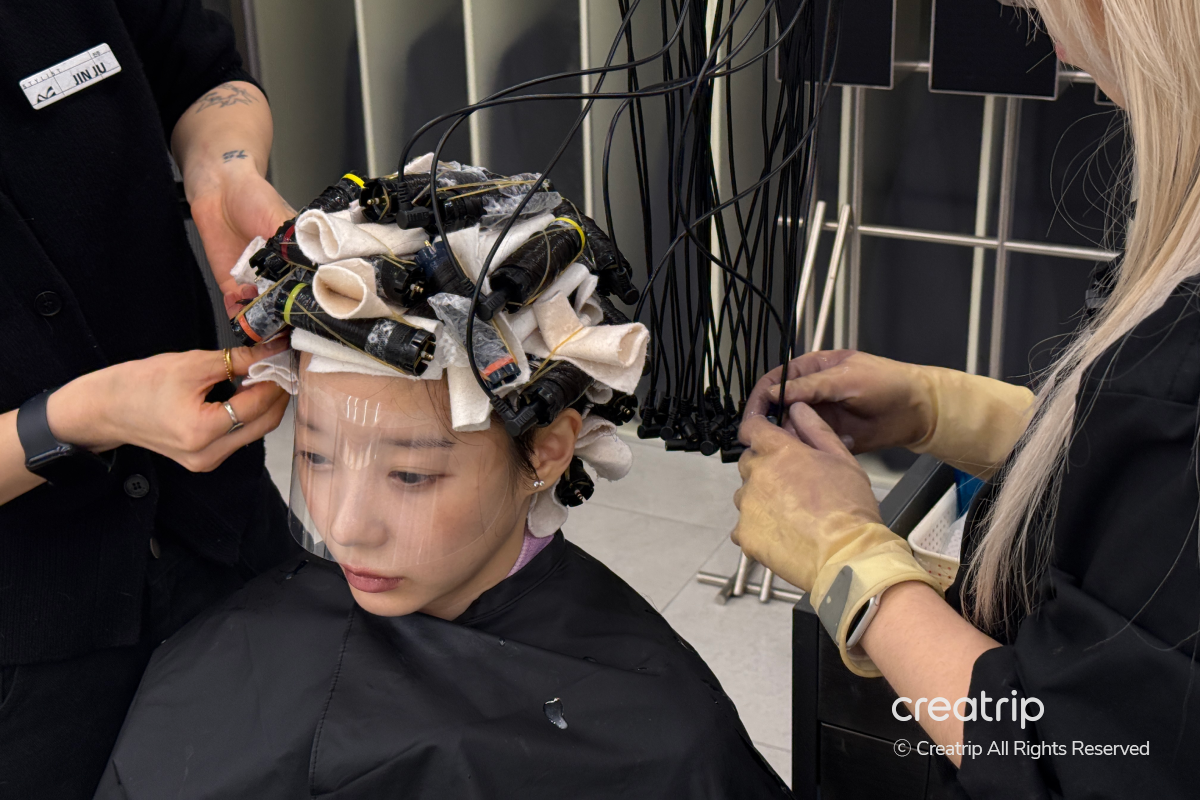
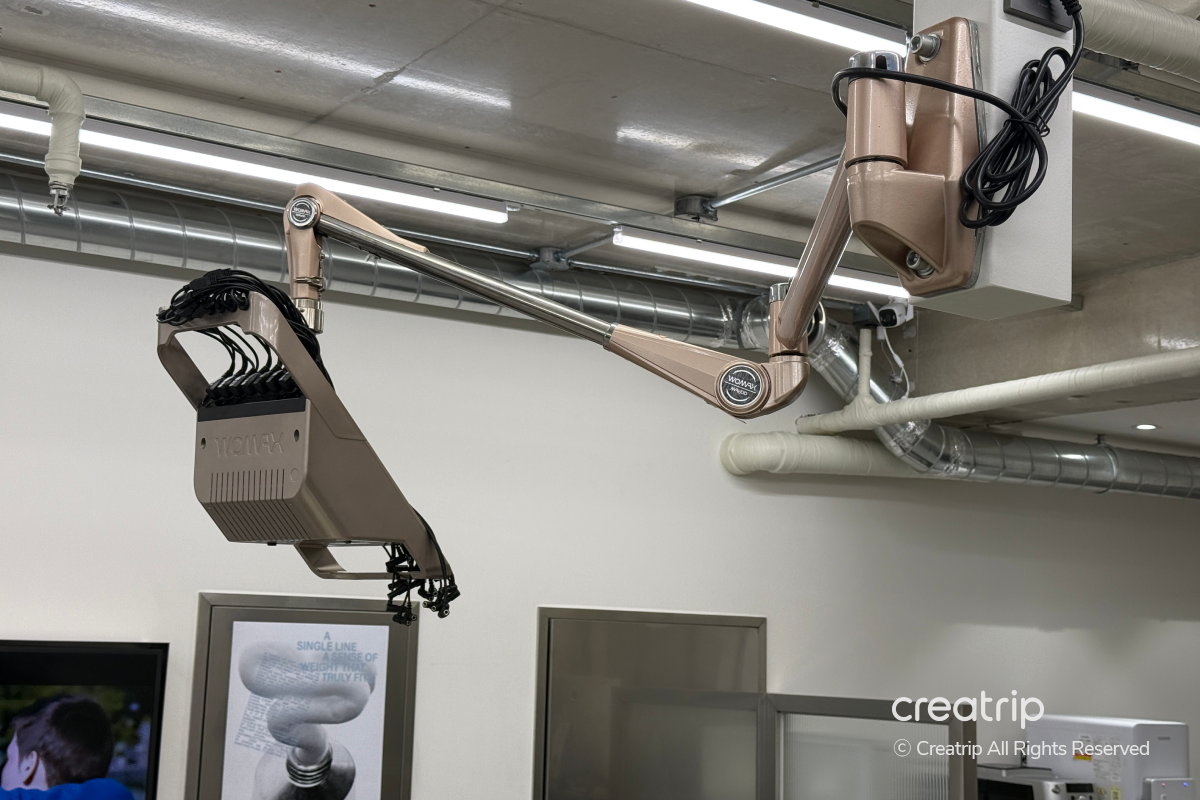
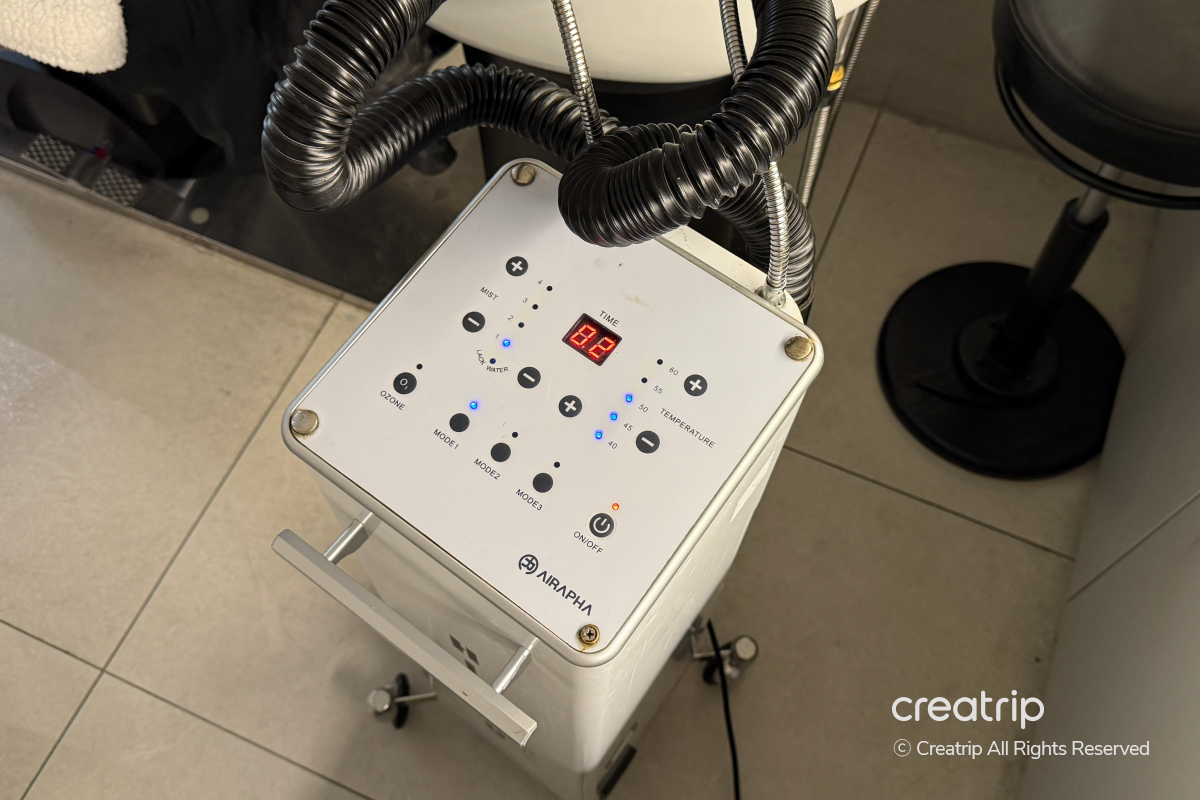
After finishing the rod work, they connected the machine to start the heat perm.
They attached a cable to each rod so the heat would be distributed evenly.
This equipment delivers heat at a steady temperature, which is how curls form in the hair.
The preparations for the heat perm are now complete!
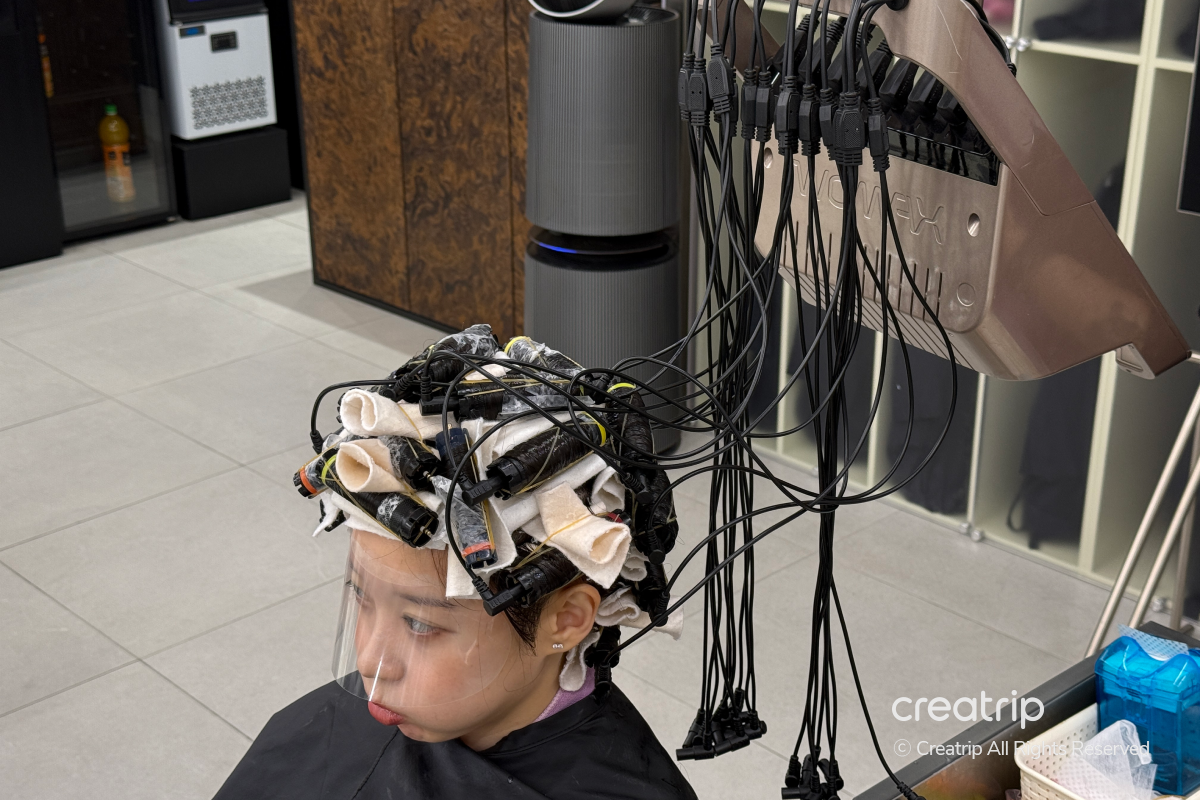
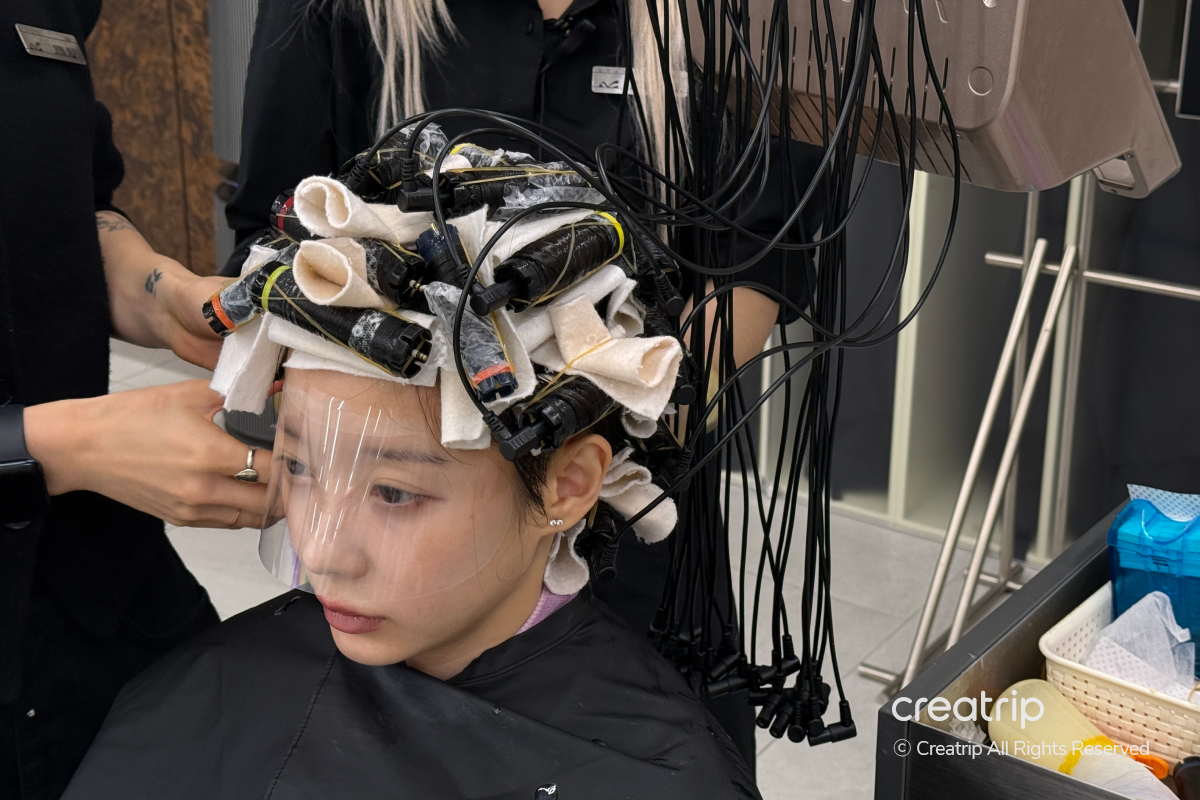
After connecting the heat perm machine, they formed the curls using heat.
First, heat was applied for about 12 minutes so curls could form in the hair, then heat was applied once more for about 5 minutes.
Finally, after removing the machine, we let the curls rest naturally for about 5 minutes to help them settle securely.
[image slider] 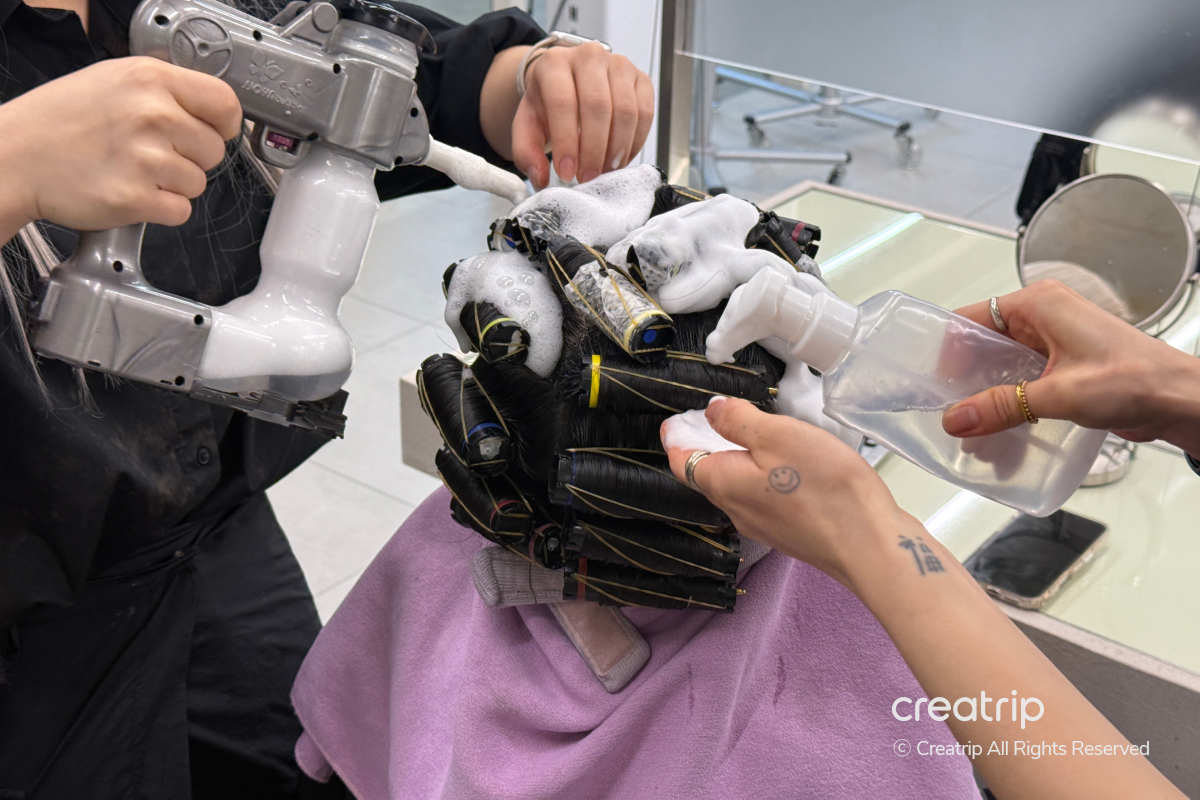
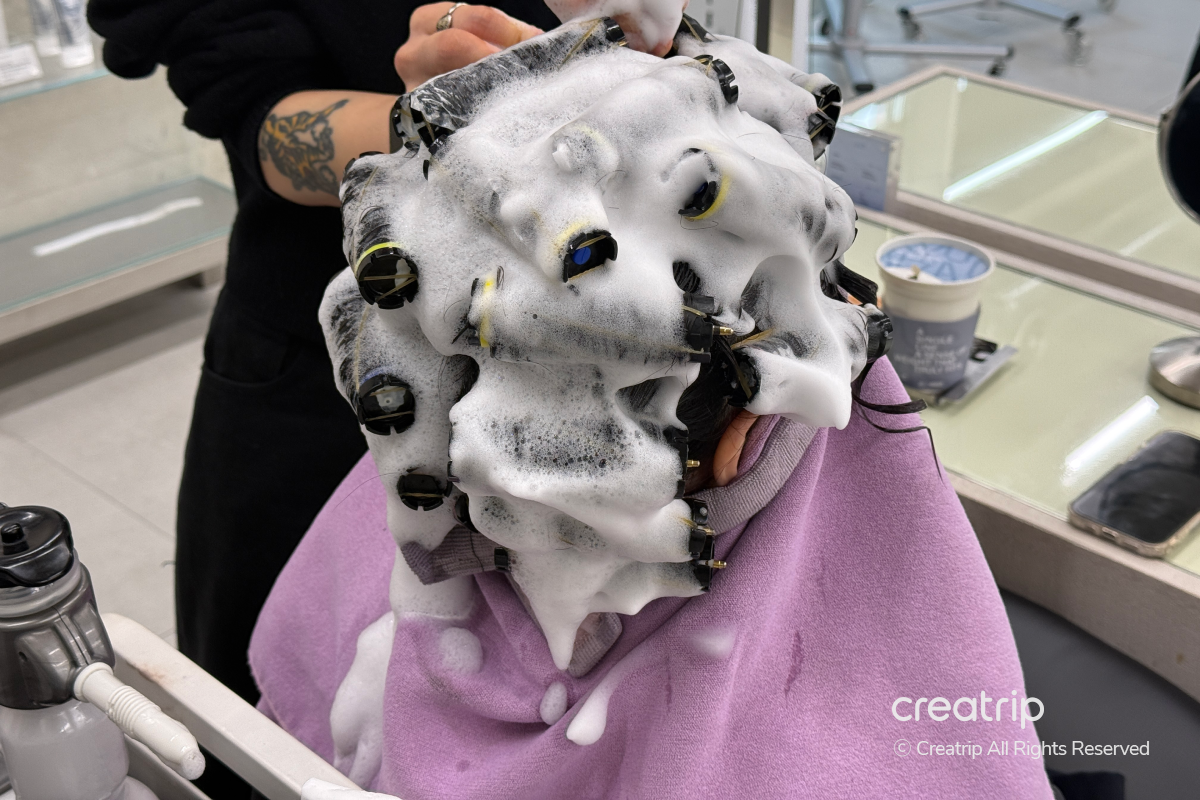
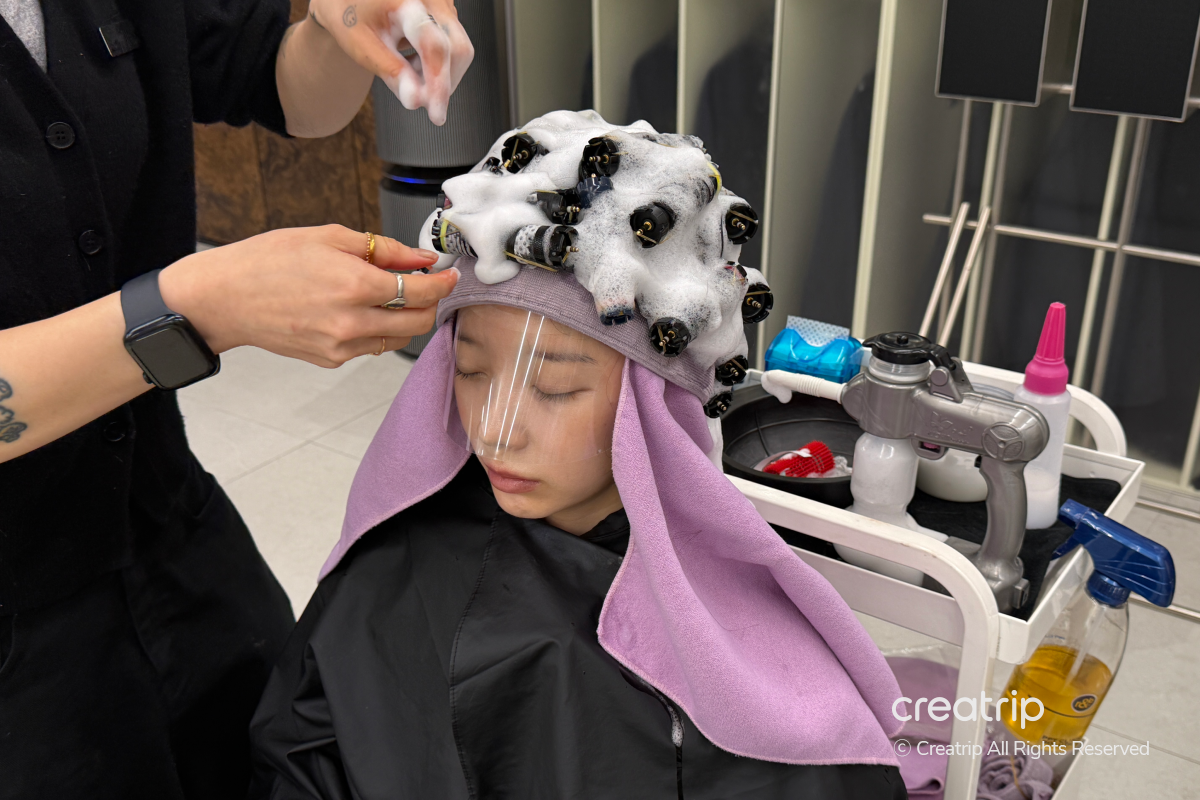
After creating the curls with a heat perm, a neutralizing process followed to set the curls.
They reinforced the gown and towels once more because the solution could drip, and they told me to let them know right away if I felt any dripping toward my face or neck.
After that, we applied a neutralizer thoroughly while the rods were still wrapped, so the curls could set securely.
This step is important for maintaining the perm’s shape, so they carefully applied the solution little by little as they went along.
[image slider] 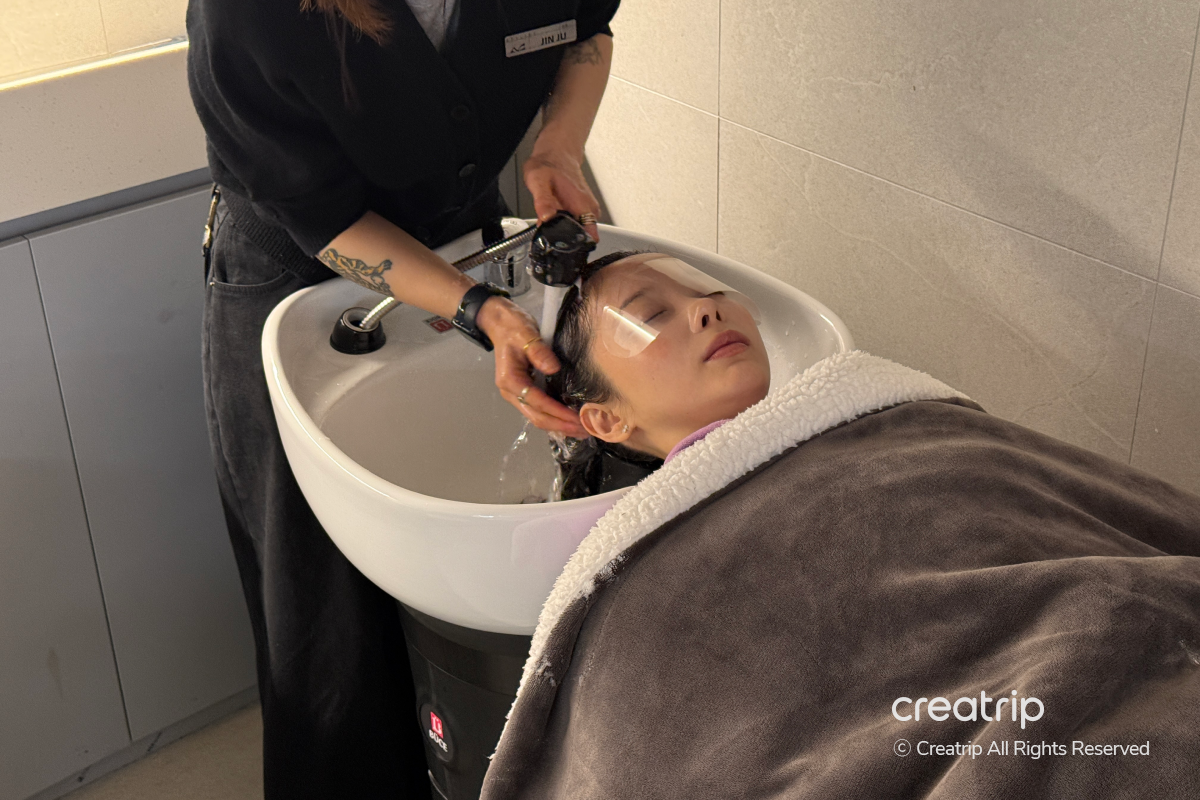
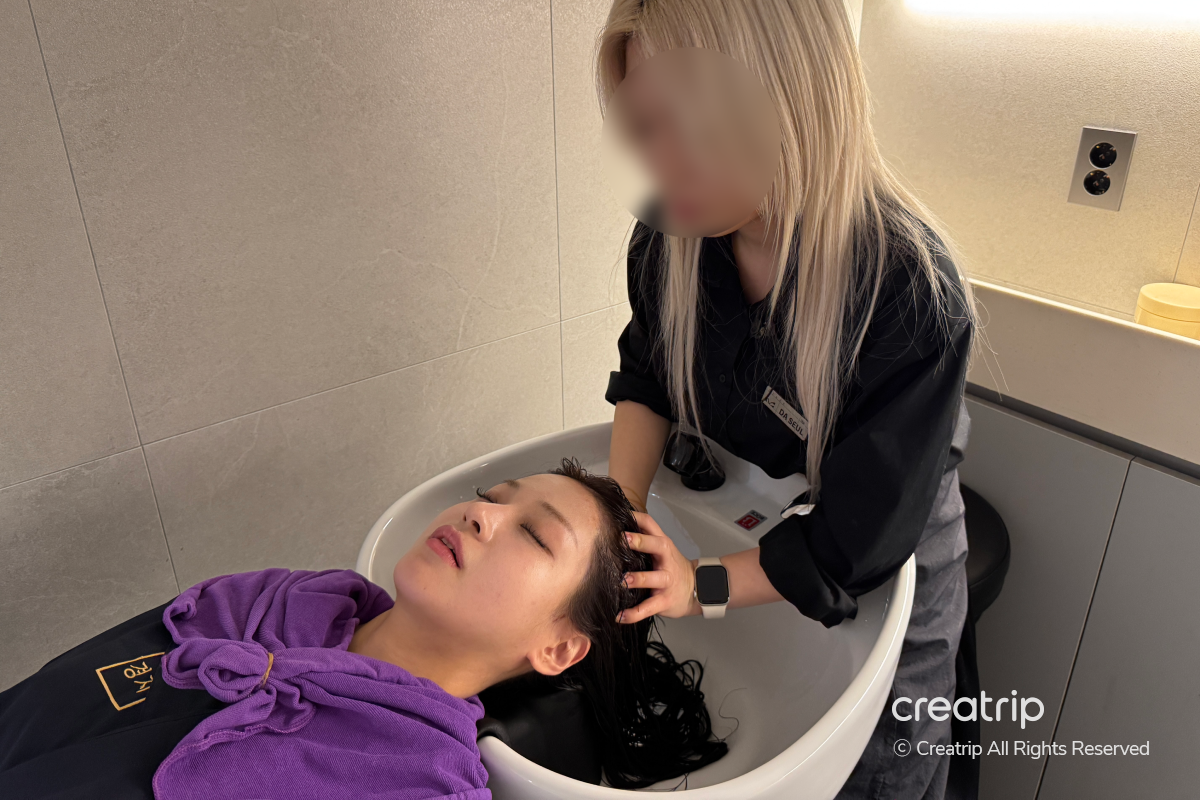
After the neutralizing process was finished, they removed all the rods and moved me to the shampoo area to thoroughly rinse any remaining solution from my hair.
Then they applied a protein treatment to nourish the hair stressed from the perm, and also provided scalp-soothing care.
For the finish, they gave a light scalp massage and acupressure, then used a mist steam treatment so the nutrients could be fully absorbed.
[image slider] 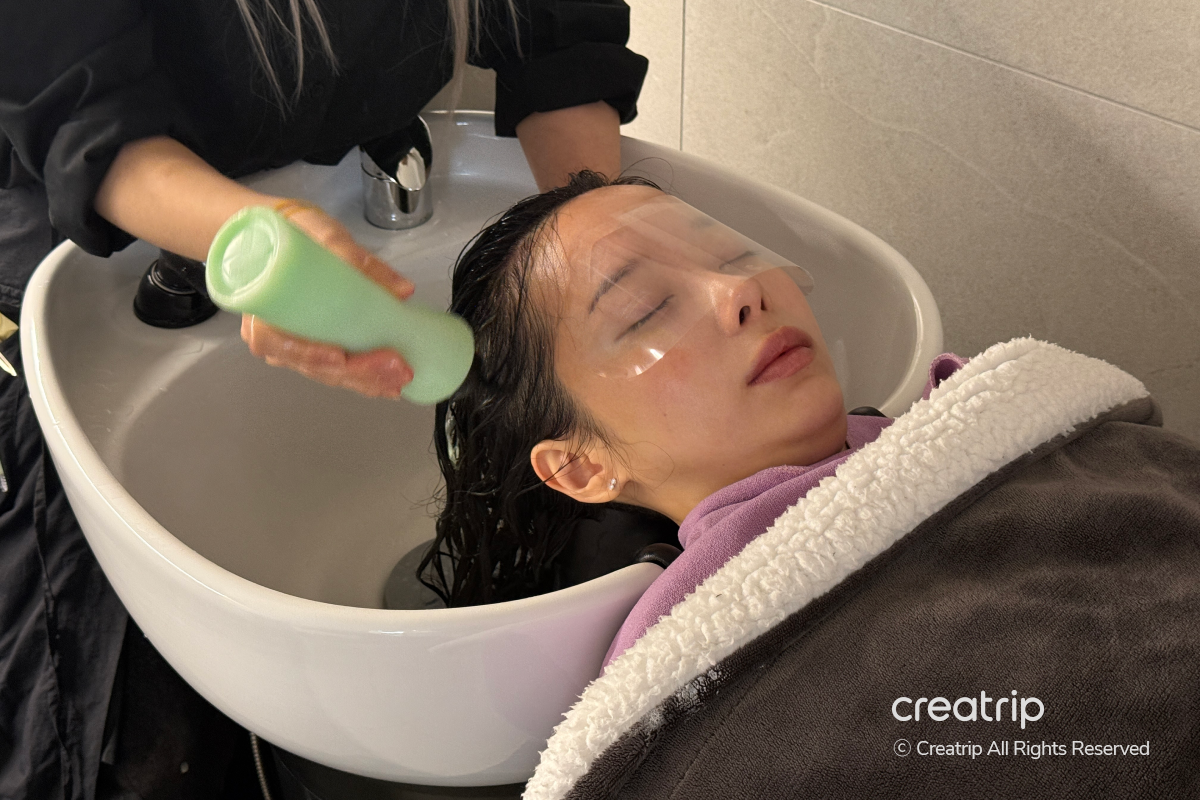
After that, they also performed a scalp treatment.
They applied a scalp pack with herbal ingredients to soothe the scalp, and I felt a cool, refreshing sensation the moment it was applied.
After applying the scalp pack, they gently pressed and loosened the scalp with light acupressure, and they let me know in advance that rinsing might feel cold because of the pack’s ingredients, so I was able to relax during the treatment.
Since this step cares for both the hair and the scalp after the perm, it felt like a comprehensive treatment overall.
[Image slider] 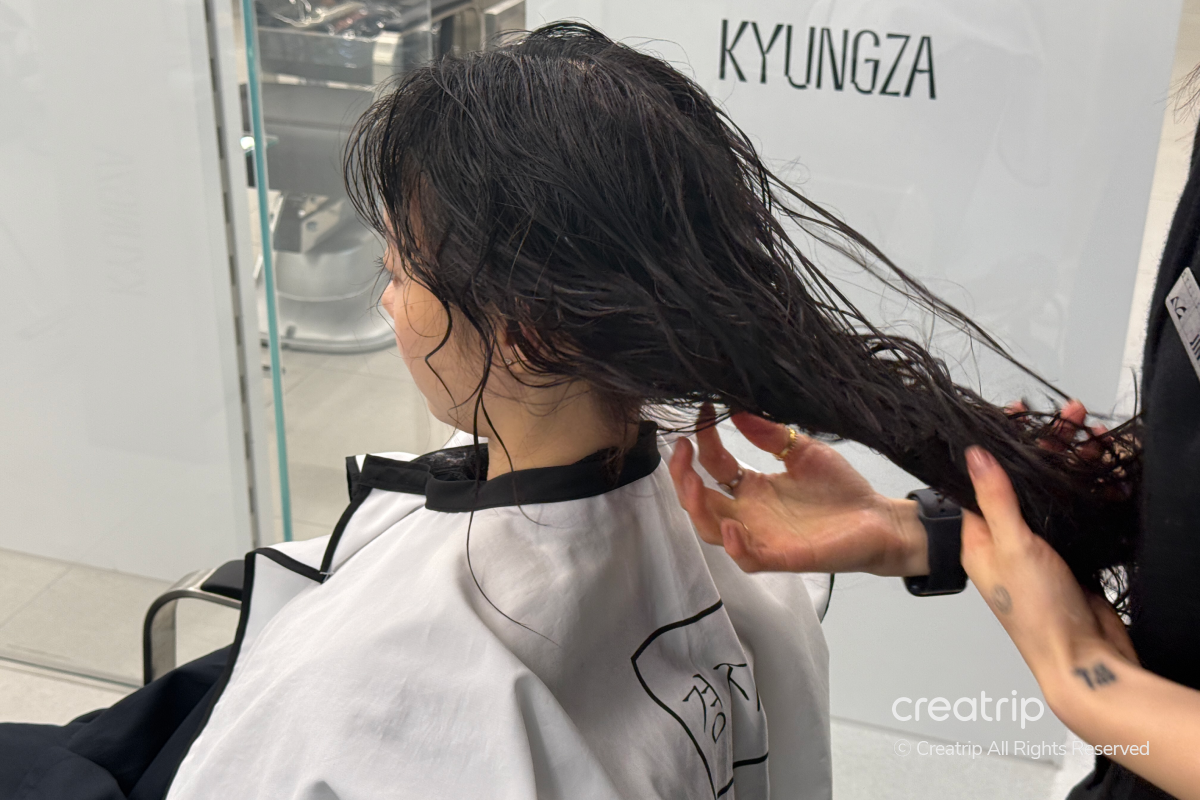
After the scalp care, we moved back to the chair where the initial cut was done to do the styling.
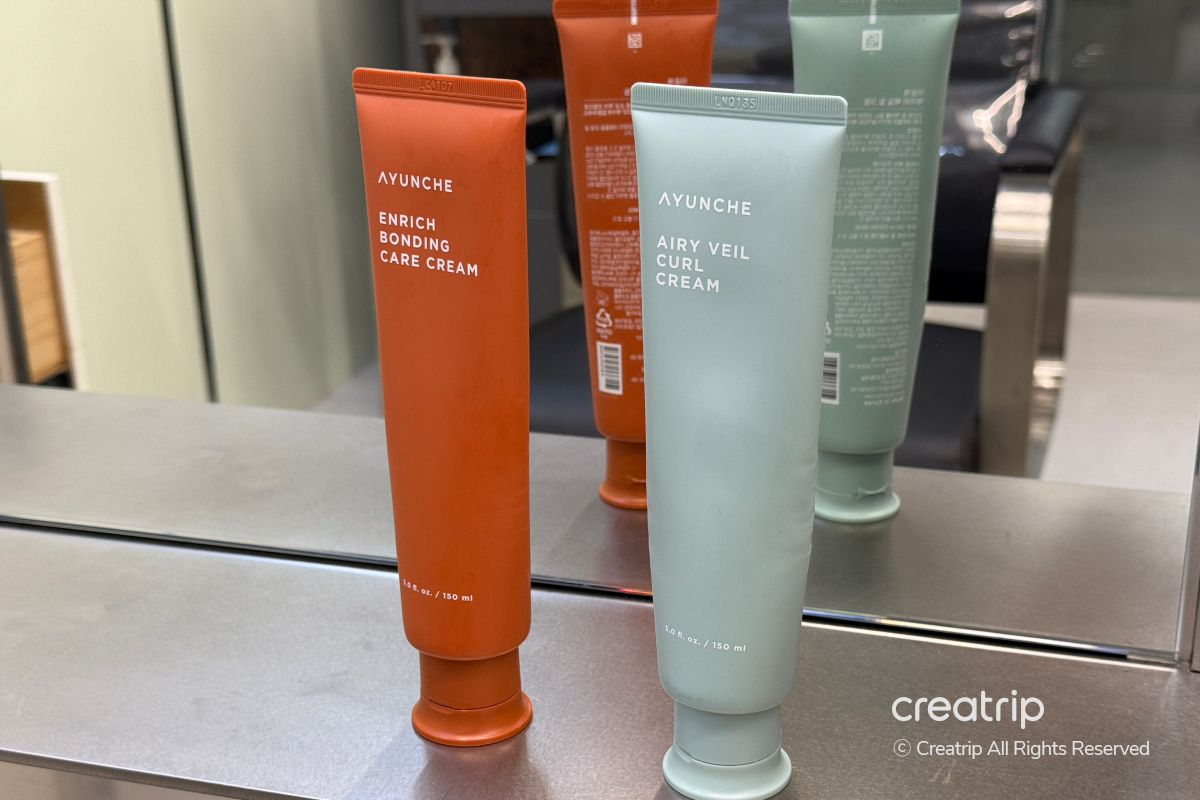
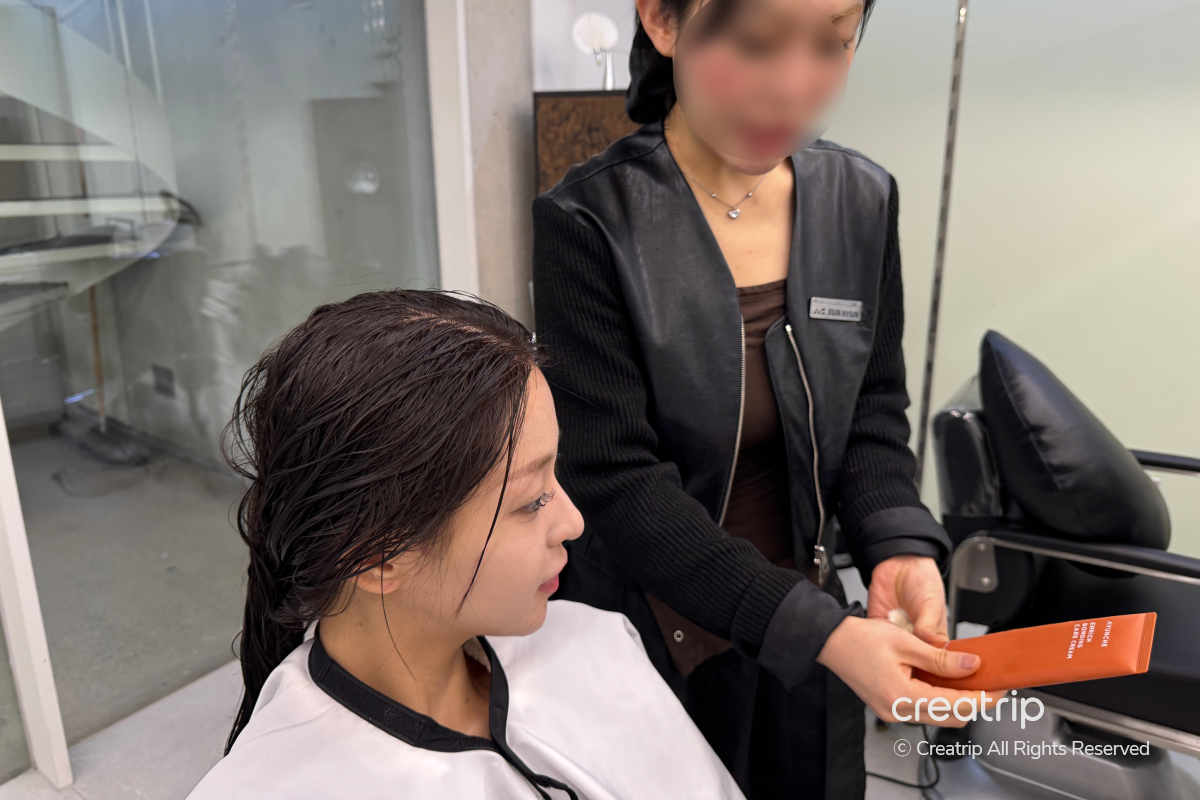
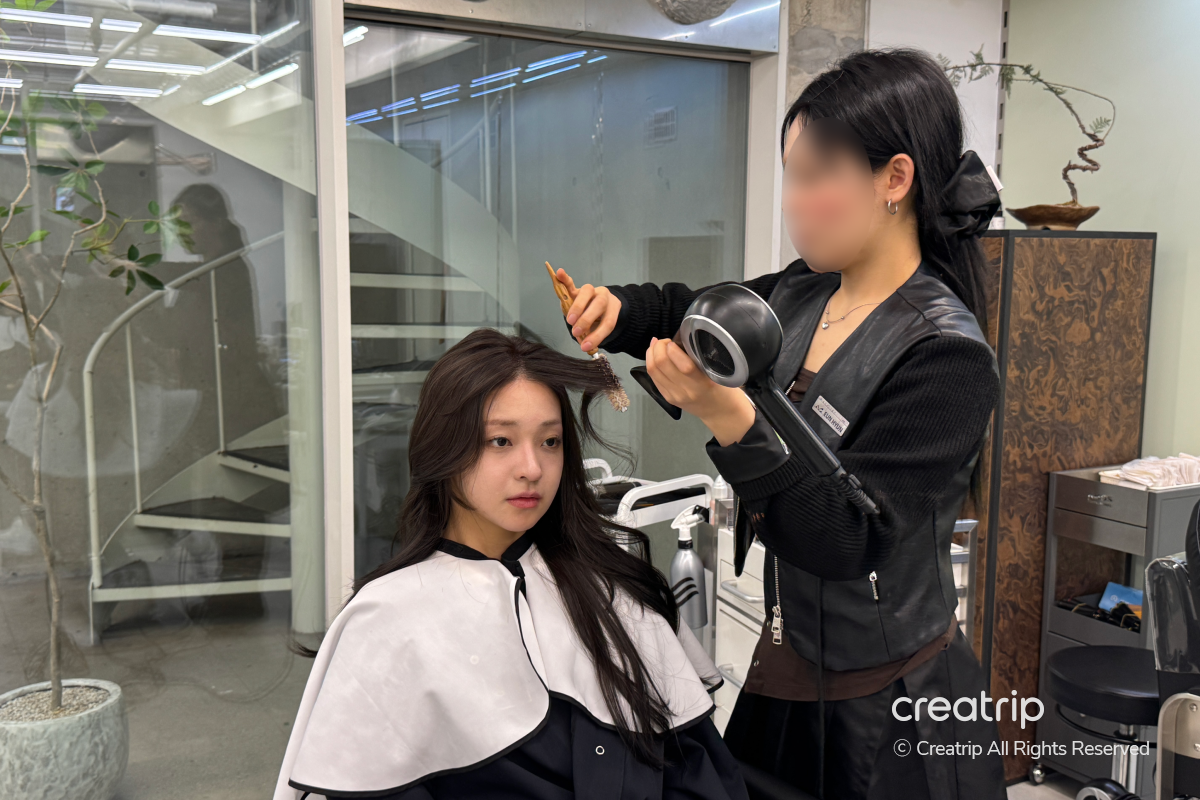
First, they applied a curl cream to enhance the curls, then worked the product through the hair so it looked natural.
They explained that the orange product was a hair nutrition treatment, and the mint product was a curl-defining cream, and they used the mint curl cream on the model's hair to shape the curls.
[Image slider] 
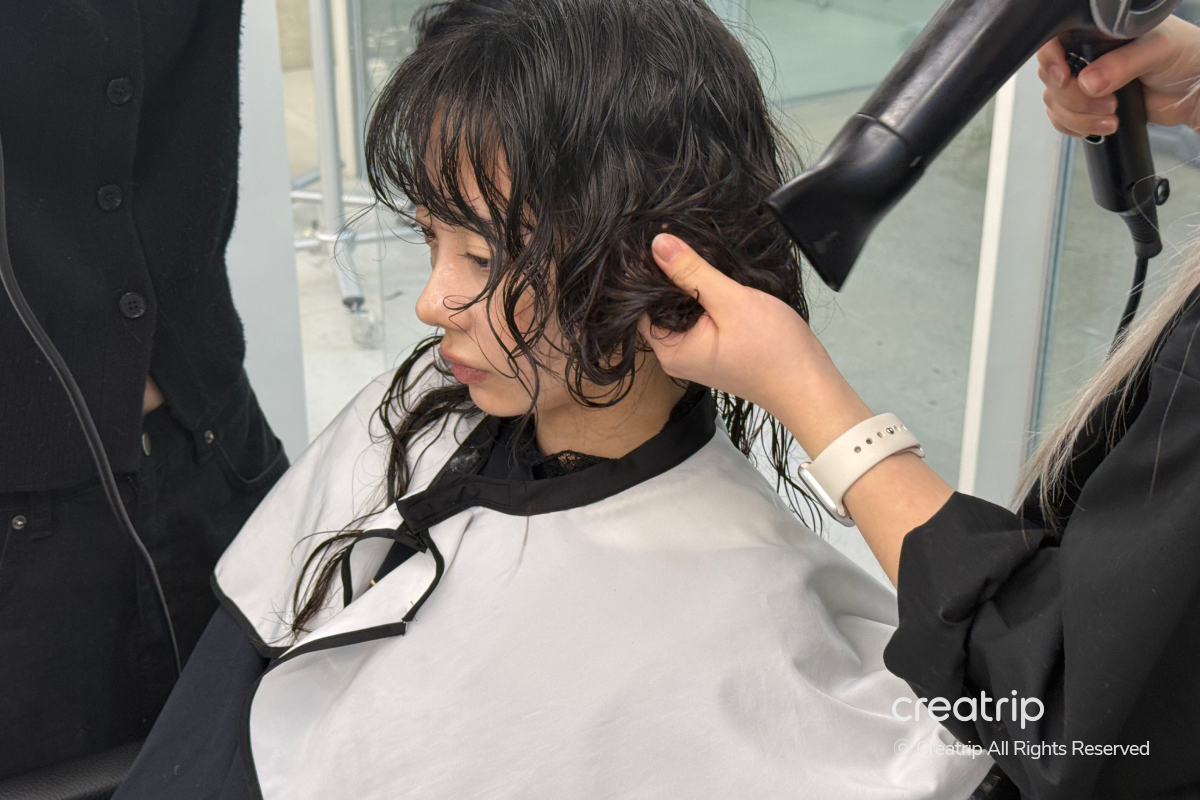
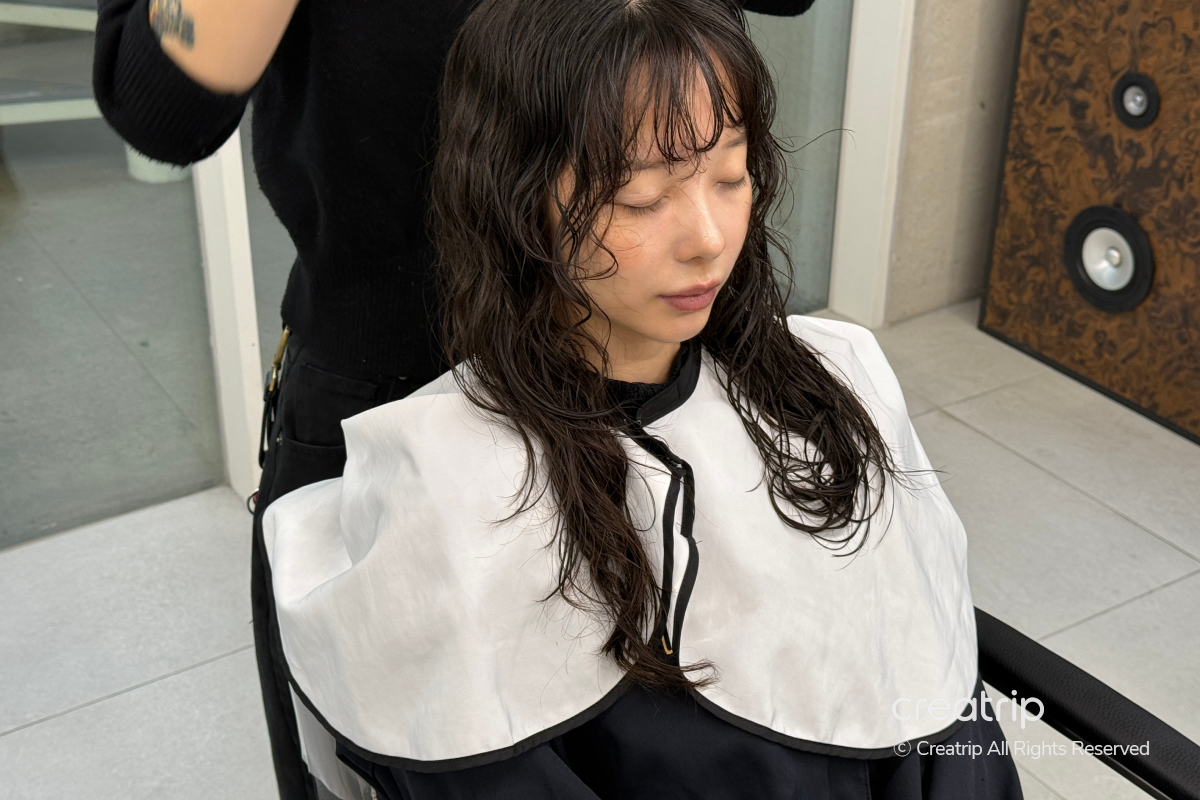
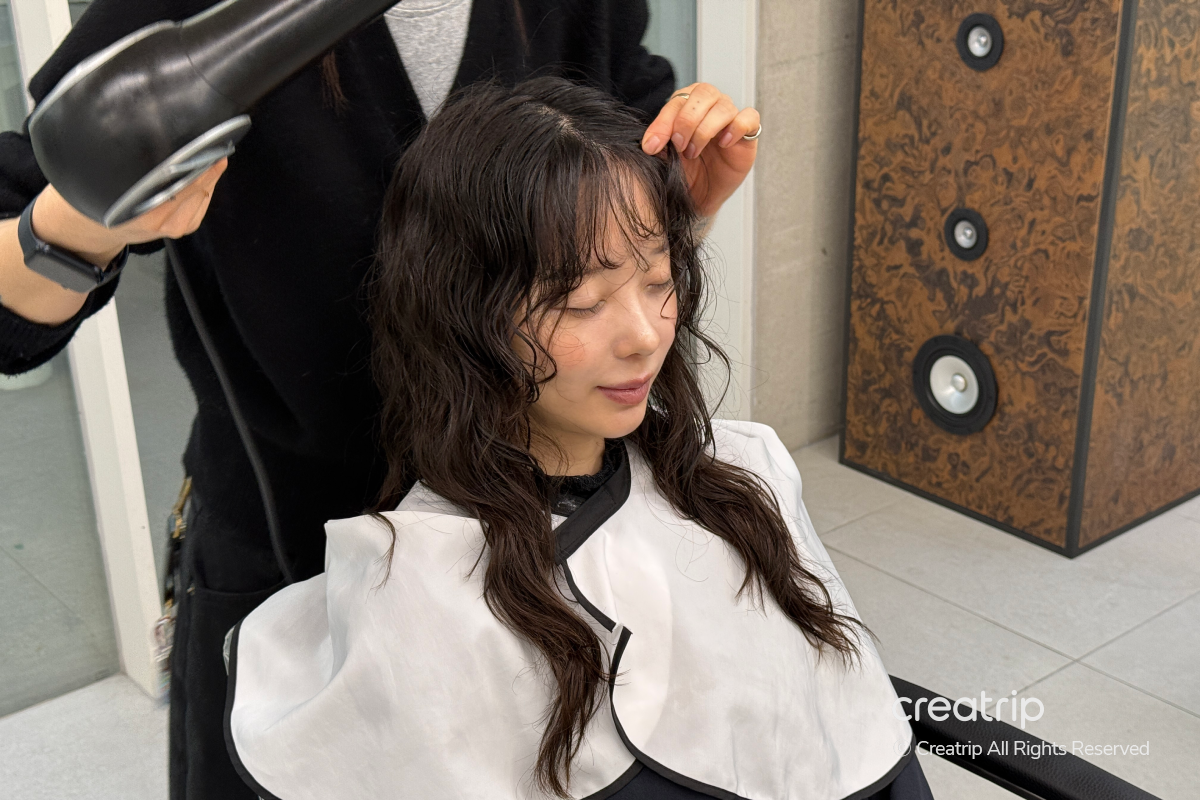
They dried the hair while setting the curl direction, finishing the perm style so it looked natural.
They explained that drying each curl in its intended direction brings out a natural vibe, and they styled carefully while checking the overall balance.
They refined the details through the final steps so the curls settled more naturally, and the style was complete and polished right after the treatment.
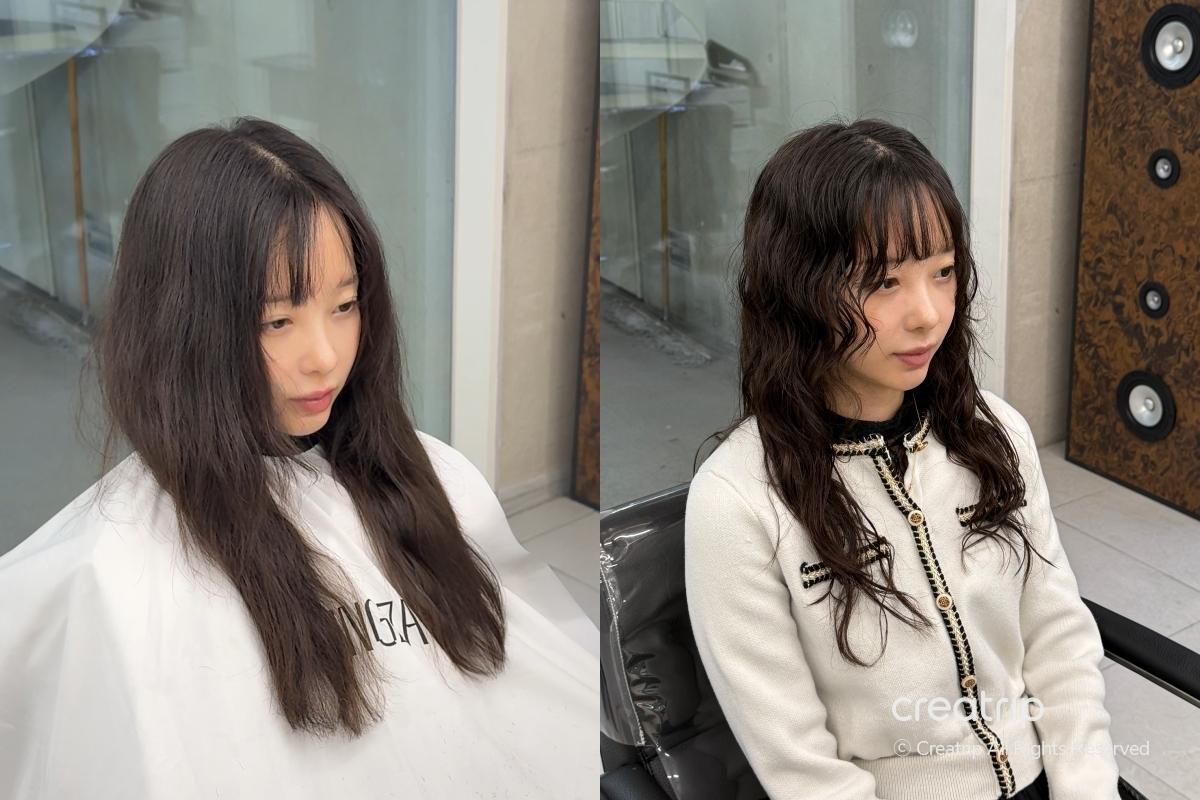
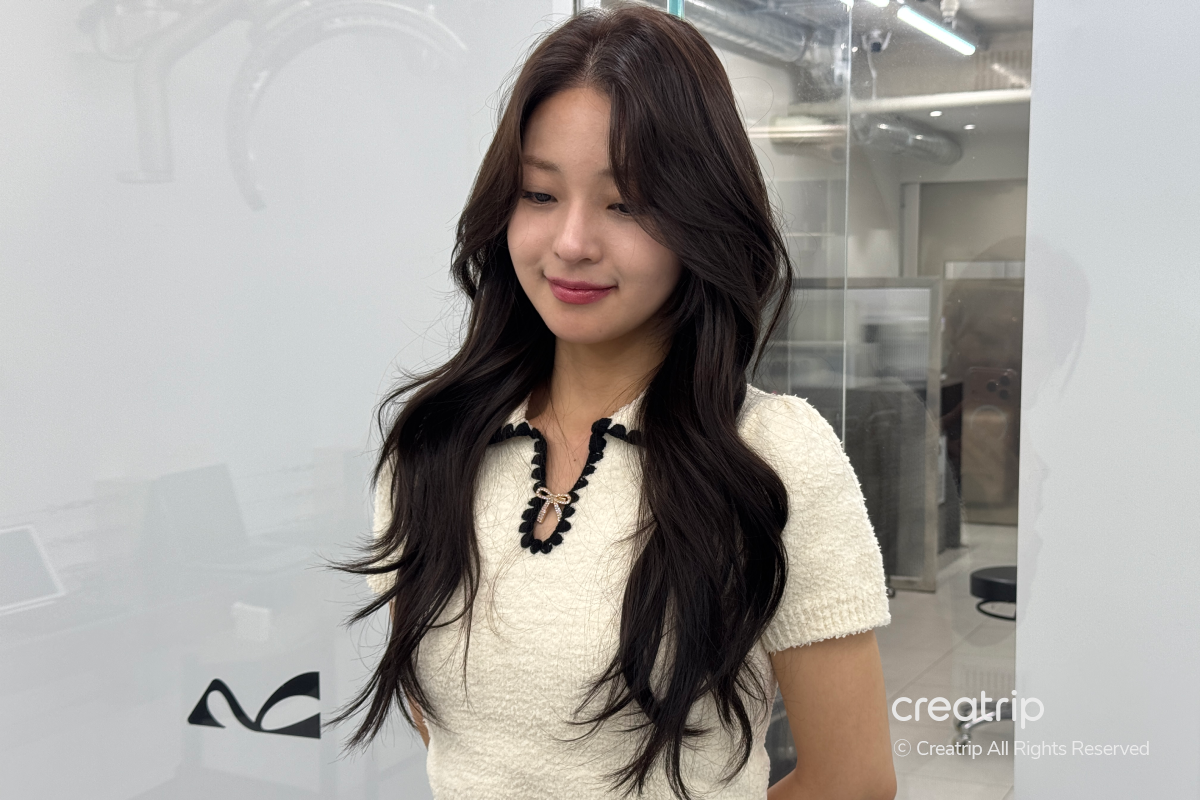
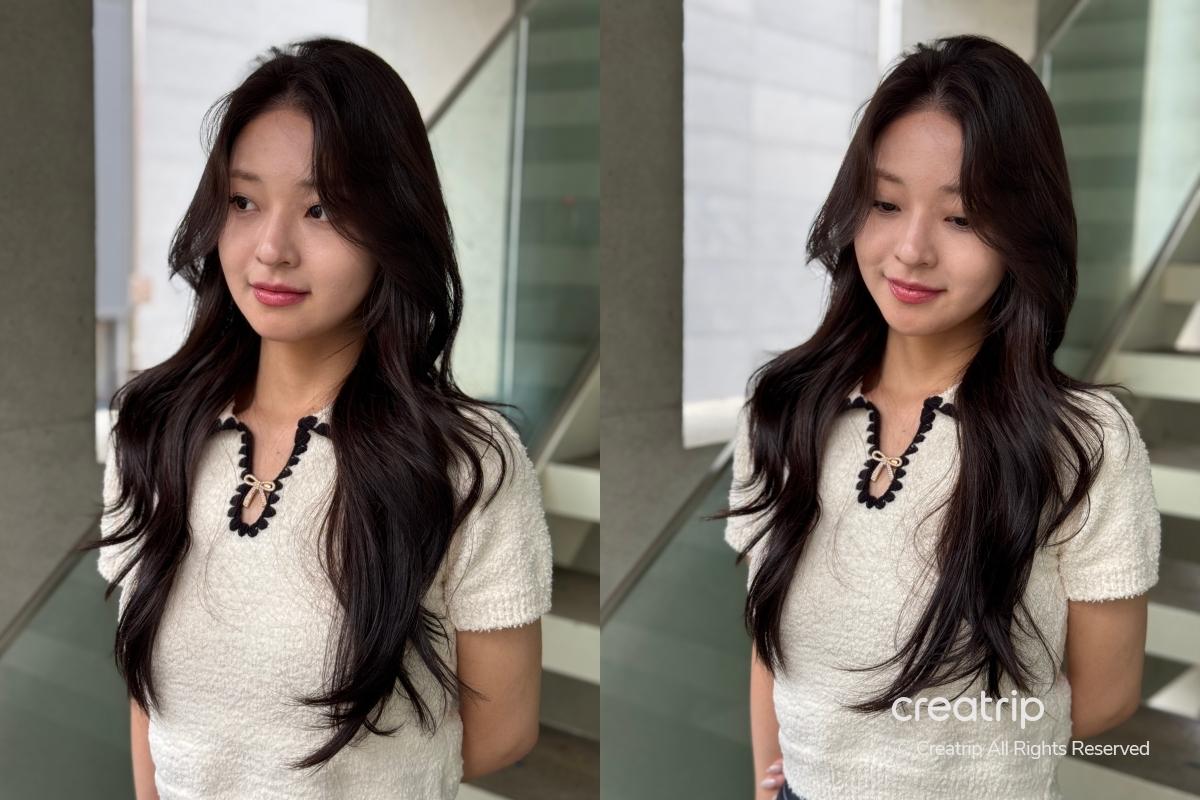
Don’t you think the before-and-after atmosphere of the treatment is clearly different at a glance?
Before the treatment my hair was generally frizzy and had no curls, but after the treatment it gained natural waves and looked much more polished.
The curls added volume and smoothed the hair texture, giving an overall neater, more styled look.
[image slider] 
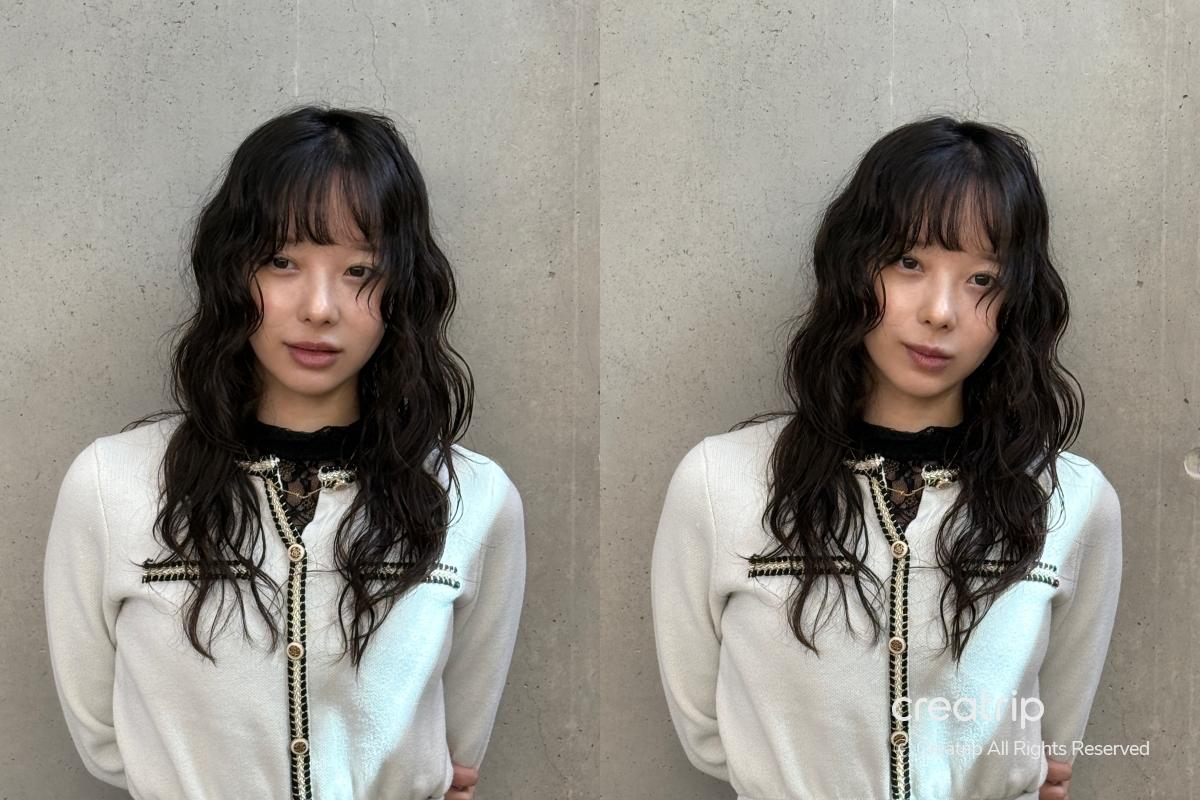
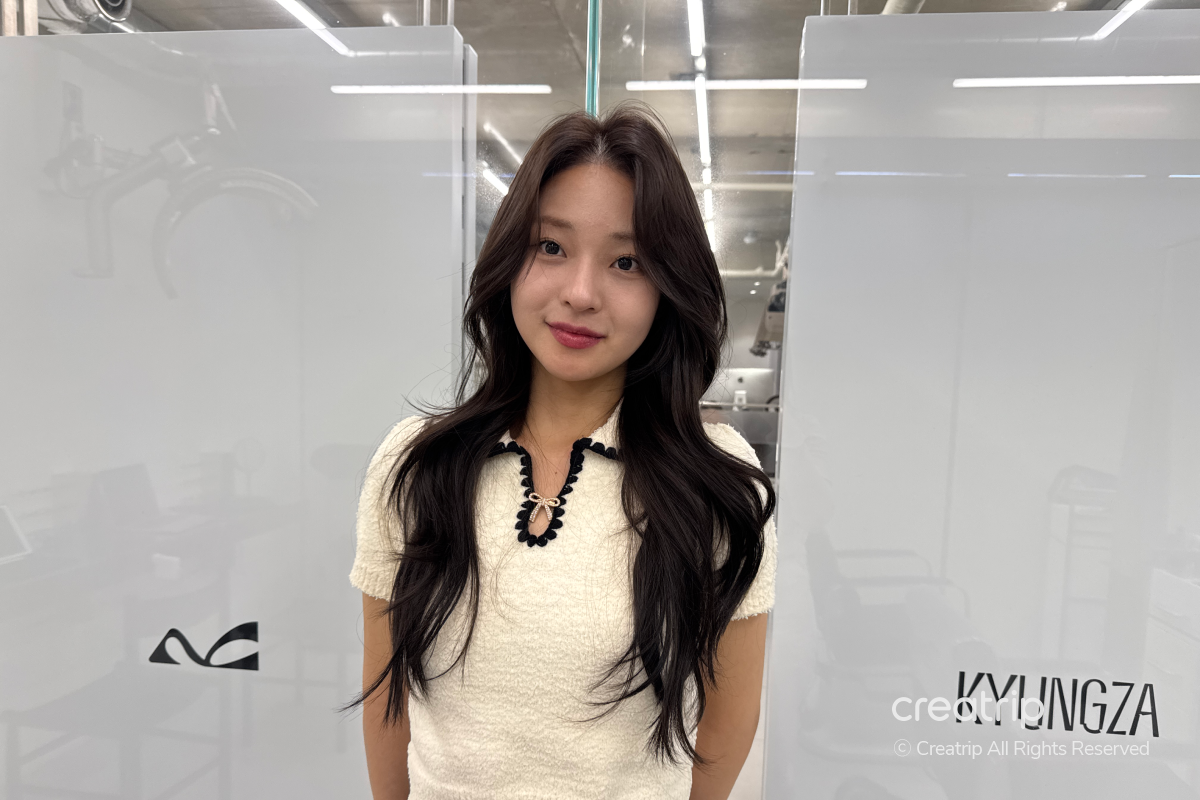
My hair was severely damaged so I was worried a perm wouldn’t turn out well, but in the end the curls looked natural and I’m happy with the result.
The soft, not-overdone waves create an overall gentle vibe, and the style finished in a way that suits the model’s cute image well.
[image slider] 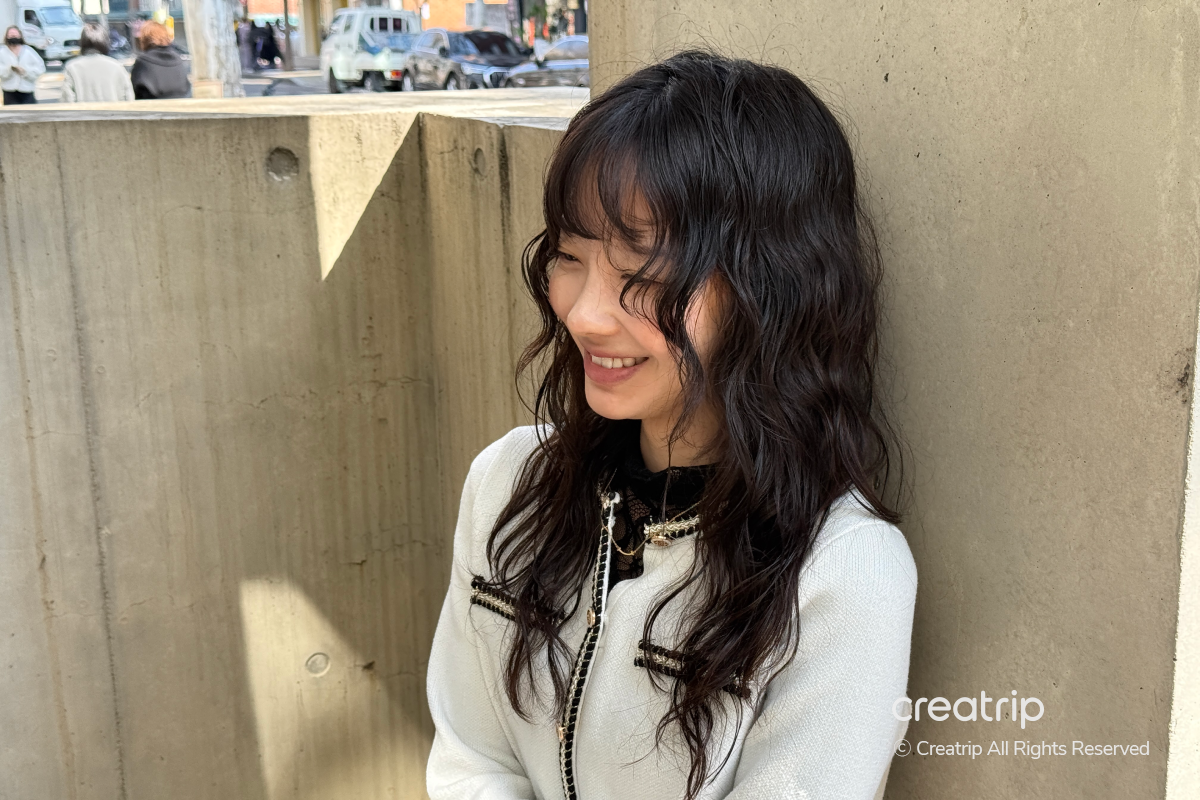

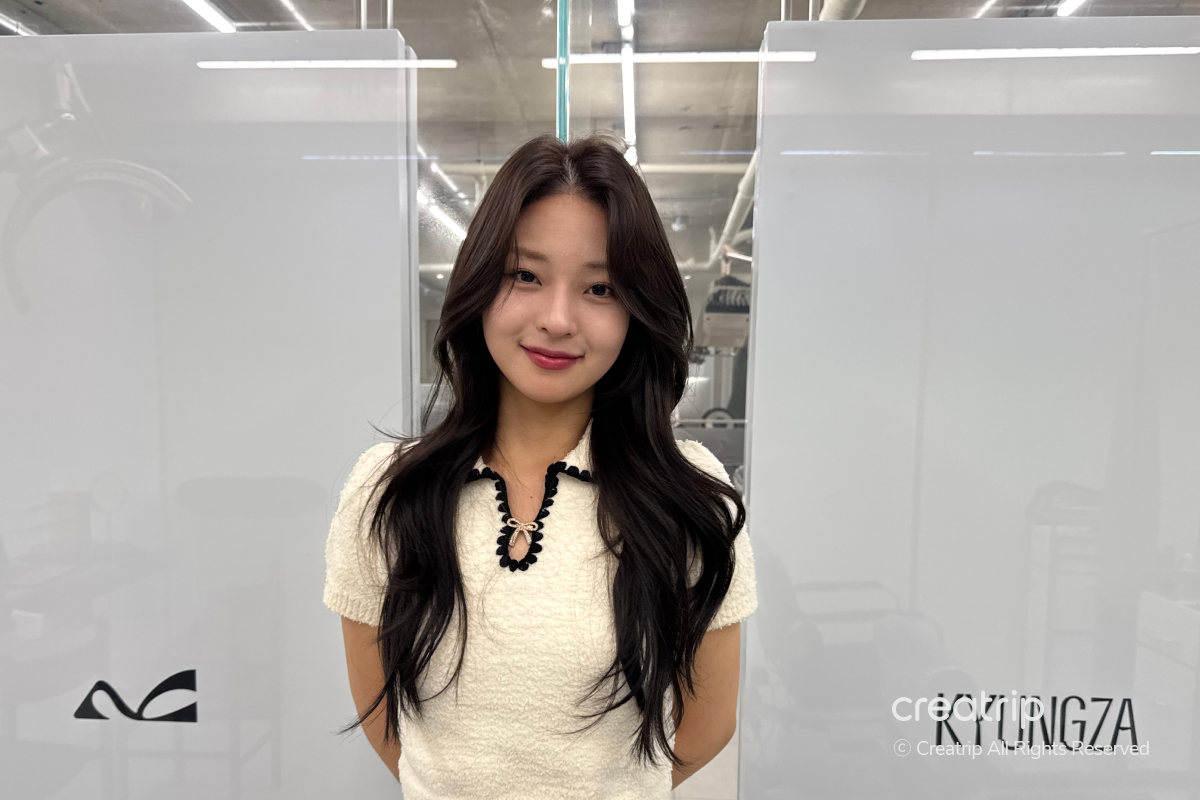
The entire treatment process was thorough, but I was even more satisfied because the results exceeded my expectations.
The curl shape and overall vibe came out naturally, making the style feel very polished, and I liked the result right after the treatment.
I was satisfied with the treatment because I could achieve the desired wavy look even with damaged hair.
This was our Creatrip package review of the KYUNGZA Hongdae Main Branch “cold perm package” treatment!
KYUNGZA | Color Visit Review
Next, I'll share my review of the color care package (color + 2-step clinic (hair treatment) + blow dry) treatment.
A designer (stylist) who specializes in color handles your service, so they can create vivid color designs without bleaching, and they can achieve the color you want while minimizing hair damage.
Before starting the actual coloring treatment, they carefully checked the current condition of my hair.
They reviewed my previous treatments, hair damage level, and current color, then consulted with me about which colors would show up best, and planned the procedure based on my desired shade and hair condition.
[image slider] 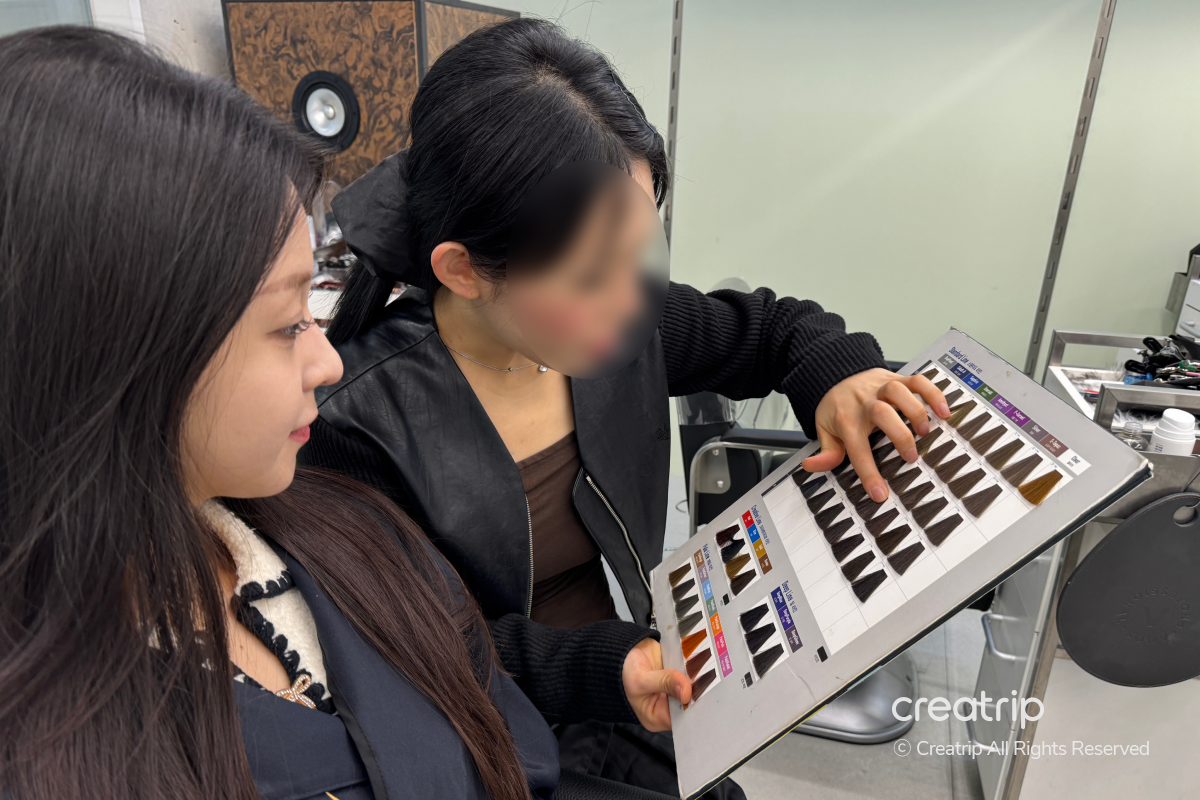
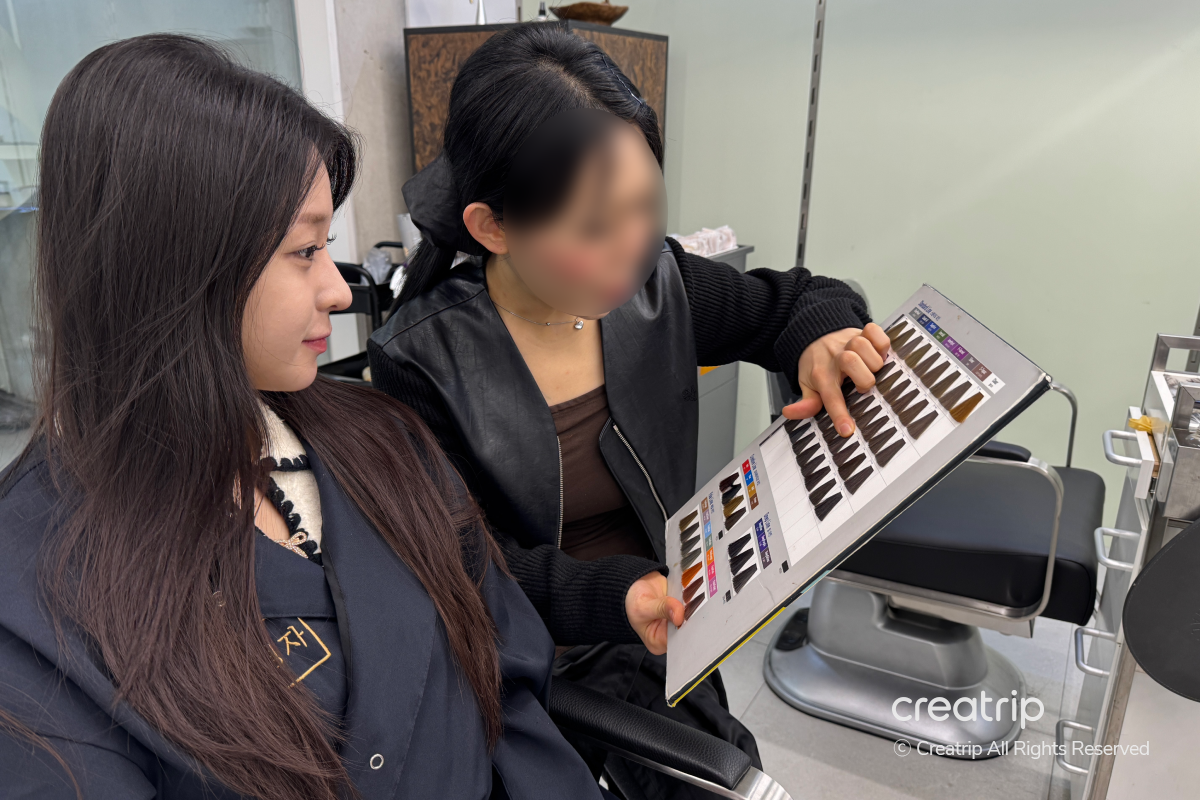
After checking the condition of my hair, we spent some time consulting over a color chart to choose the shade I wanted.
She compared each color chart one by one and explained which shade would look most natural on my current hair base, and together we chose a color that would show well without being too over the top.
[Image slider] 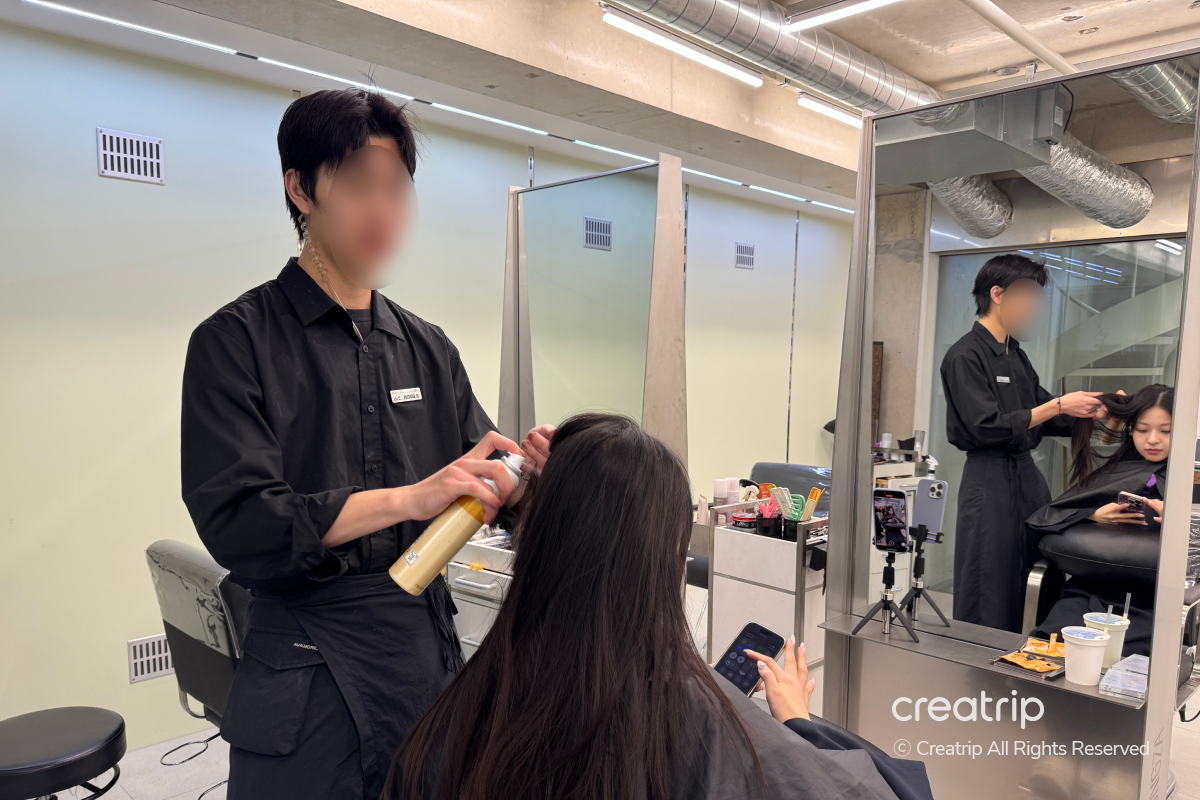
Before starting the coloring treatment, they first sprayed a scalp protector to safeguard the scalp.
We used a step that reduces irritation from dye touching the scalp directly, applying a protective agent before the treatment to minimize scalp strain, then proceeded with the full coloring service.
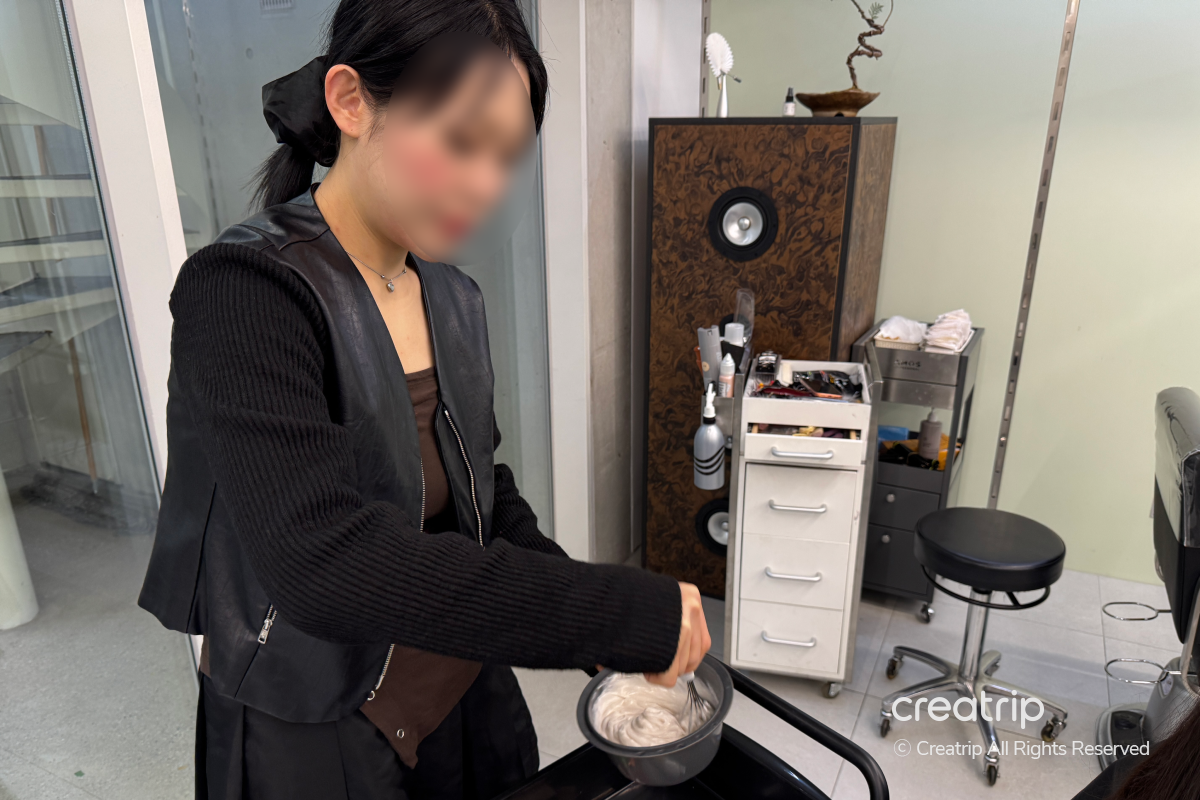
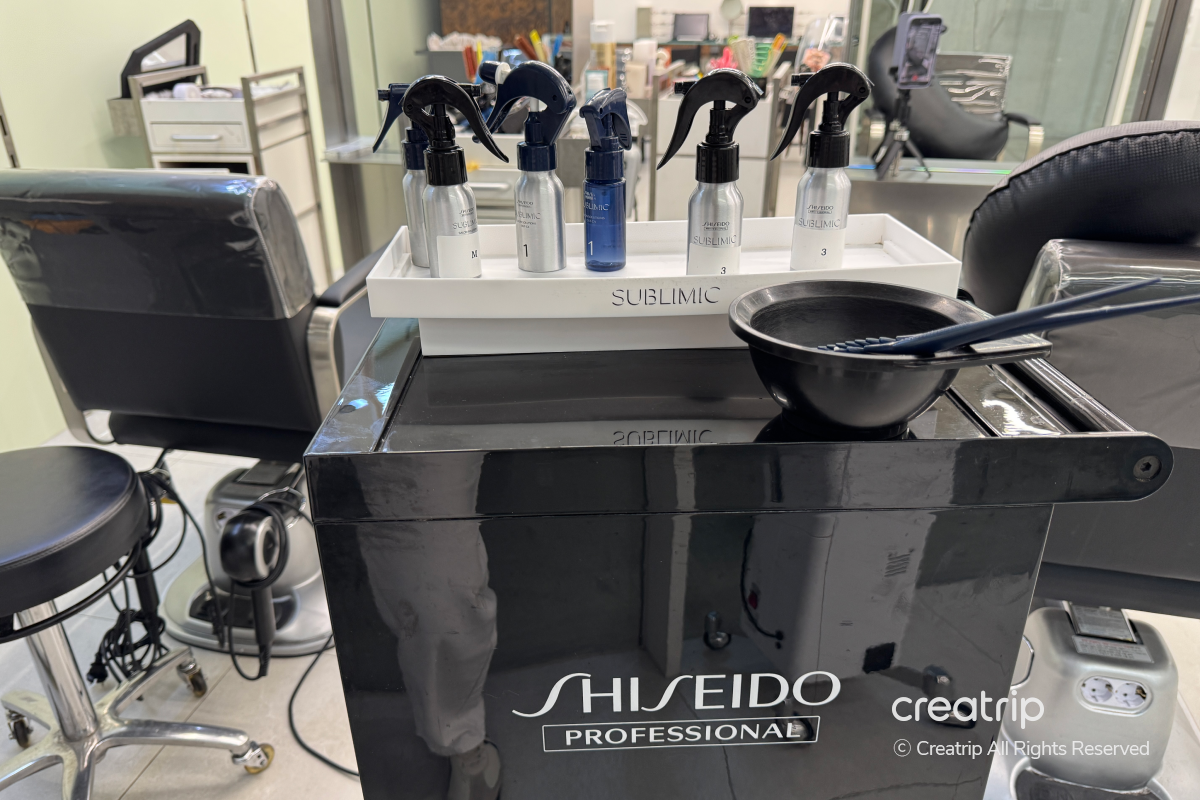
They prepared the dye by custom-mixing the color chosen during the consultation.
After assessing my hair condition and the color I wanted, they adjusted the dye ratios and prepared the color, then began the full coloring treatment.
[image slider] 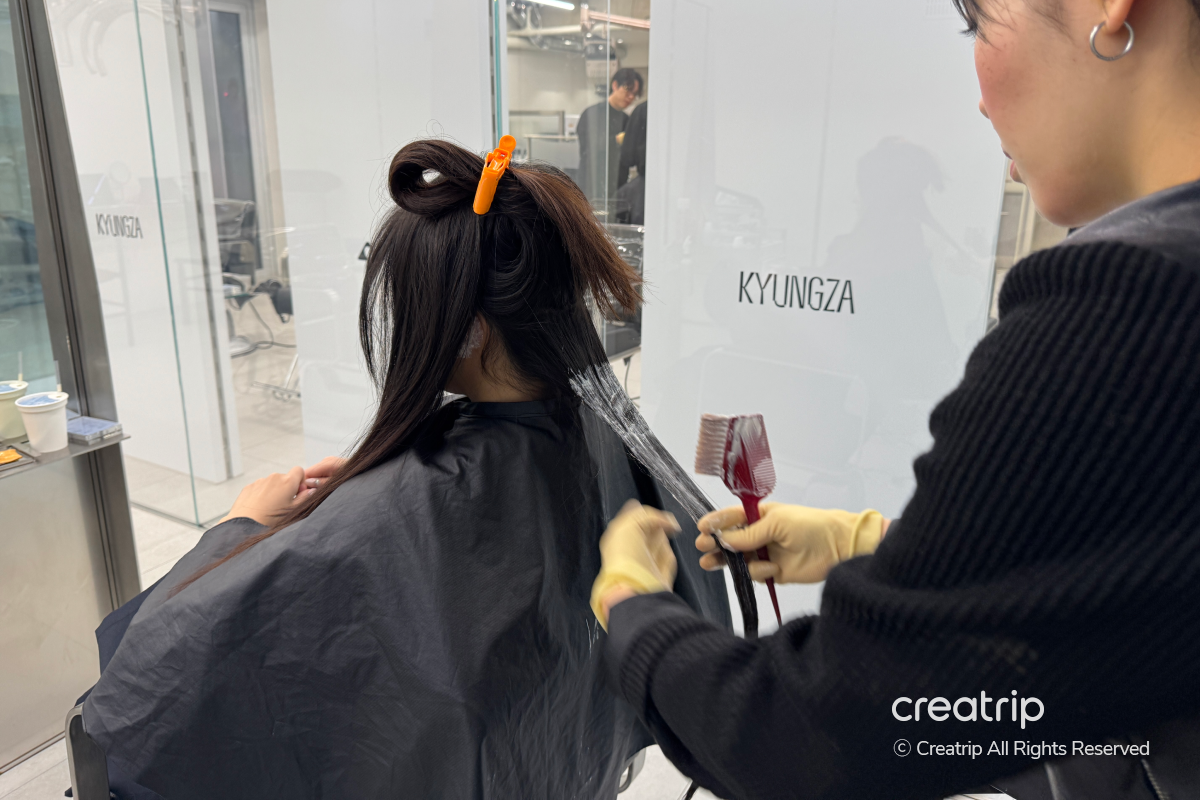

For the color, they started by applying dye to the mid-lengths and ends of my hair first, leaving the areas near the scalp for later.
They explained that the areas close to the scalp heat up from body temperature and the color develops faster there, so they apply dye to the lengths first to ensure an even overall color.
After that, they carefully applied dye to balance the overall color and completed the treatment.
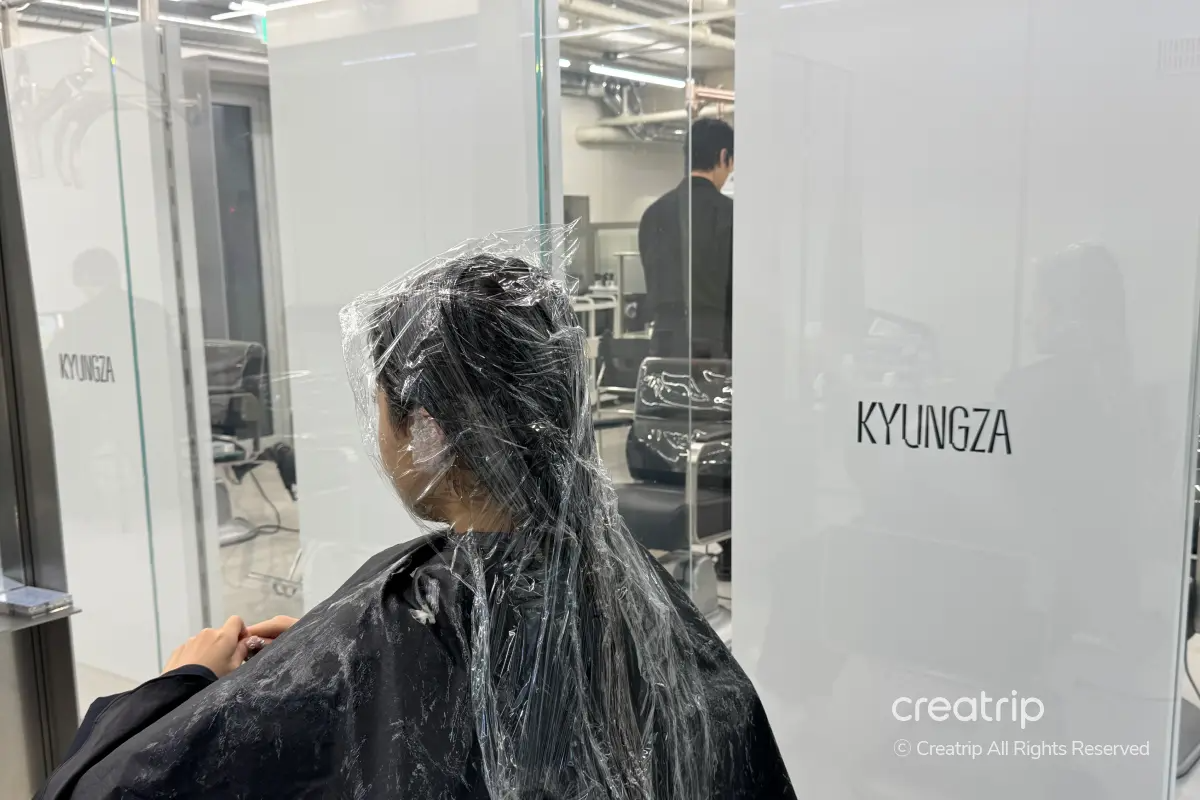
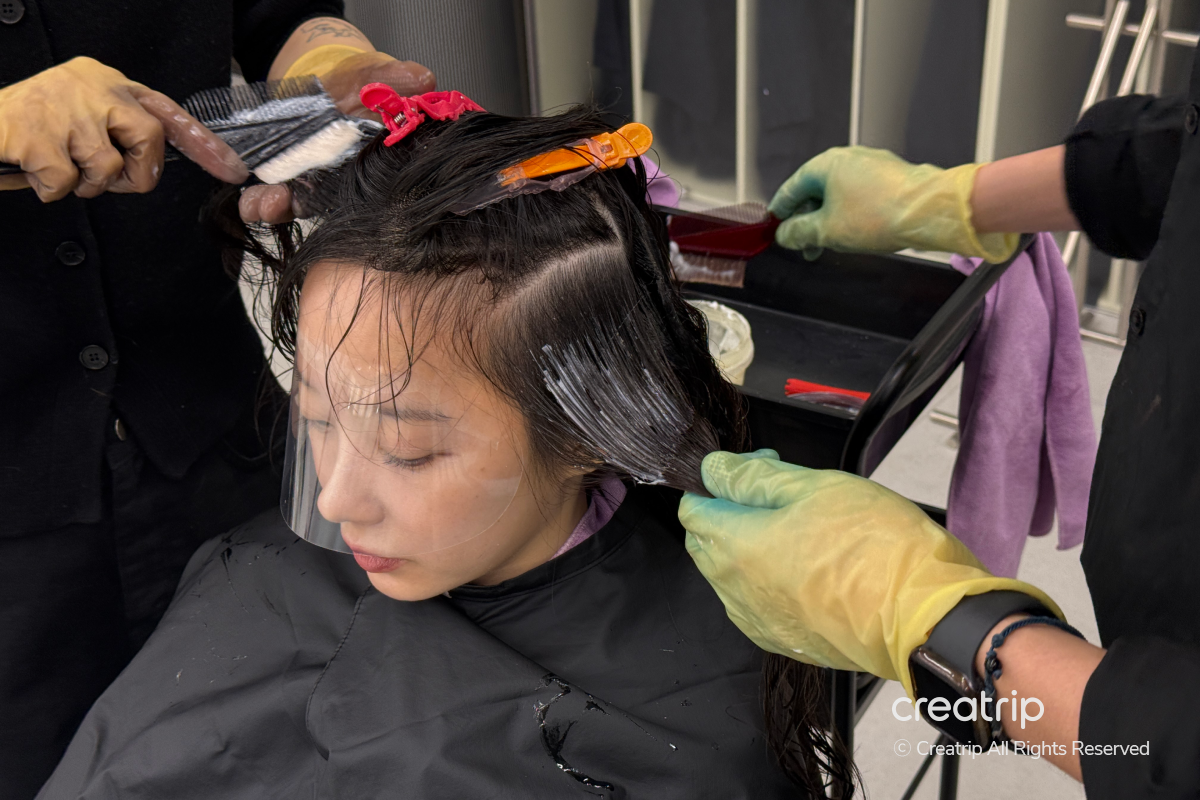
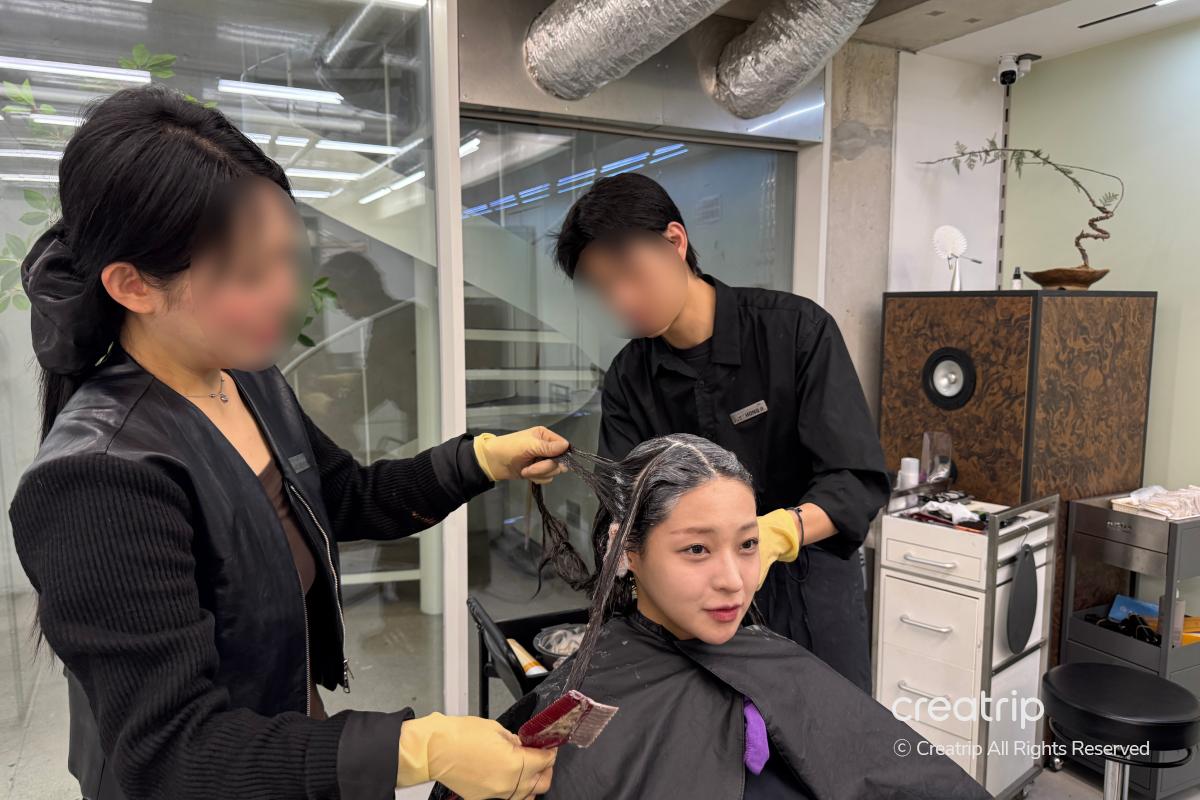
After applying the dye all over, they wrapped my hair in plastic and let it sit for a set time so the color could fully develop.
They explained that it's the process of using a wrap to maintain the hair’s temperature so the dye can work evenly.
We let the color sit for the recommended processing time so it could set into the hair properly!
[Image Slider] 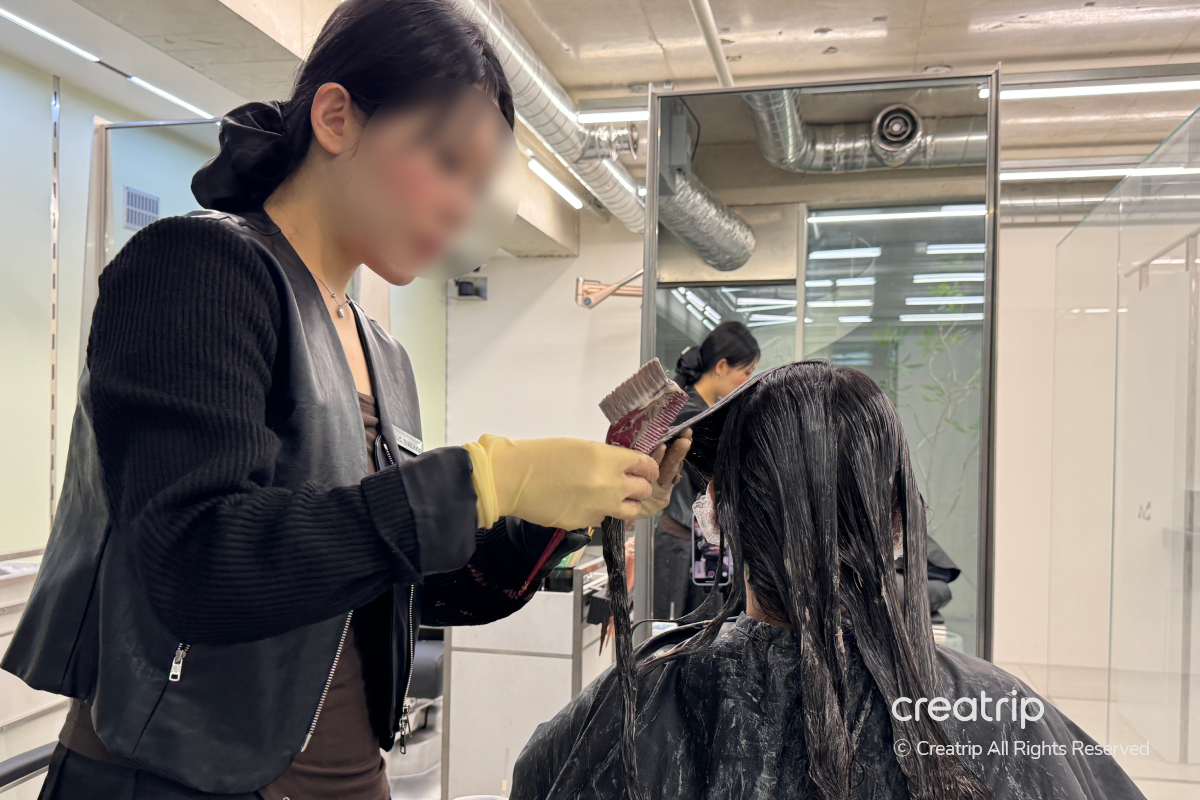
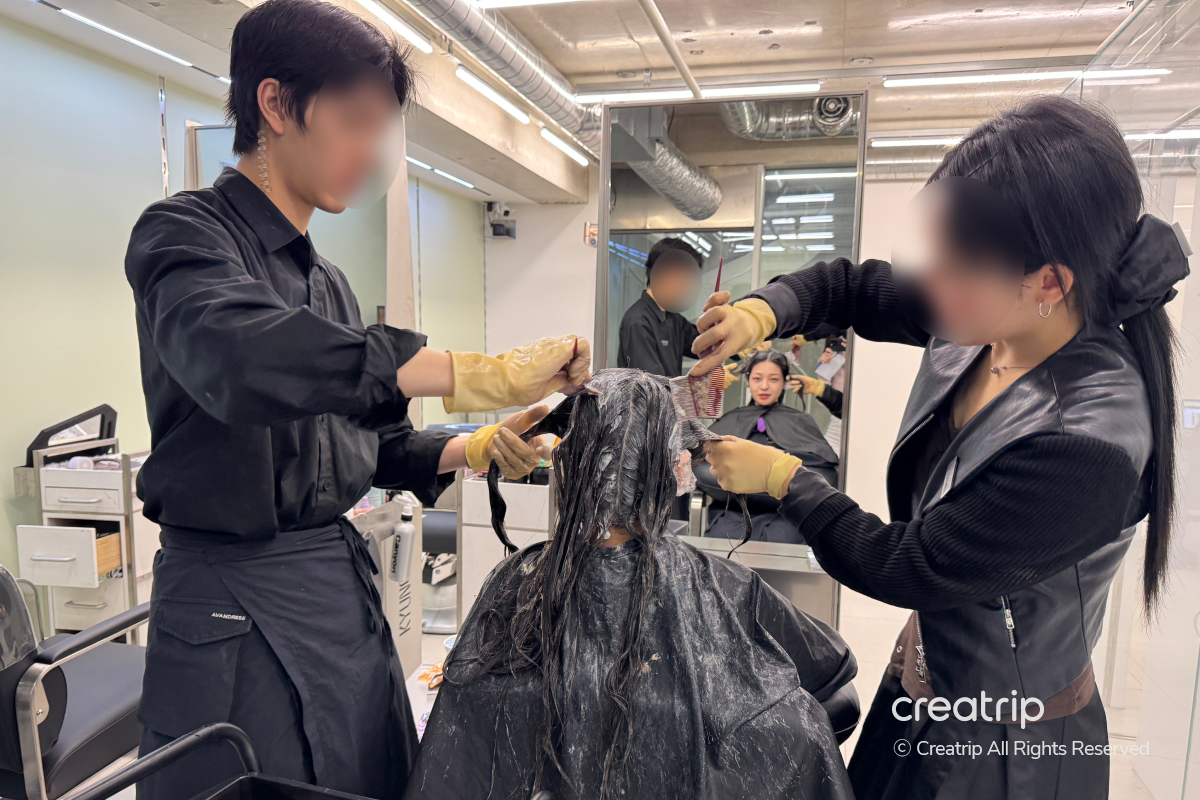
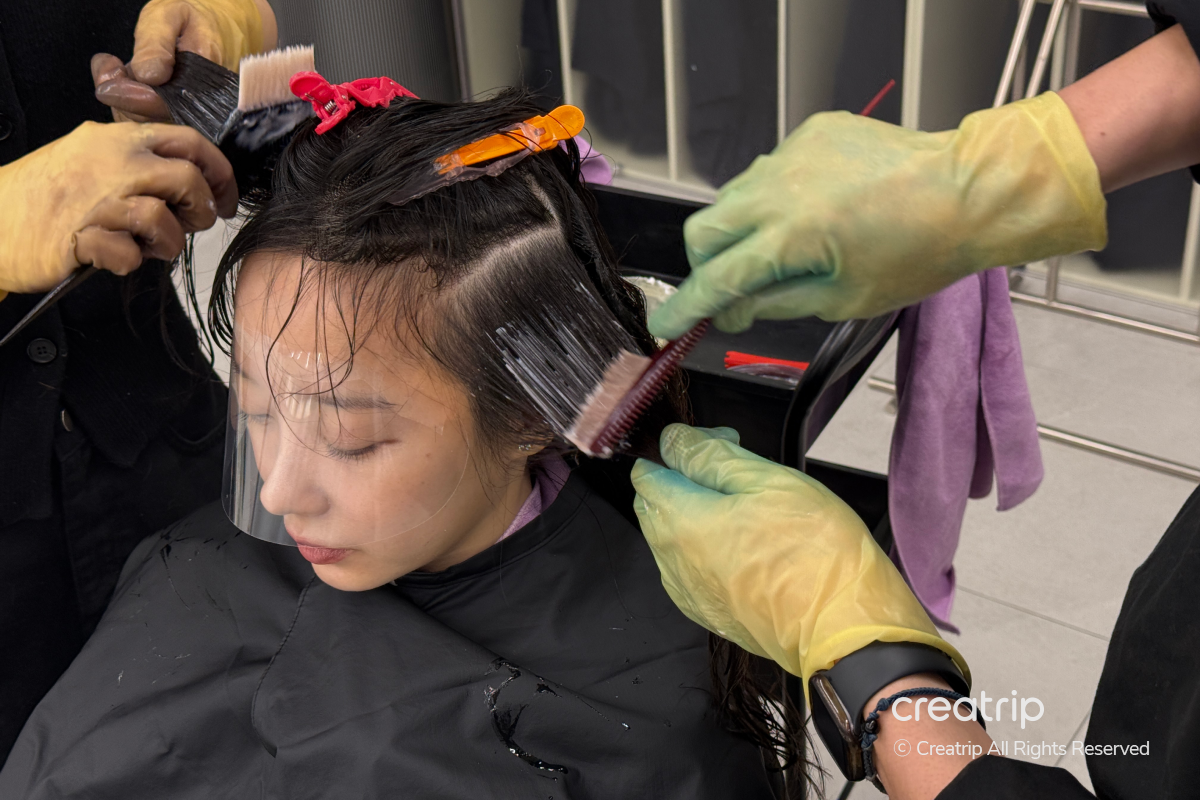
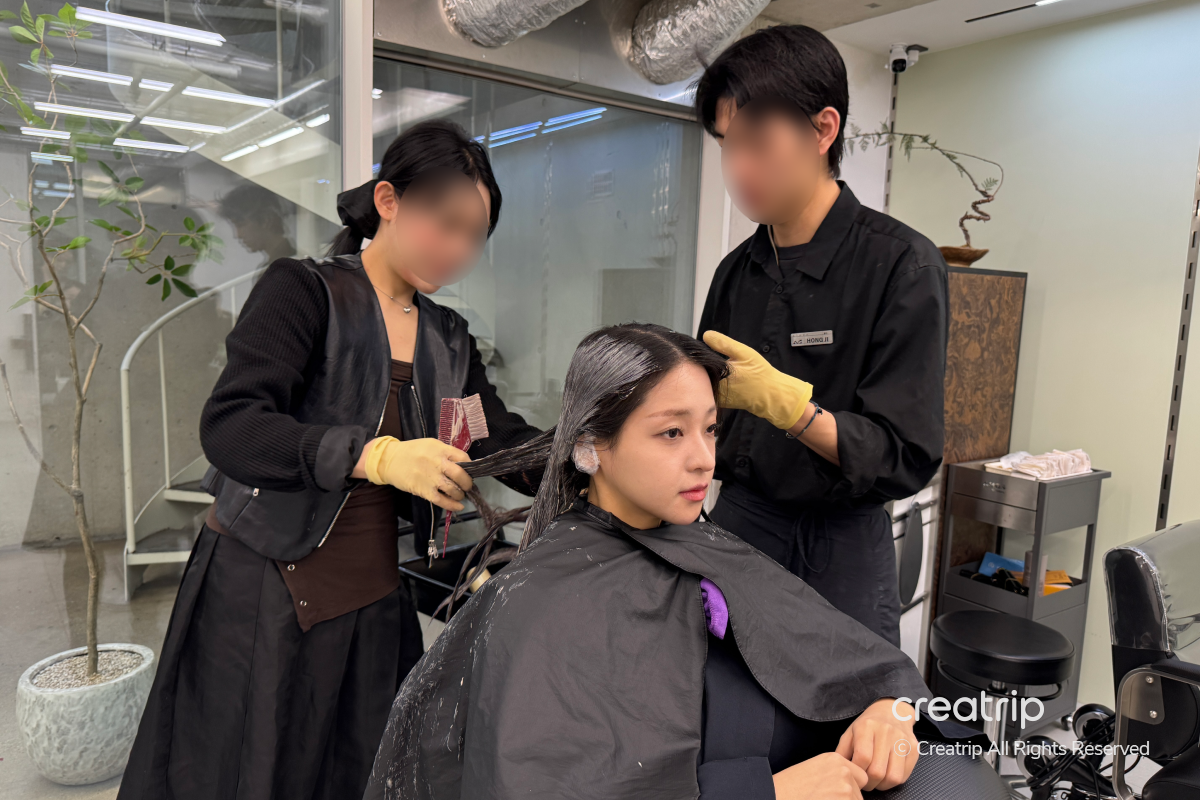
I applied the dye first to the mid-lengths and ends of the hair, then after some time checked to see how the color had developed.
Then the dye was carefully reapplied all the way to the roots so the overall color would look even.
They carried out the coloring step by step, carefully working to prevent the color from becoming darker on one side or ending up patchy.
[Image slider] 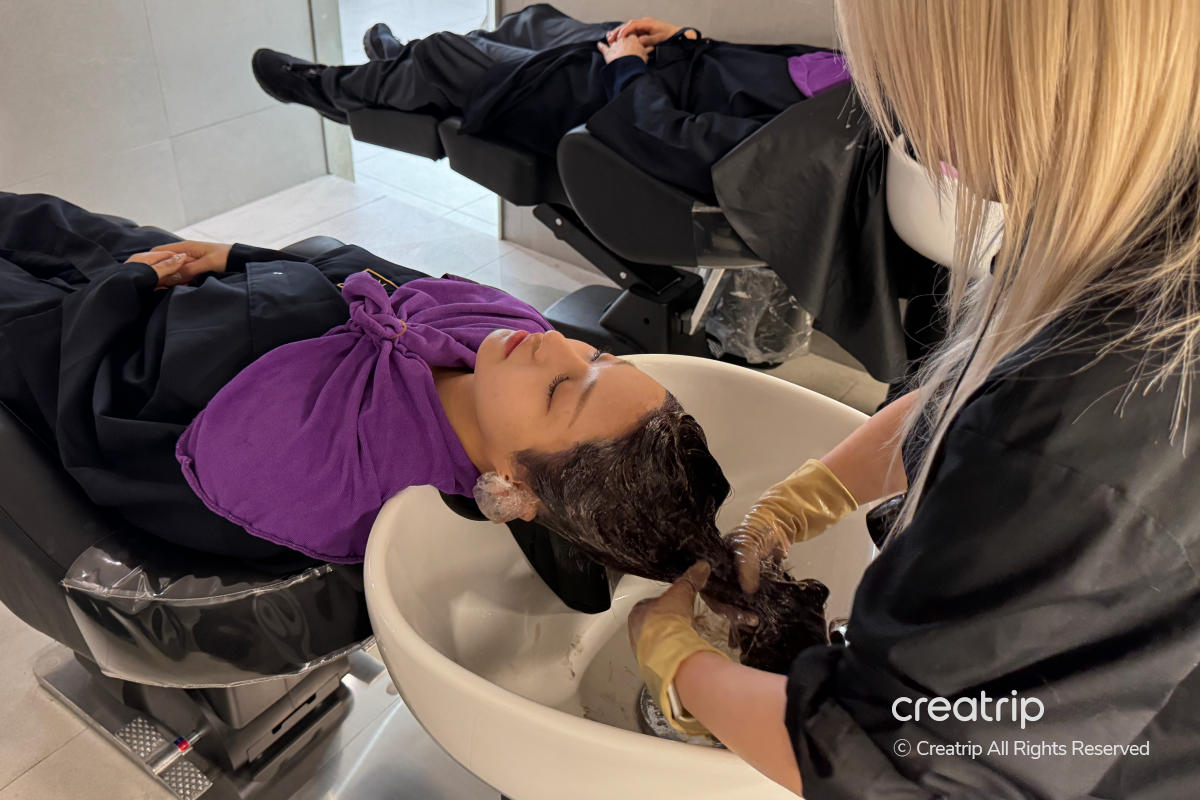
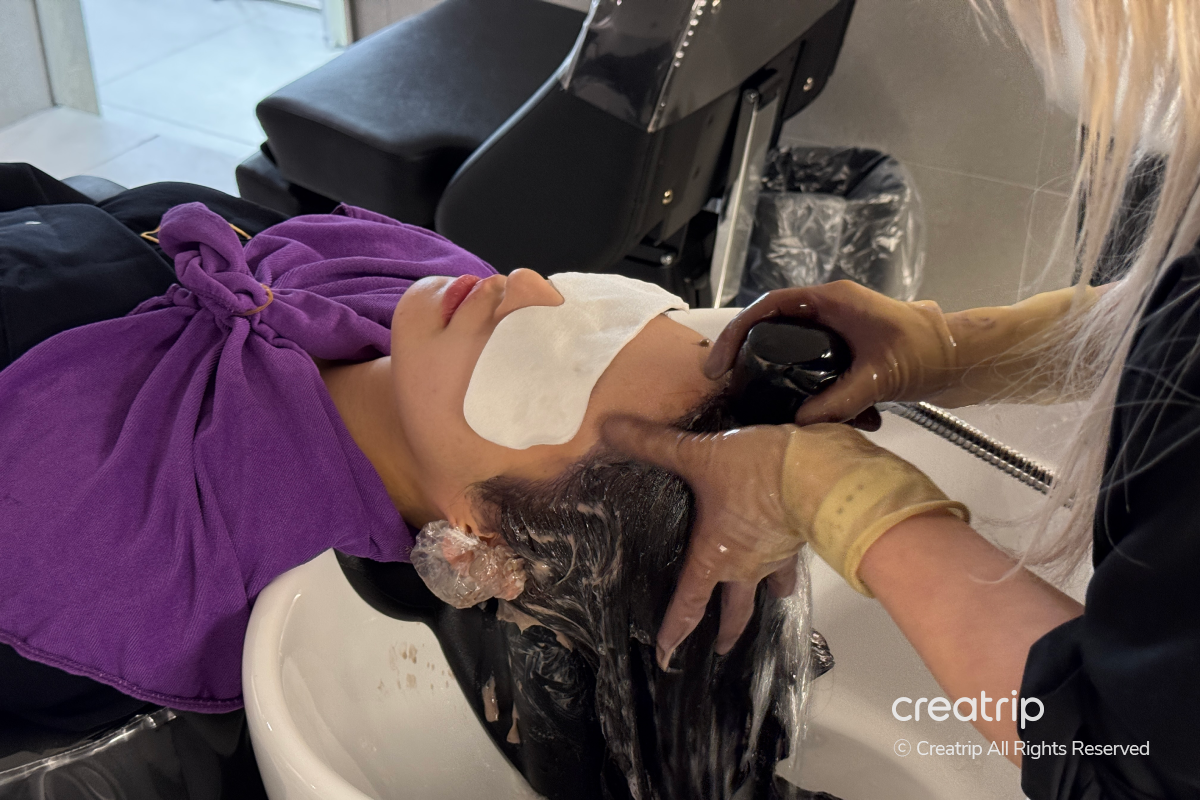
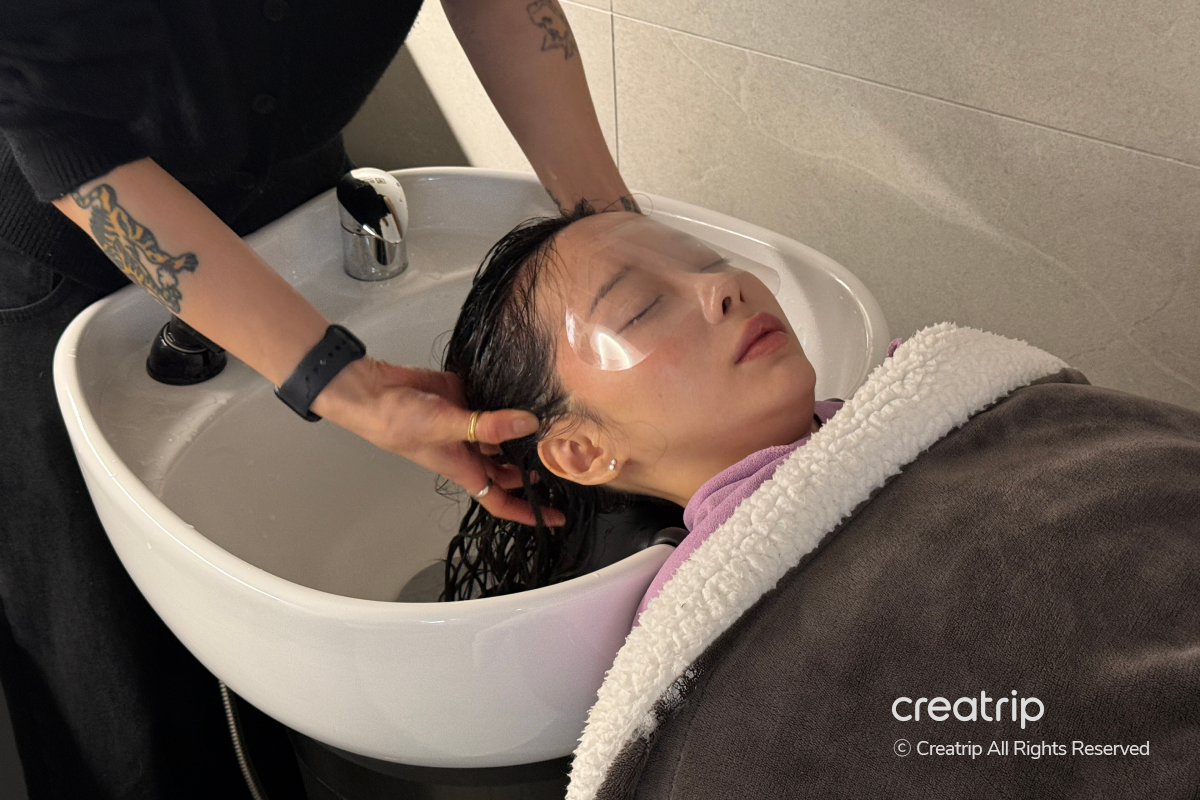
After the color had fully developed, I moved to the shampoo area where they thoroughly rinsed any remaining dye from my hair.
During the rinsing process, they gently massaged my scalp and hair, carefully making sure no residue remained.
[Image Slider] 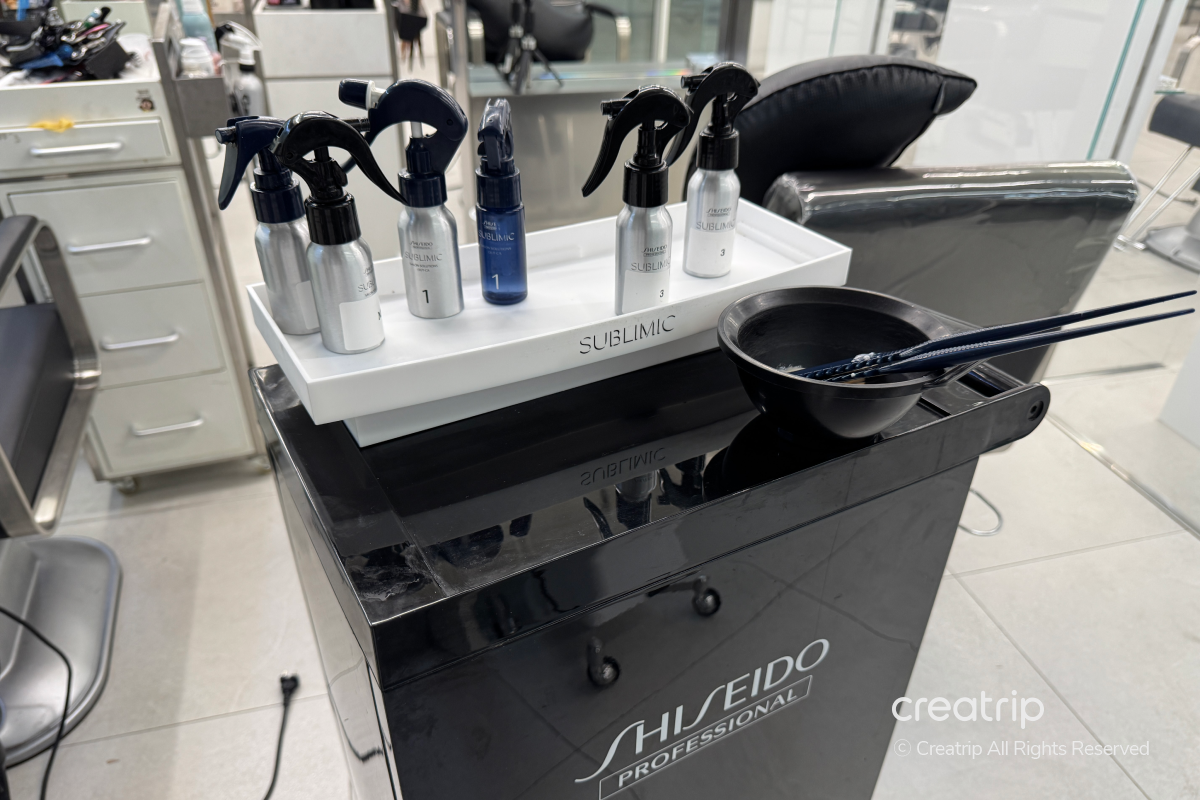
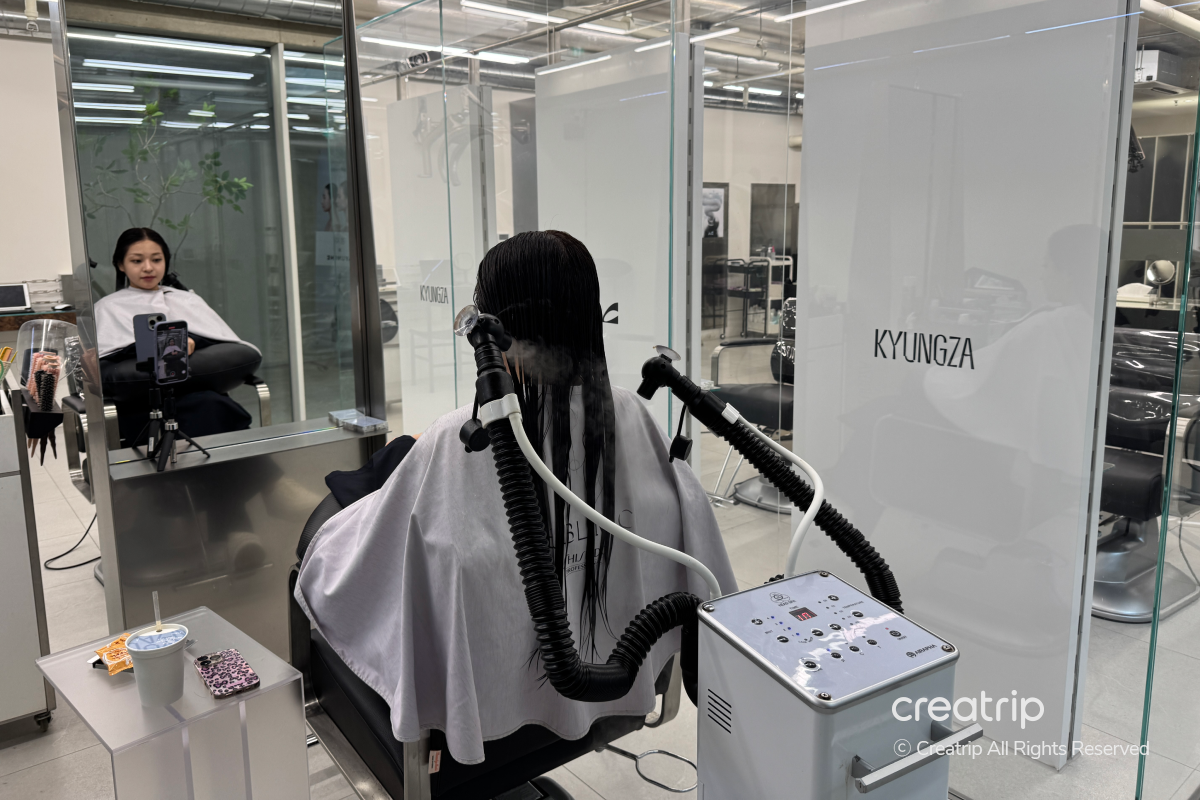
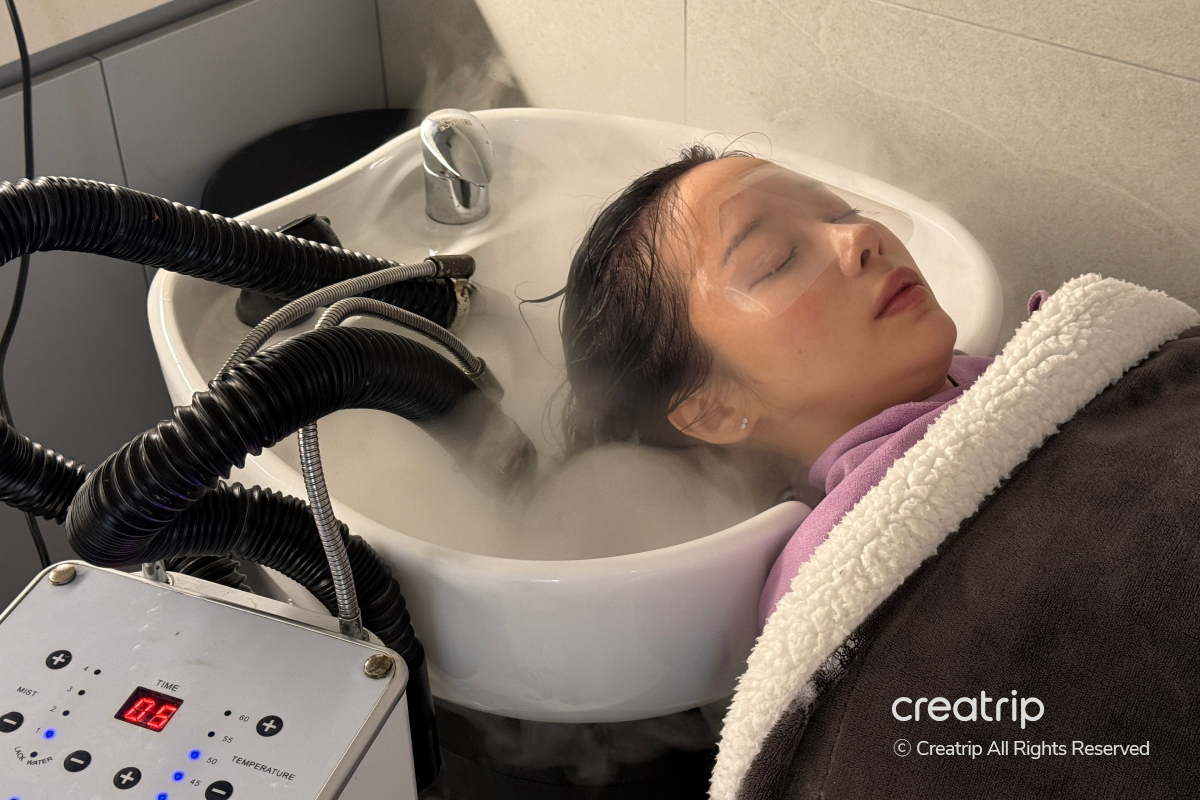
After finishing the shampoo, we went back to our seats and applied a nourishing product to the hair.
After applying the product, we continued treatment using a steam machine so moisture and nutrients could be fully absorbed into the hair.
This step uses steam to wrap the hair, helping the nutrients absorb into the strands more effectively.
After that, we proceeded with the 2-STEP clinic (hair treatment) included in the package.
This step replenishes nutrients to hair that can become dry from coloring, it’s a process that manages hair condition after the color treatment.
After the steam care, they applied a nourishing hair treatment product once more to smooth the hair.
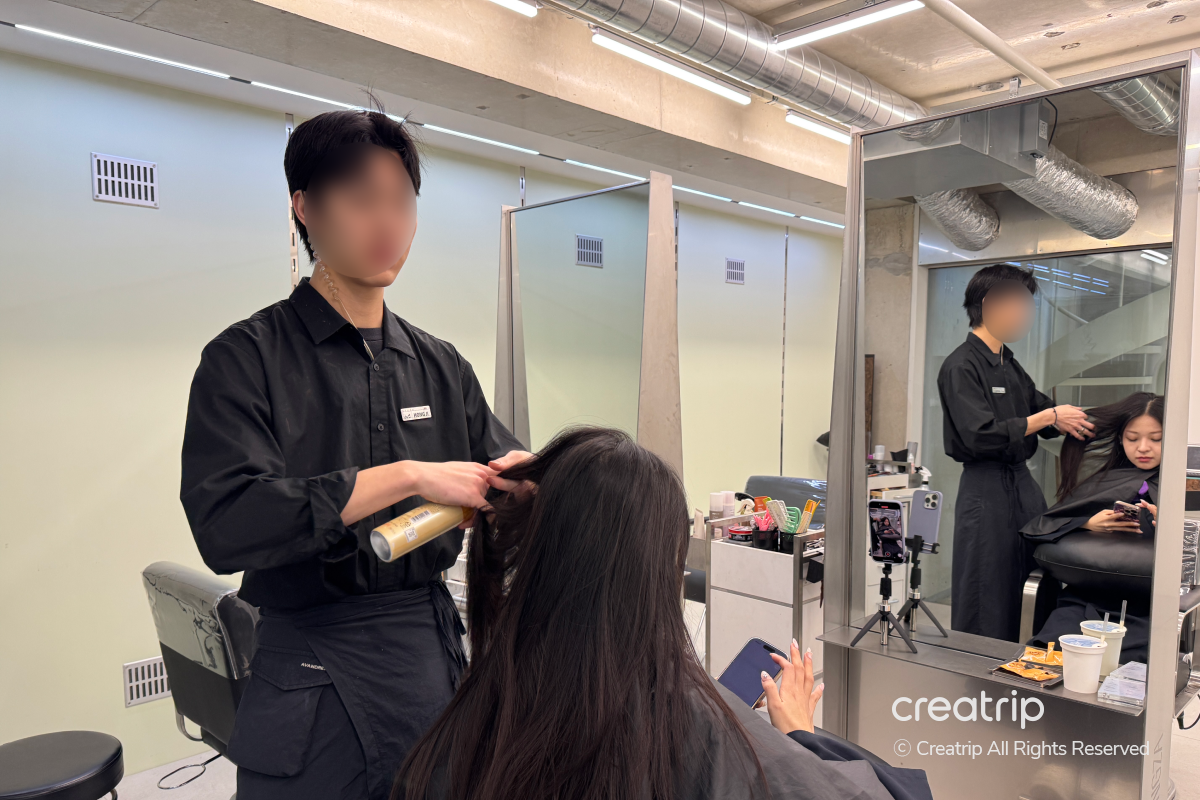
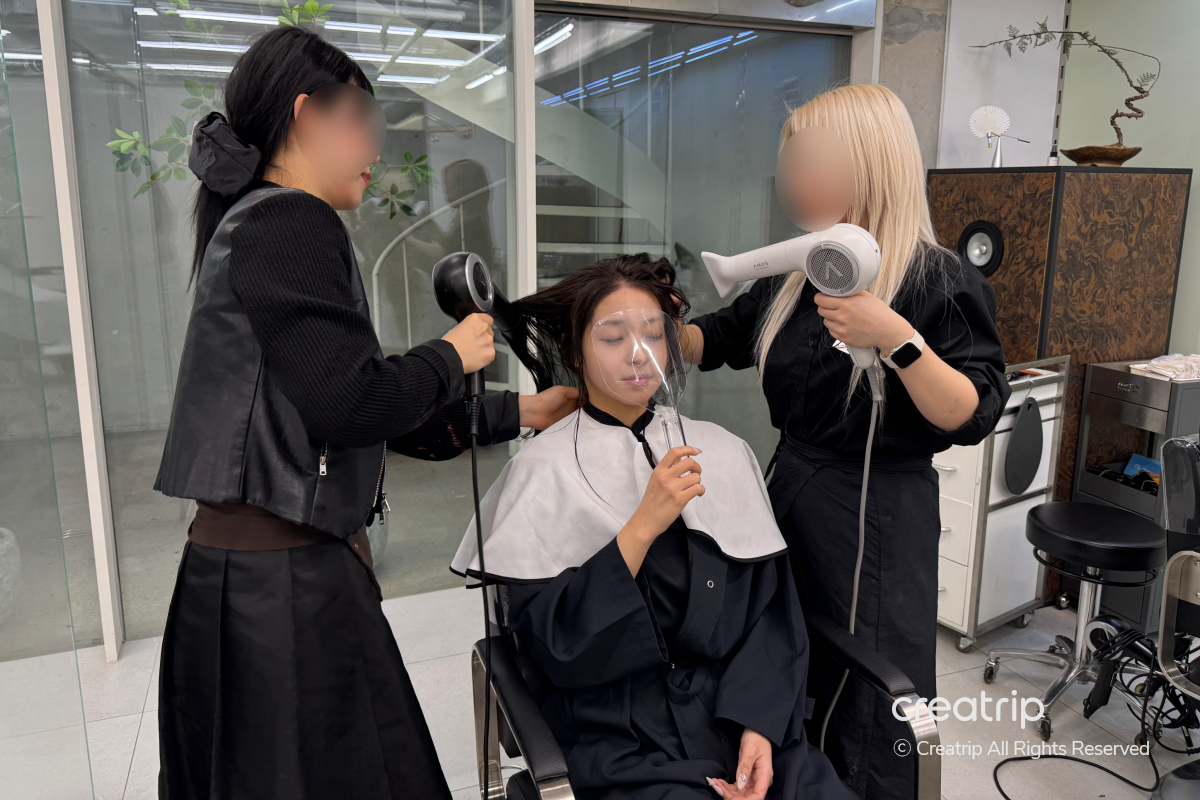
Then they dried my hair, using a face guard so the air wouldn’t blow directly on my face, finishing with careful attention.
They dried from both sides at the same time to quickly dry the hair while shaping the overall style.
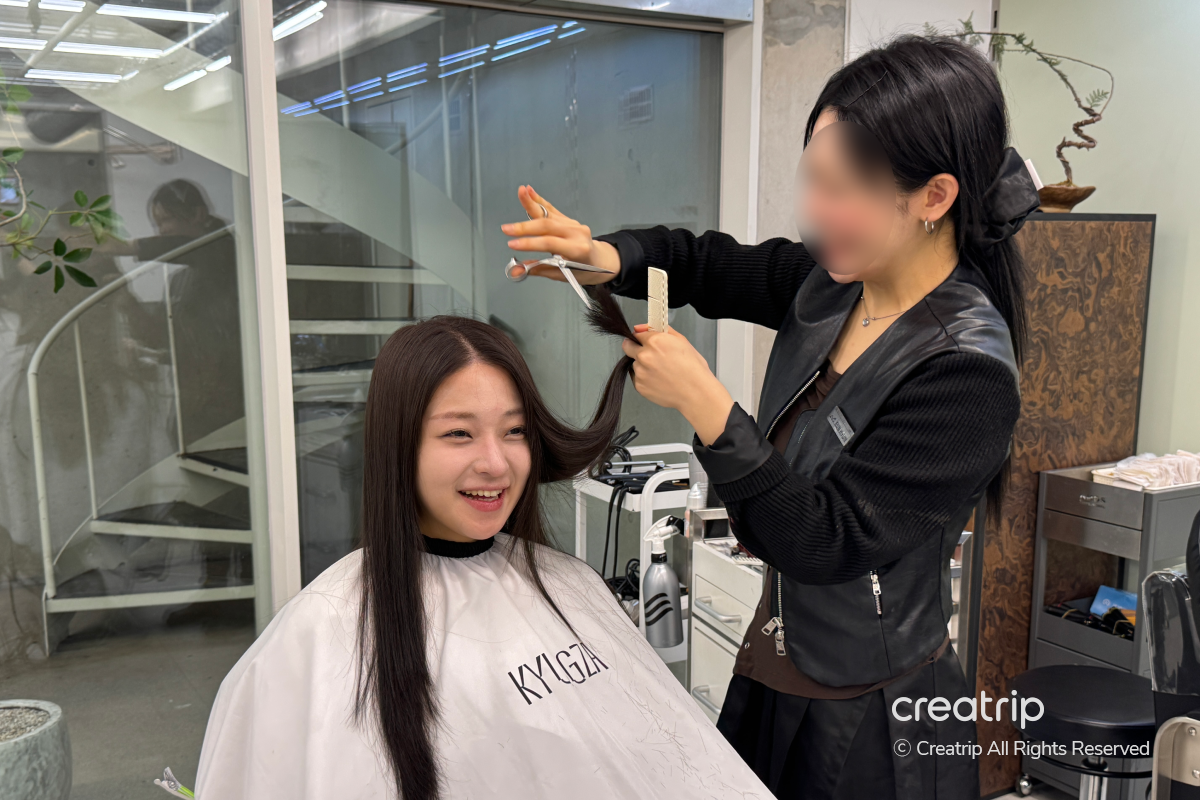

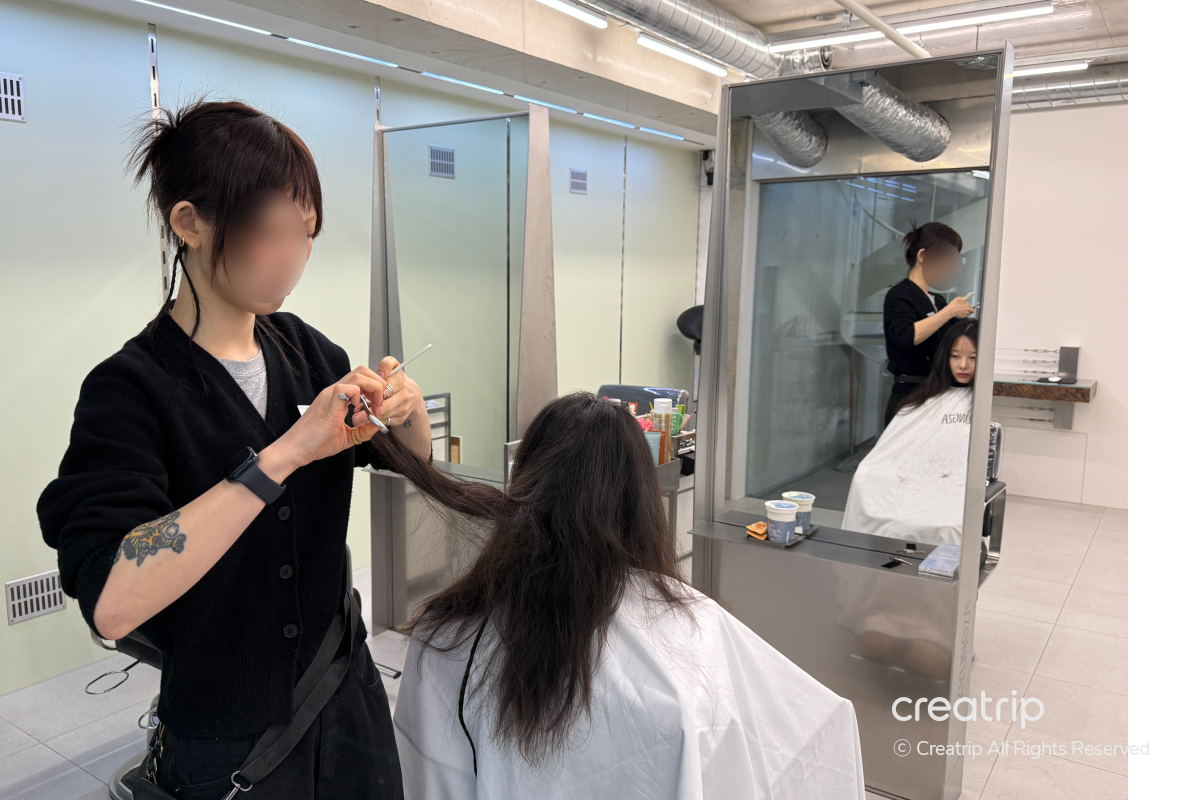
Before the blow-dry, they lightly performed a haircut on the ends to tidy up the overall style.
Rather than changing the length much, they just neatened the end line, which made the overall silhouette look cleaner.
After that, they continued with the blow-dry to complete the final style!
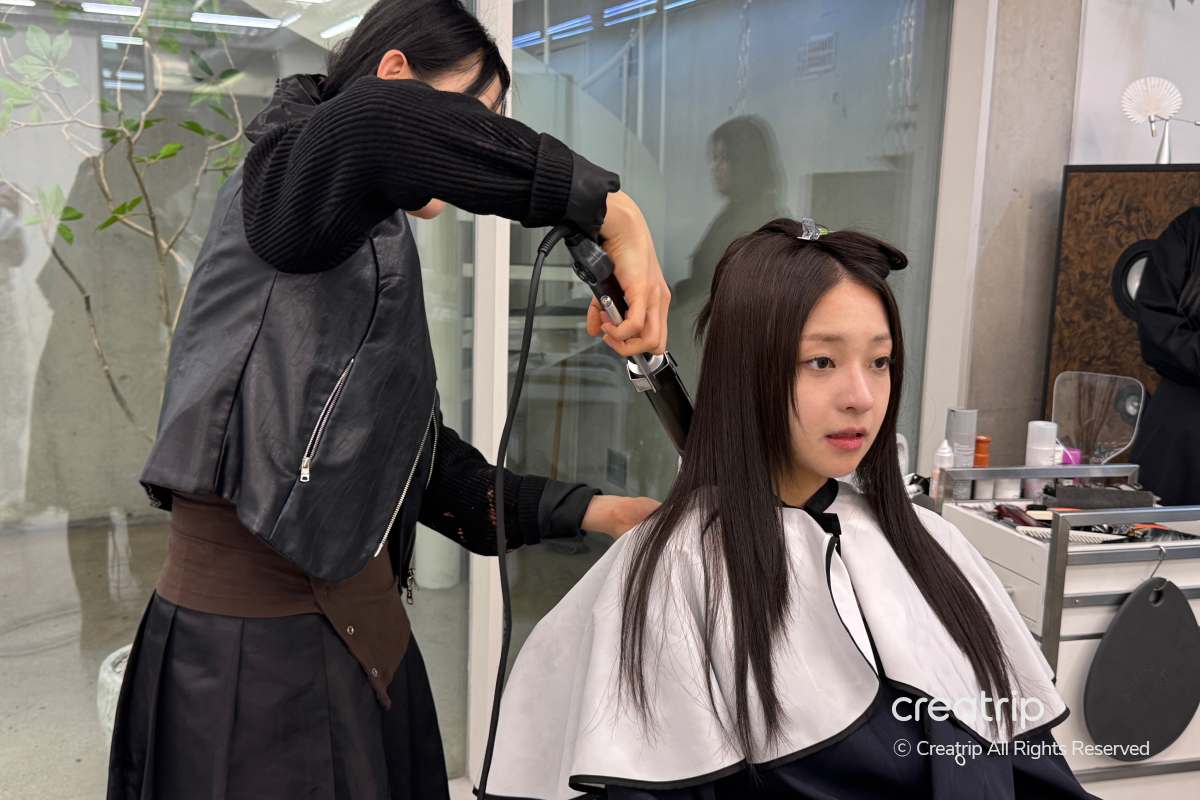
After the cut, they proceeded with the blow-dry to refine the whole style.
They sectioned the hair and used a brush, dryer, and flat iron together to dry and create natural volume, and with quick movements they carefully smoothed the hair for a polished finish.
Blowing along the hair’s texture, the styling process was completed in a relatively short time.

When the blow-dry was finished and I checked the overall style, I was very satisfied with the result.
The color looked naturally toned and the hair had a healthy shine, the waves created by the blow-dry fell softly, giving an overall feminine vibe.
The ends were neatly finished so the curls flowed naturally, and overall it was a calm yet voluminous style.
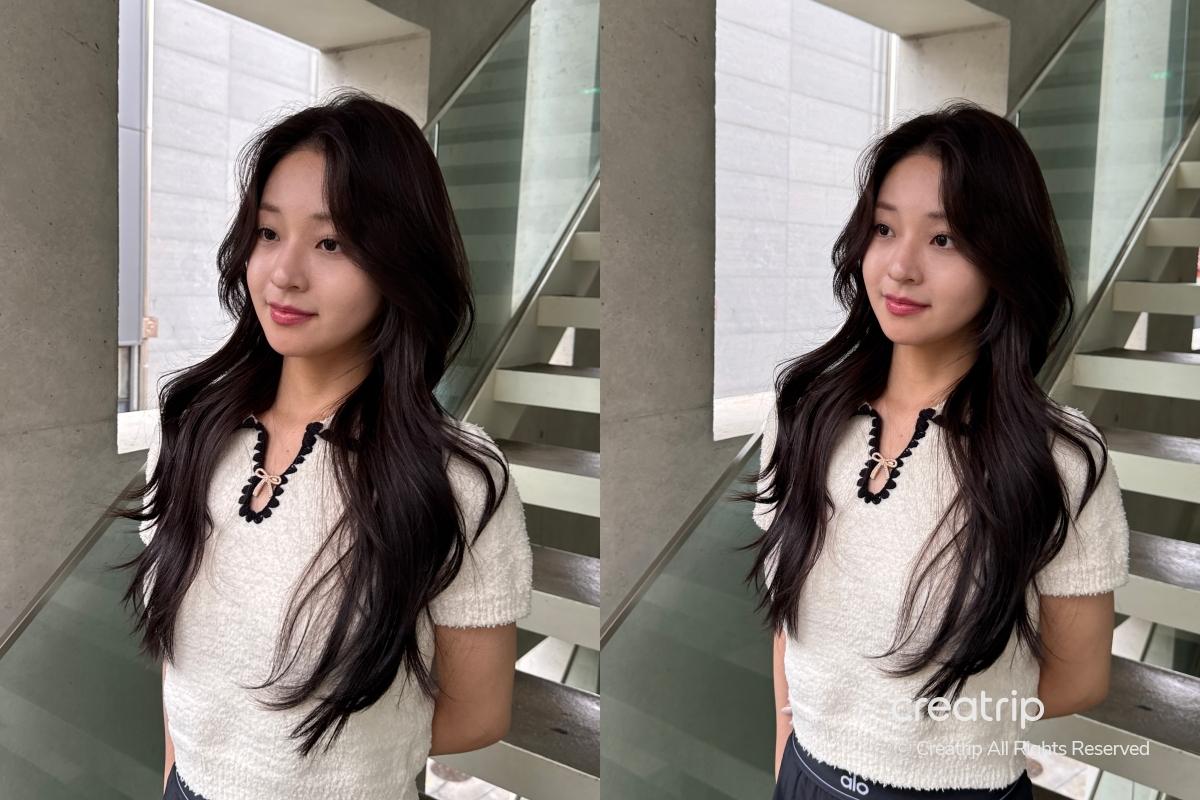
It looked great indoors, but under natural light the color appeared even more natural.
With the light, a subtle sheen was added to the hair so the color expressed more softly, and the waves from the blow-dry looked naturally revived, raising the overall finish of the style.
They paid special attention to finishing the blow-dry thoroughly, so I didn’t need to style it afterward and could continue my travel plans right away.
From consultation to treatment and final styling, the whole process was conducted systematically, so I was highly satisfied with the result.
In particular, the technique that considered both color expression and hair condition was impressive, and the ability to achieve the desired style while minimizing damage was a strong point.
If you’re considering coloring and a perm in Hongdae, this salon takes both color design and style completion into account.
It’s close to Hongdaeipgu Station, so it’s convenient to visit during a trip, and its location makes it easy to continue your schedule right after the treatment.
If you’re thinking about coloring or a perm in Hongdae, I recommend KYUNGZA, which performs treatments while considering both color and hair condition!
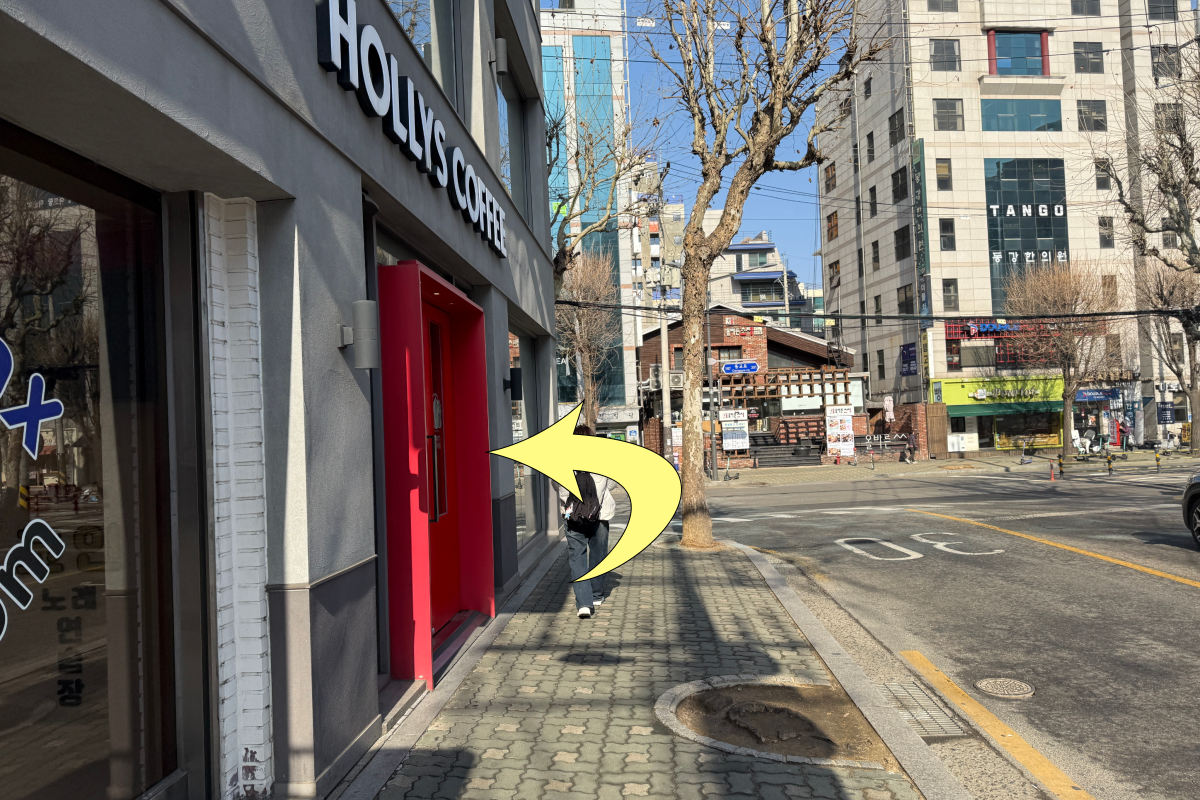
KYUNGZA Hongdae Main Branch | How to Get There
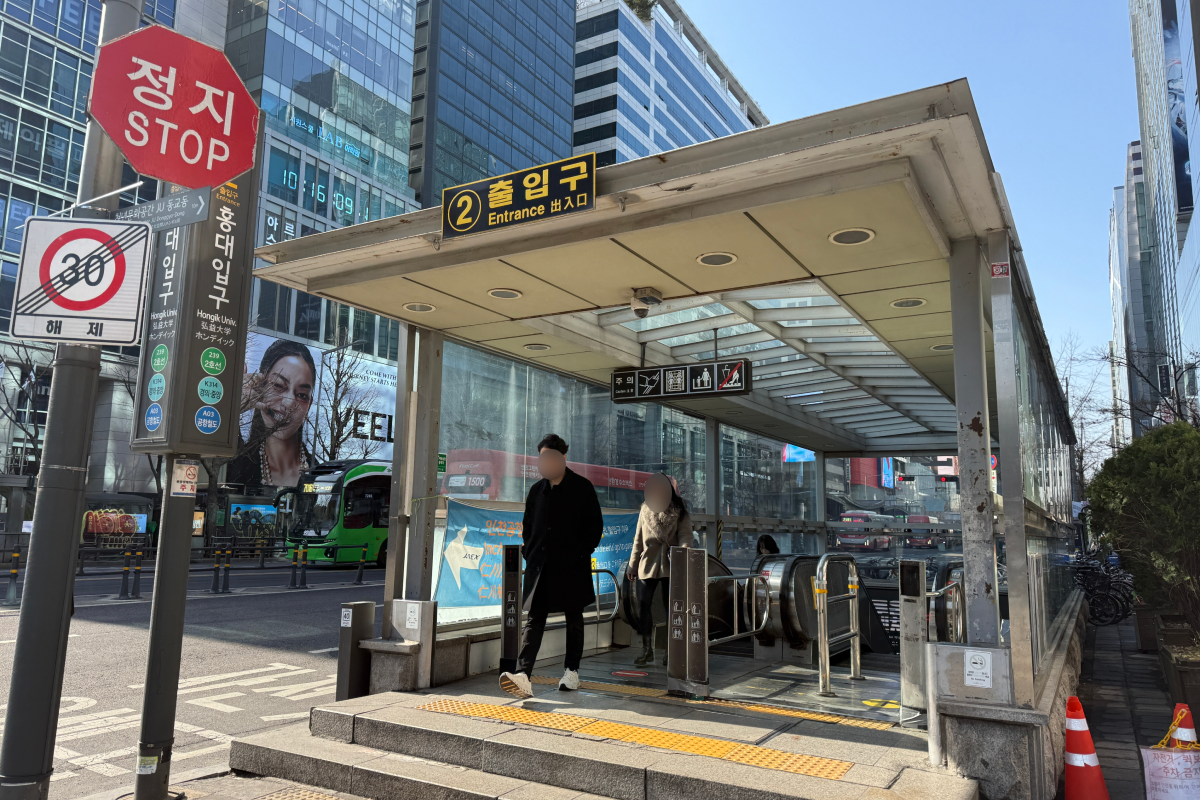
1. Exit at Hongdaeipgu Station, Exit 2.
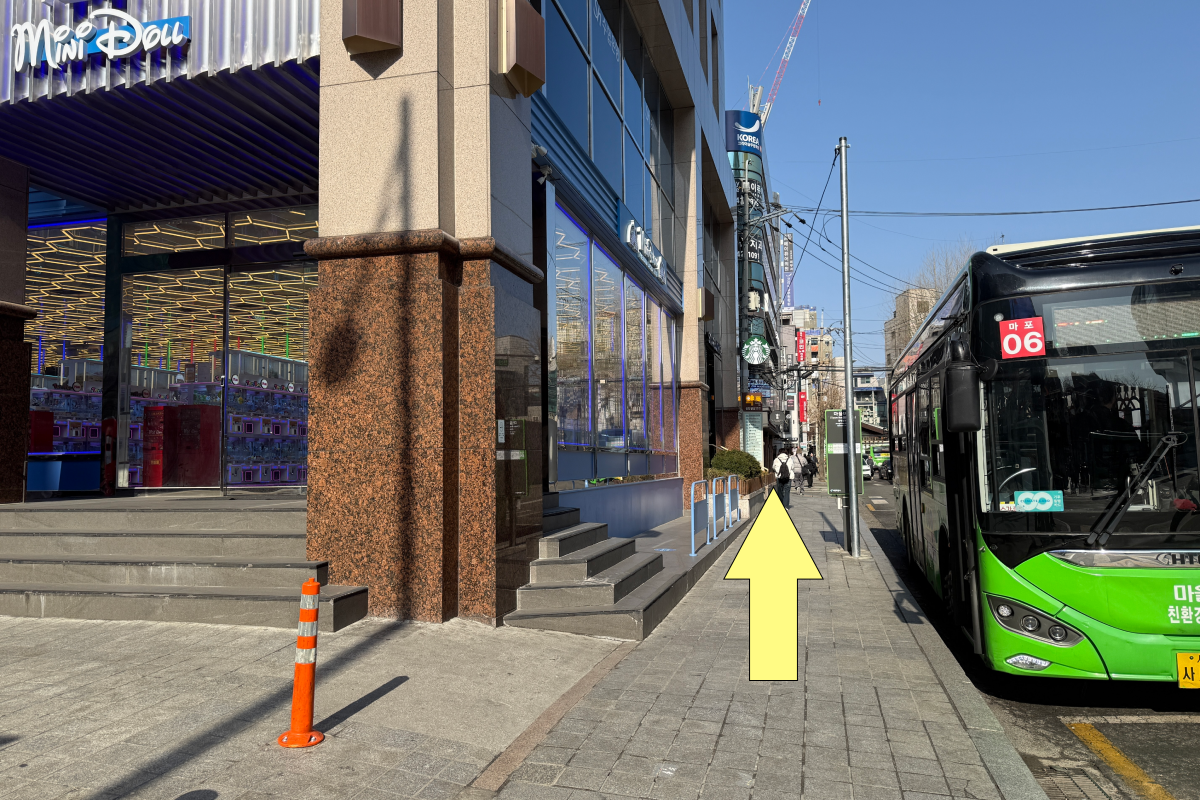
2. With your back to the station, keep walking straight ahead toward the left.
3. Turn left at the end of the alley.
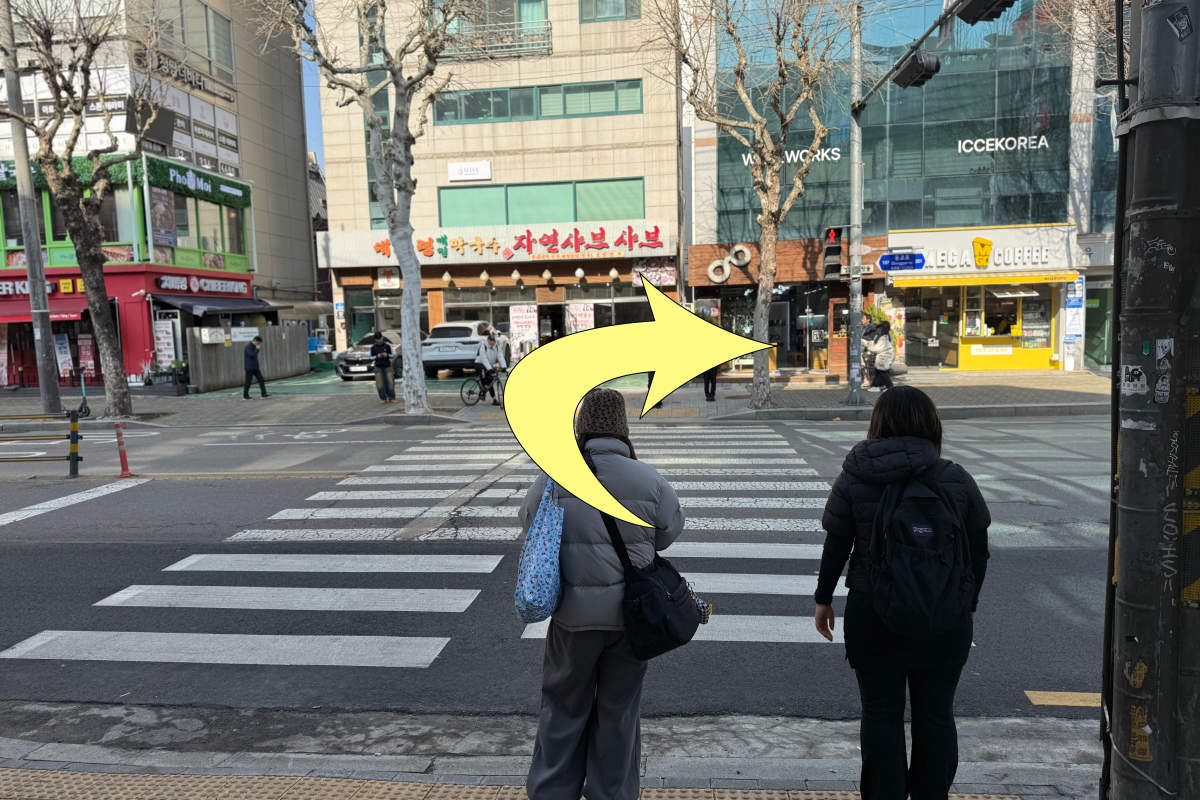
4. Cross the intersection, then turn right.
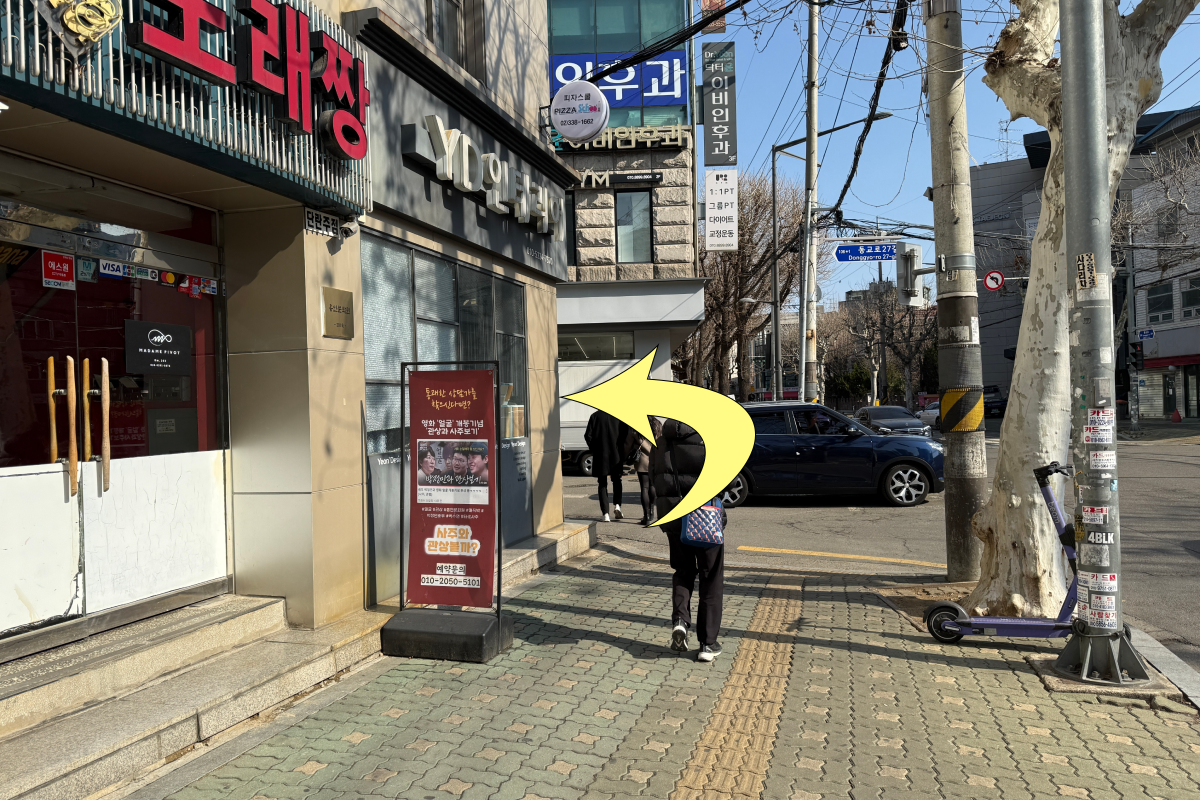
5. Turn left.
6. Go straight.
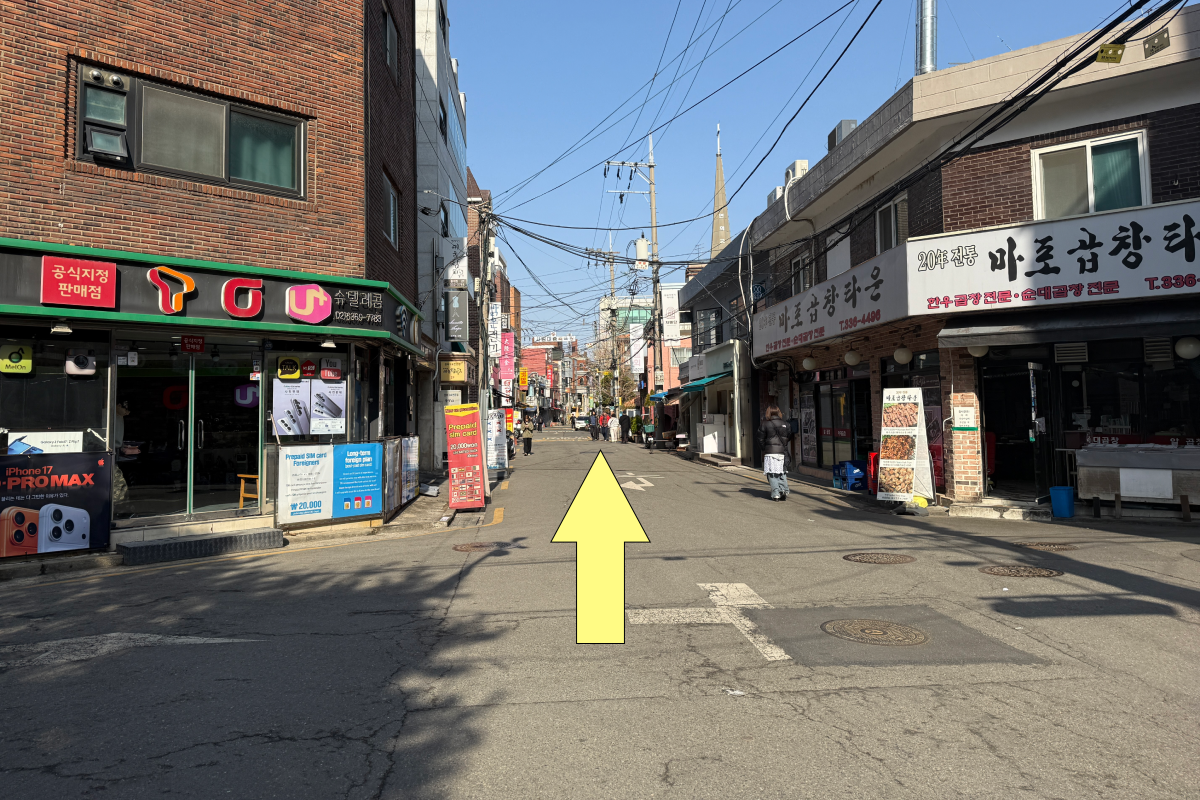
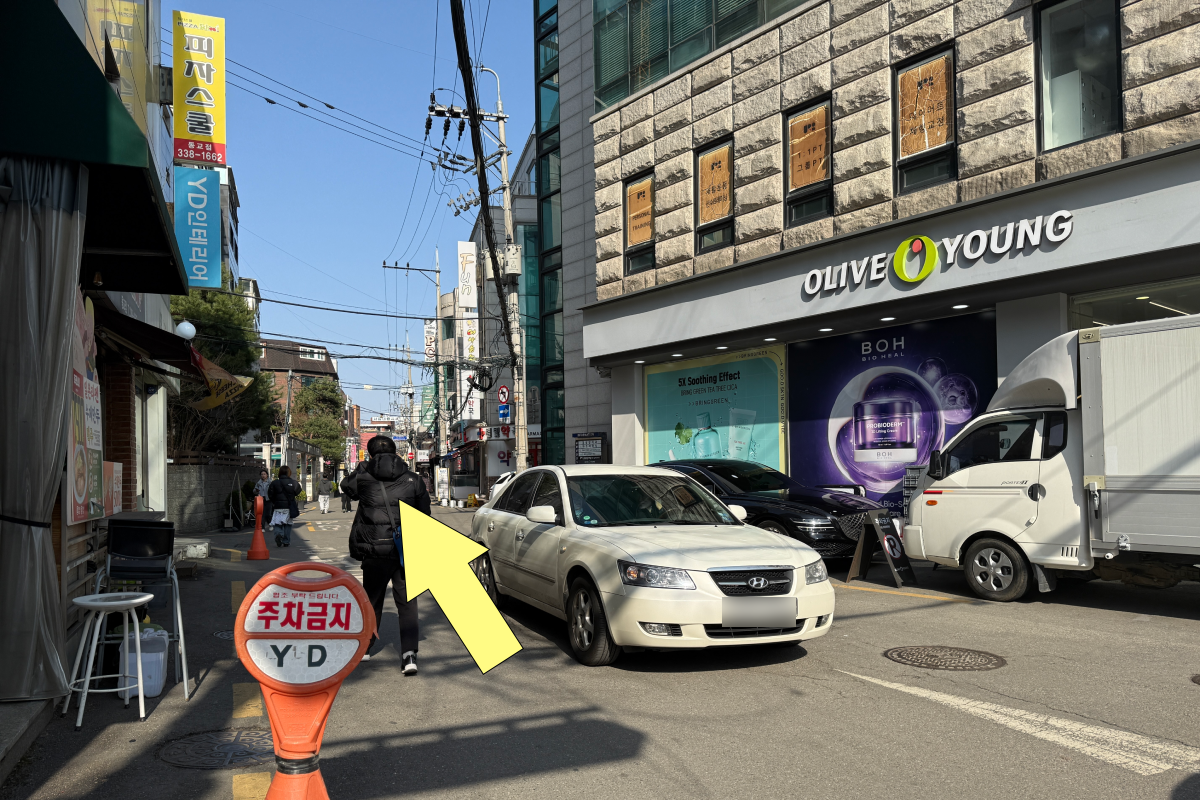
7. Continue straight ahead.
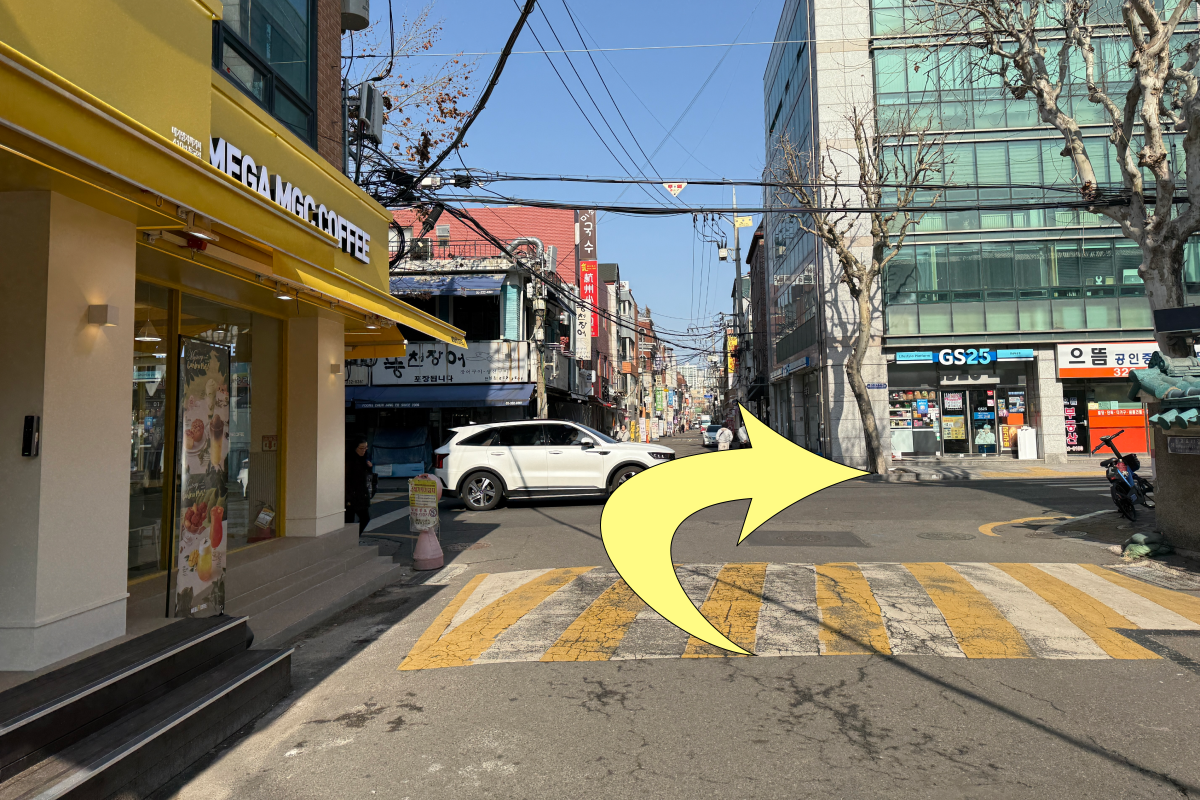
8. Turn right at the intersection.
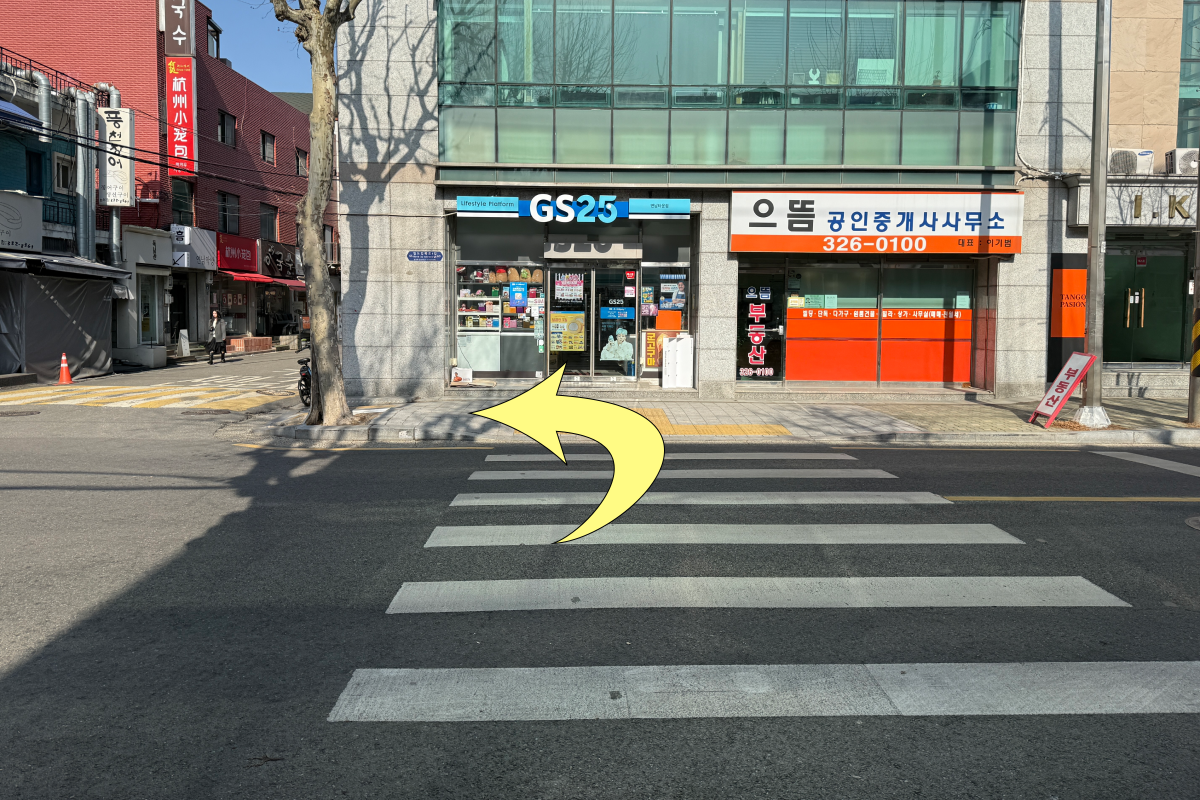
9. Cross the intersection and make a left turn.
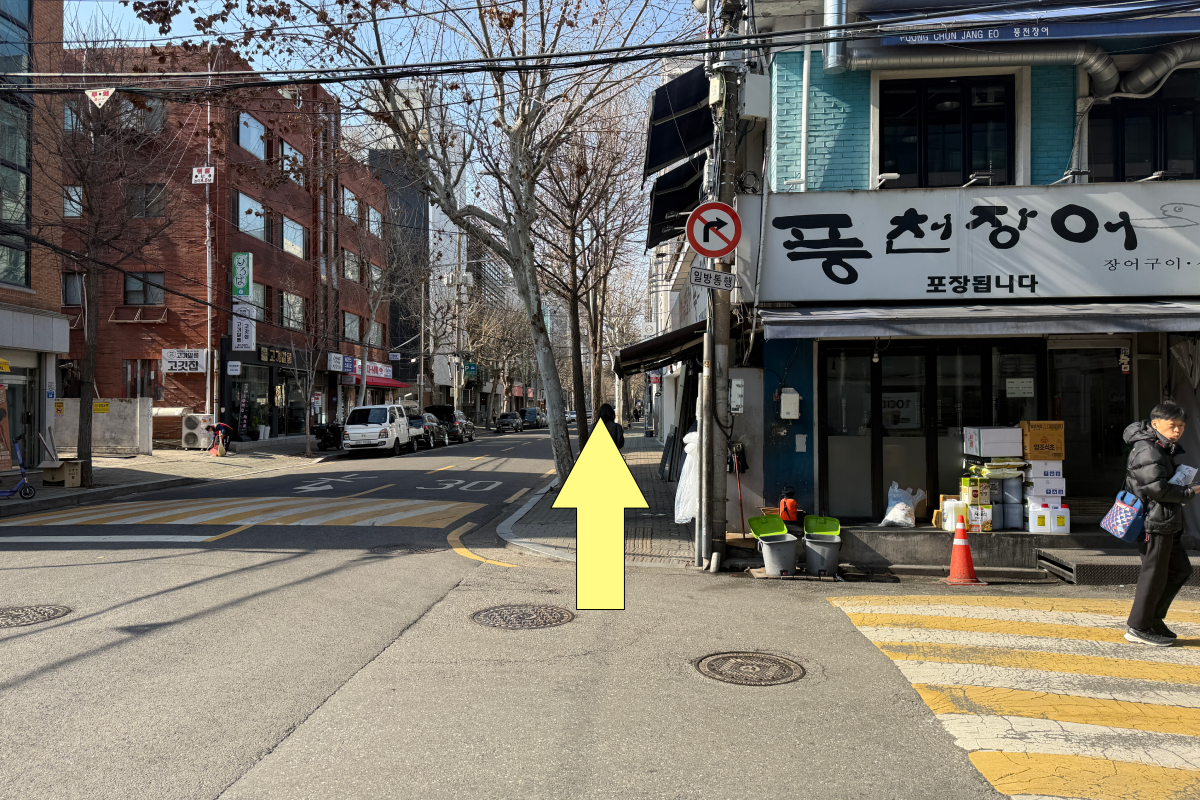
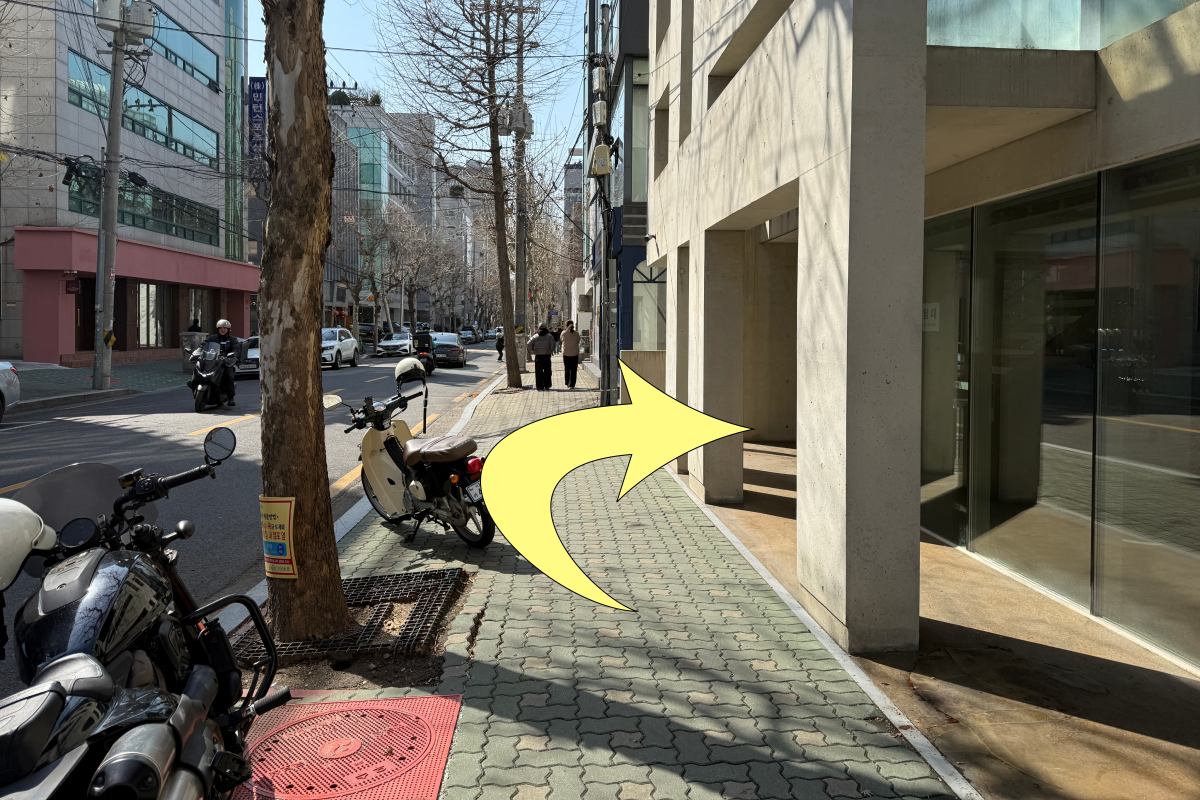
10. Go straight.
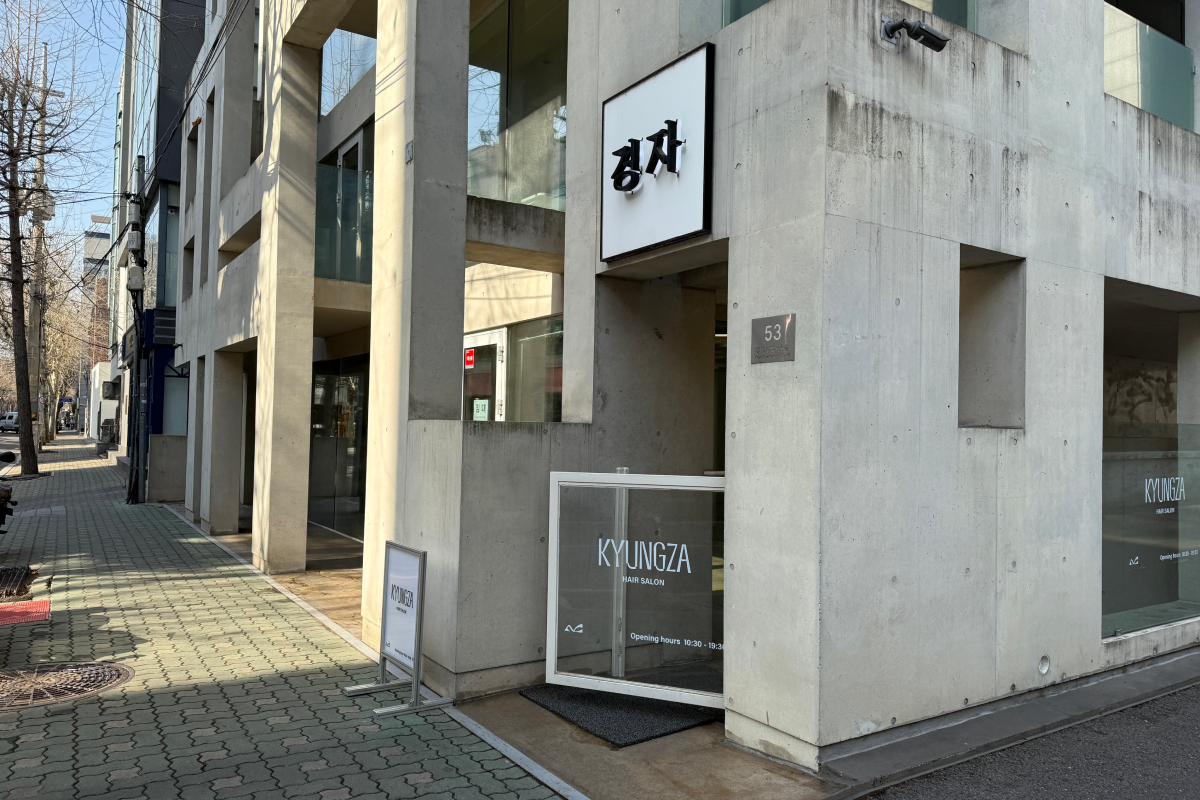
B1, KYUNGZA Hongdae Main Branch arrived!
KYUNGZA Hongdae Main Branch | How to Use the Elevator
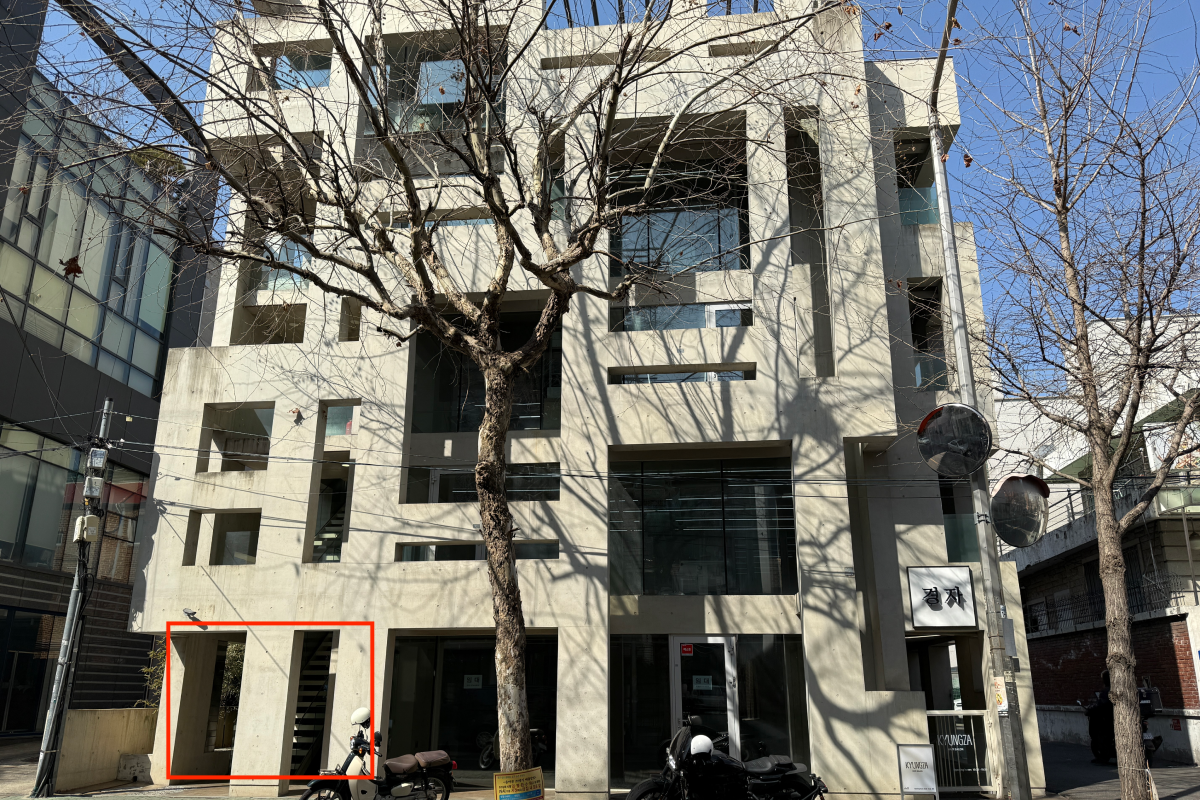
The elevator is located to the left of the entrance.
Go straight from the store entrance, then turn right.

Go inside.
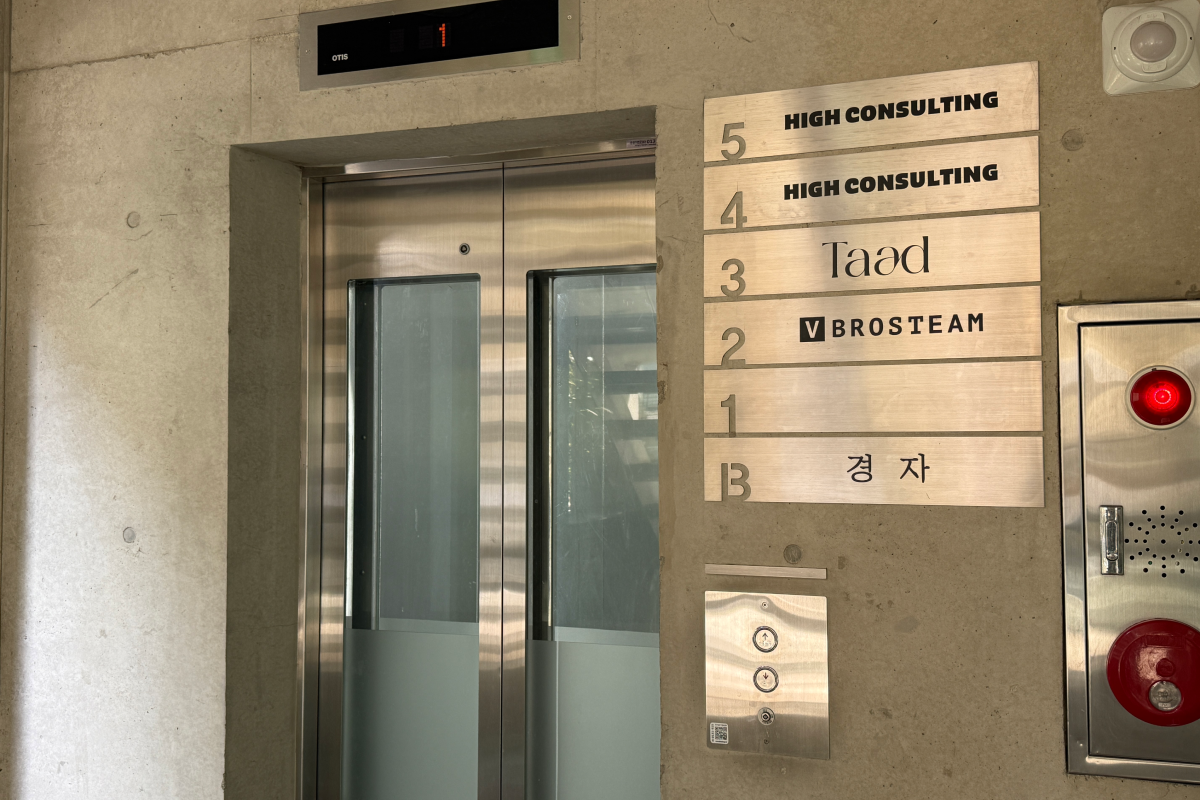
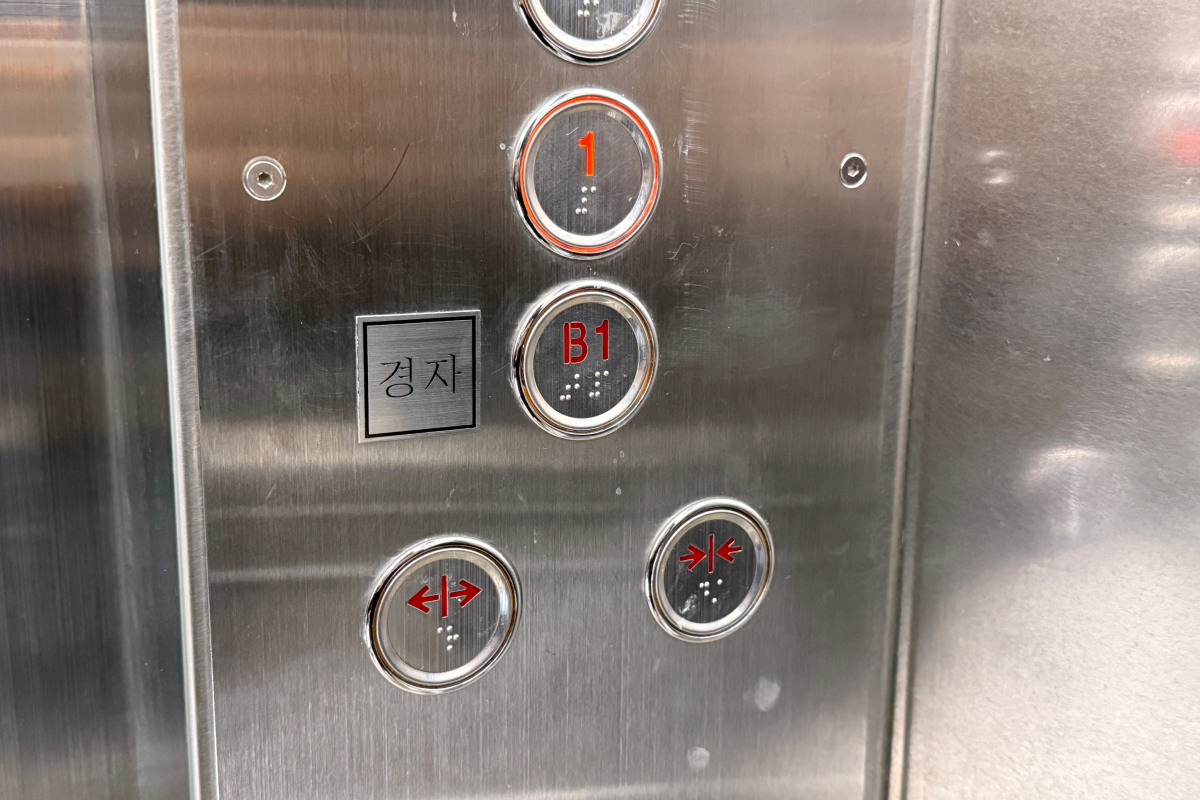
KYUNGZA Hongdae Main Branch is located on B1.
KYUNGZA Hongdae FAB Branch | How to Get There
* 1–8 are the same as KYUNGZA Hongdae FAB Branch.
Below is the route to KYUNGZA Hongdae FAB Branch.
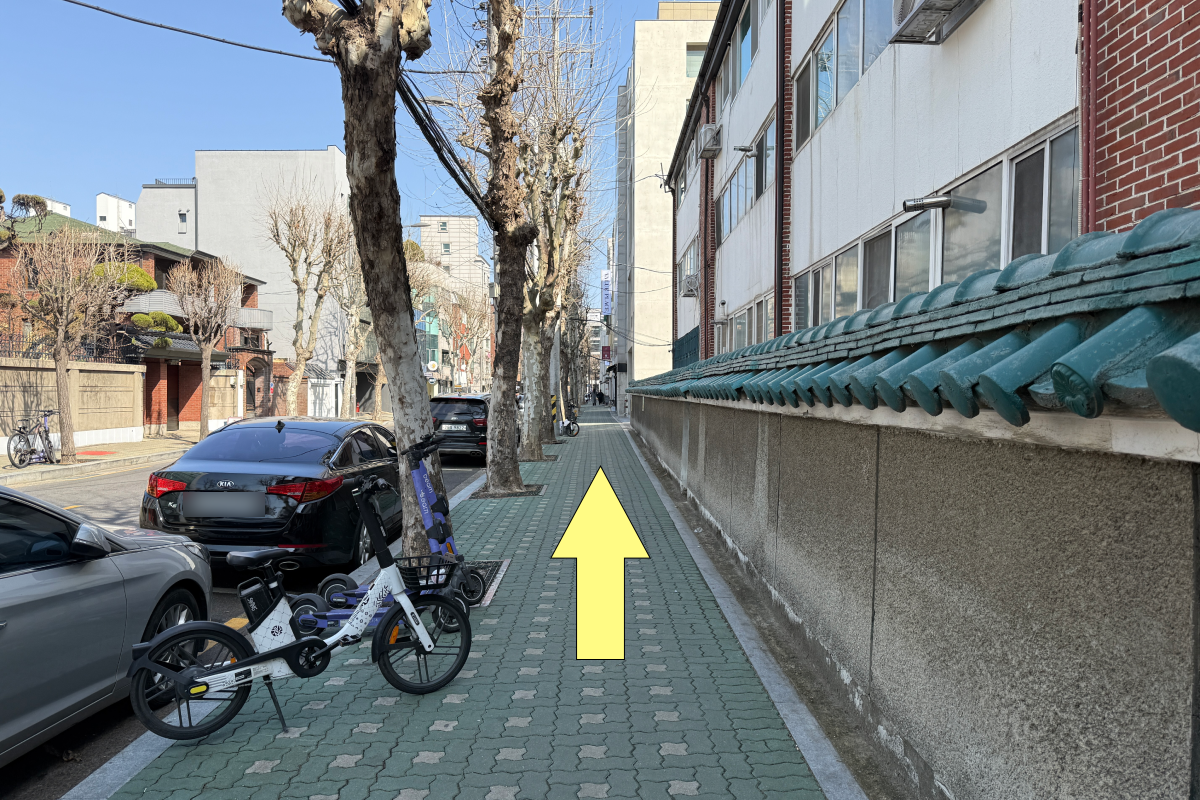
Go straight ahead.
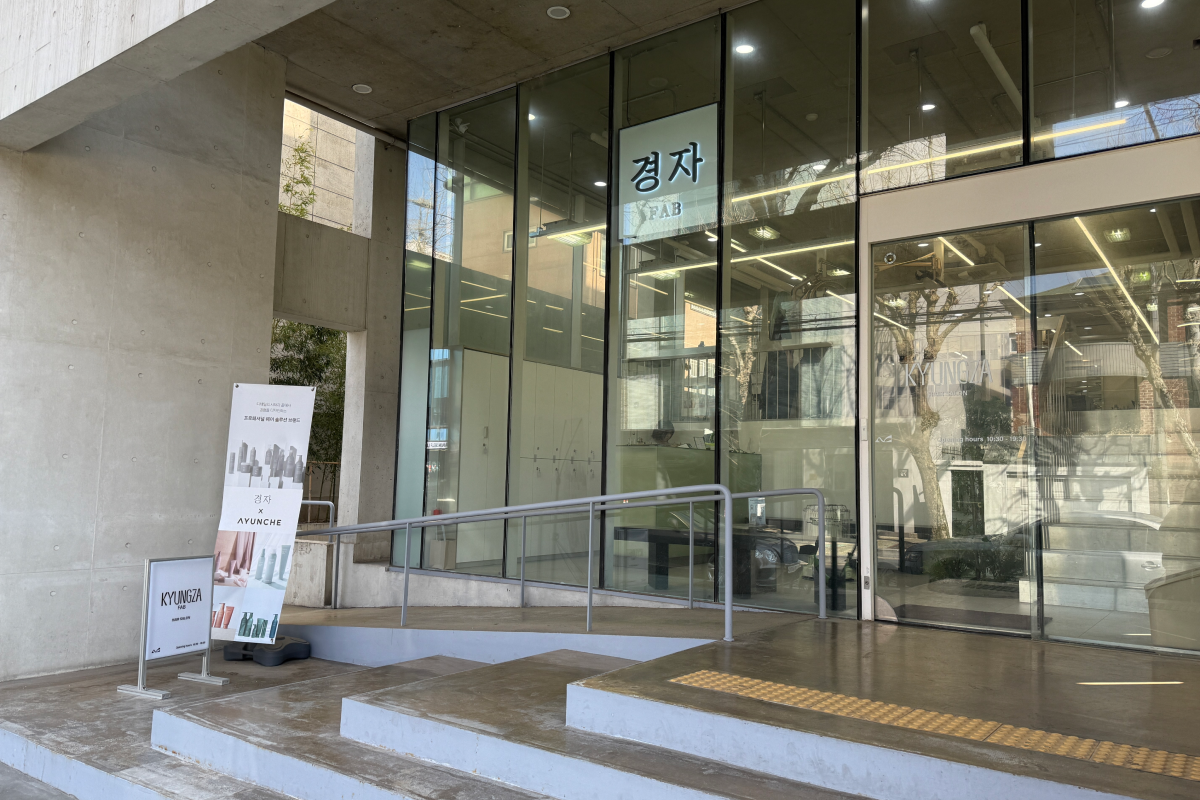
Arrived at KYUNGZA Hongdae FAB Branch!
If you have any questions or concerns, Creatrip provides 24/7 real-time support in English, Chinese, and Japanese for international visitors completely free of charge. Reach us anytime on WhatsApp (+82 10-8818-2915) or LINE (@creatrip, @required). You can also follow us on Instagram, TikTok, Threads, and Youtube to stay updated on all things Korea!